

Assembling a seamed sweater is an important step that often is not given much detail in patterns. There are many different seam types to choose from that will get the job done, but they all have their own strengths and drawbacks, and some only work on certain edges. When it comes to seaming vertical-to-vertical, horizontal-to-horizontal, and vertical-to-horizontal edges, we’ve got two favorite seaming stitches that can be used separately or together to finish a sweater: mattress stitch and fake grafting! We chose these two seaming stitches because they’re strong but have some stretch, and they create neat, discreet seams.
Vertical-to-Vertical Edges
The gold standard for seaming vertical edges to vertical edges is the mattress stitch! It’s worked from the right side with the pieces laid flat next to each other, and to seam, the bar between the selvage (the edge stitch) and the rest of the work is caught with yarn needle. By alternating between catching the bar on one piece of knitting and catching the bar on the opposite piece of knitting, a zig-zag shaped seam is created that offers both strength and a little stretch. The seam yarn should be pulled snug but not yanked tight.
Horizontal-to-Horizontal Edges
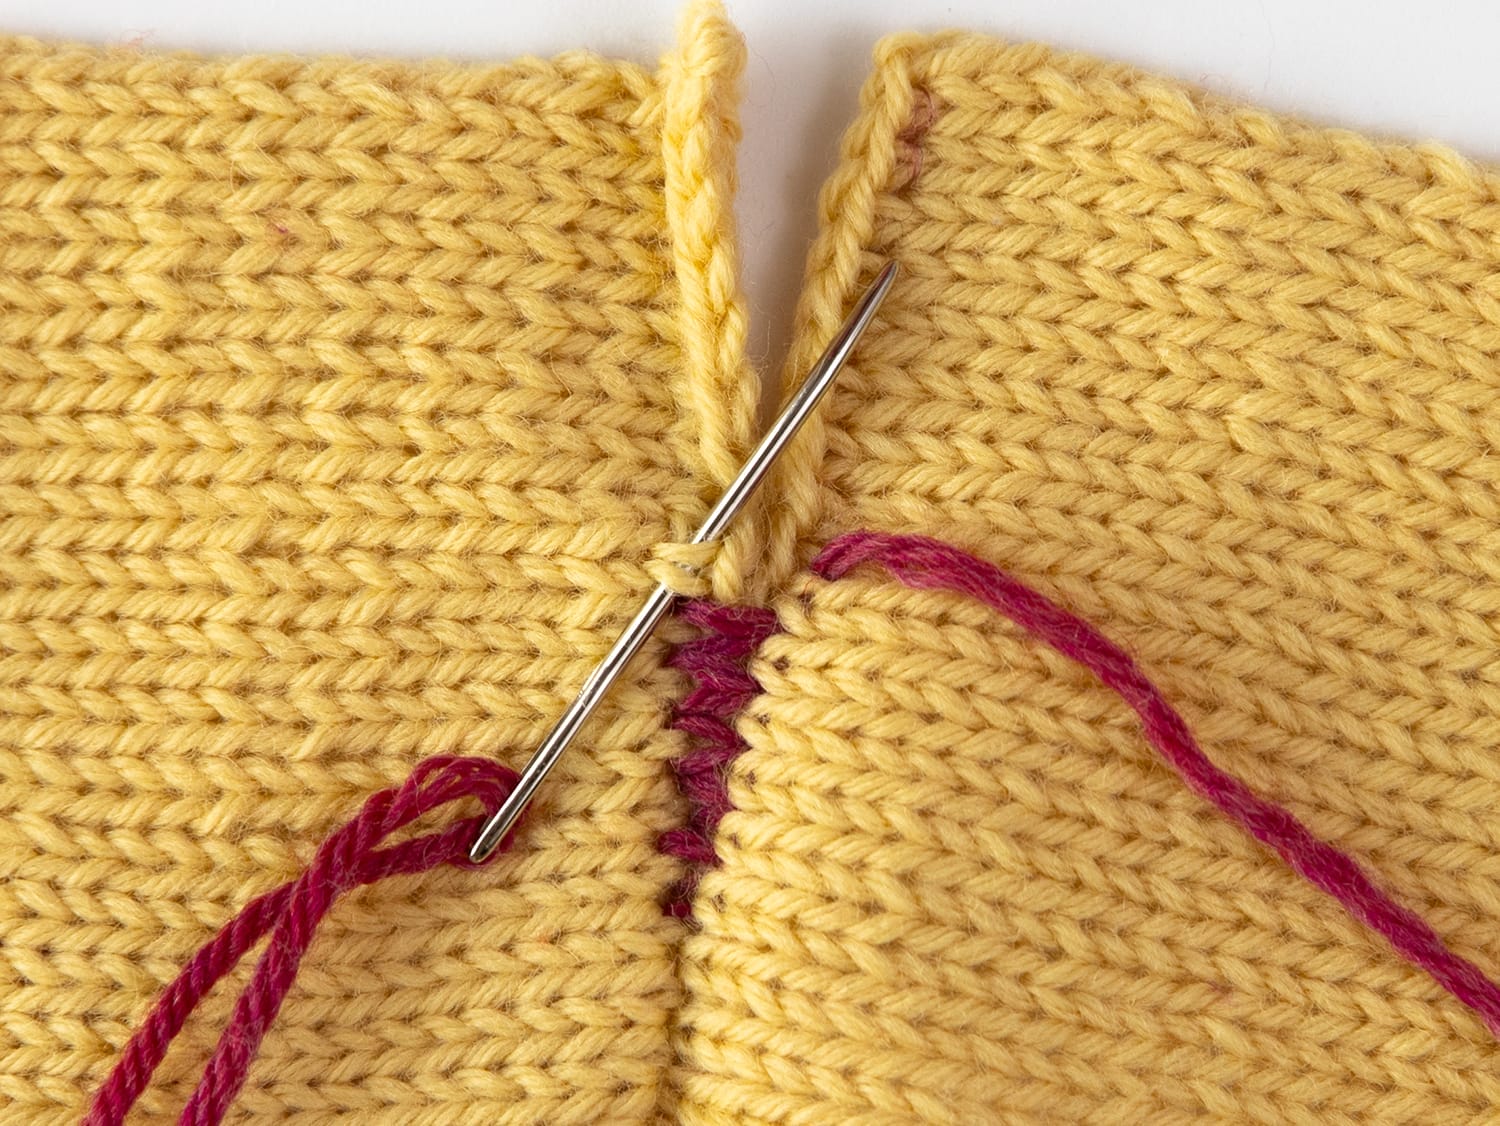
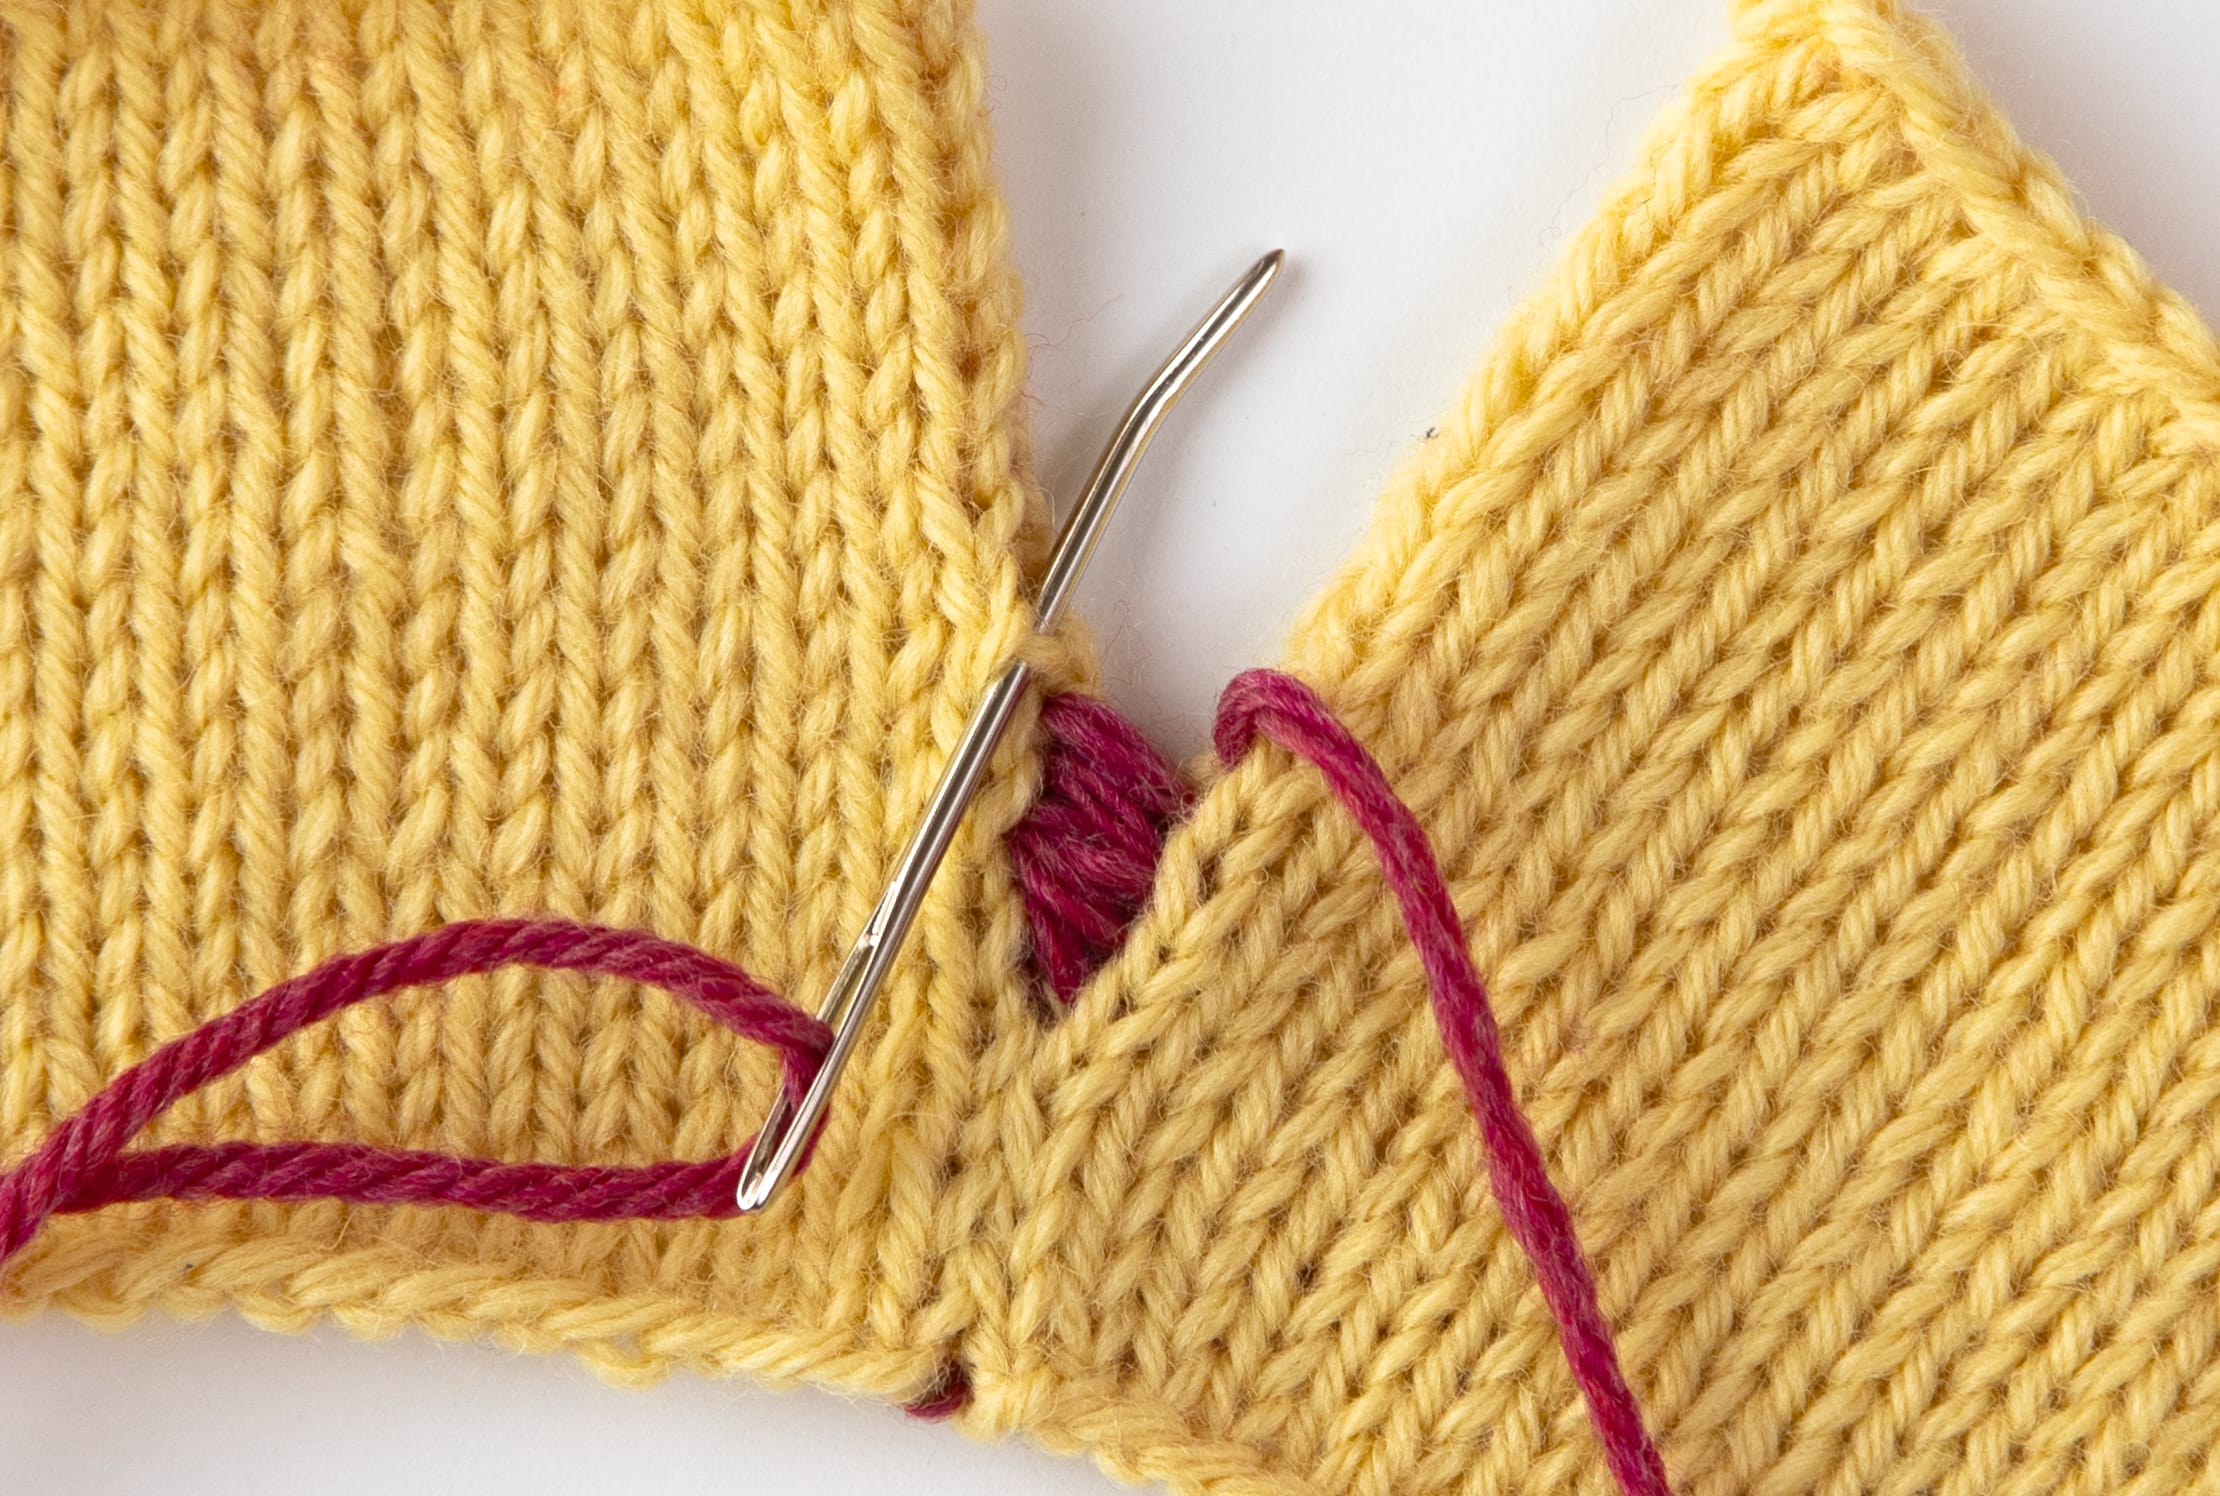
Fake grafting is an easy and attractive choice for seaming horizontal edges together. Some knitting technique books classify fake grafting as a variation on mattress stitch because it’s also worked from the right side and creates a discreet seam. Instead of catching the bars between stitches like you would for two vertical edges, you pass your needle around full stitches along horizontal edges. It gets the name “fake grafting” because your seam stitches will resemble knit stitches before they’re pulled tight. Whether you’d like to leave your seam loose and looking like a row of knit stitches or pull the seam tight to hide away the seam stitches is up to you!
Vertical-to-Horizontal Edges
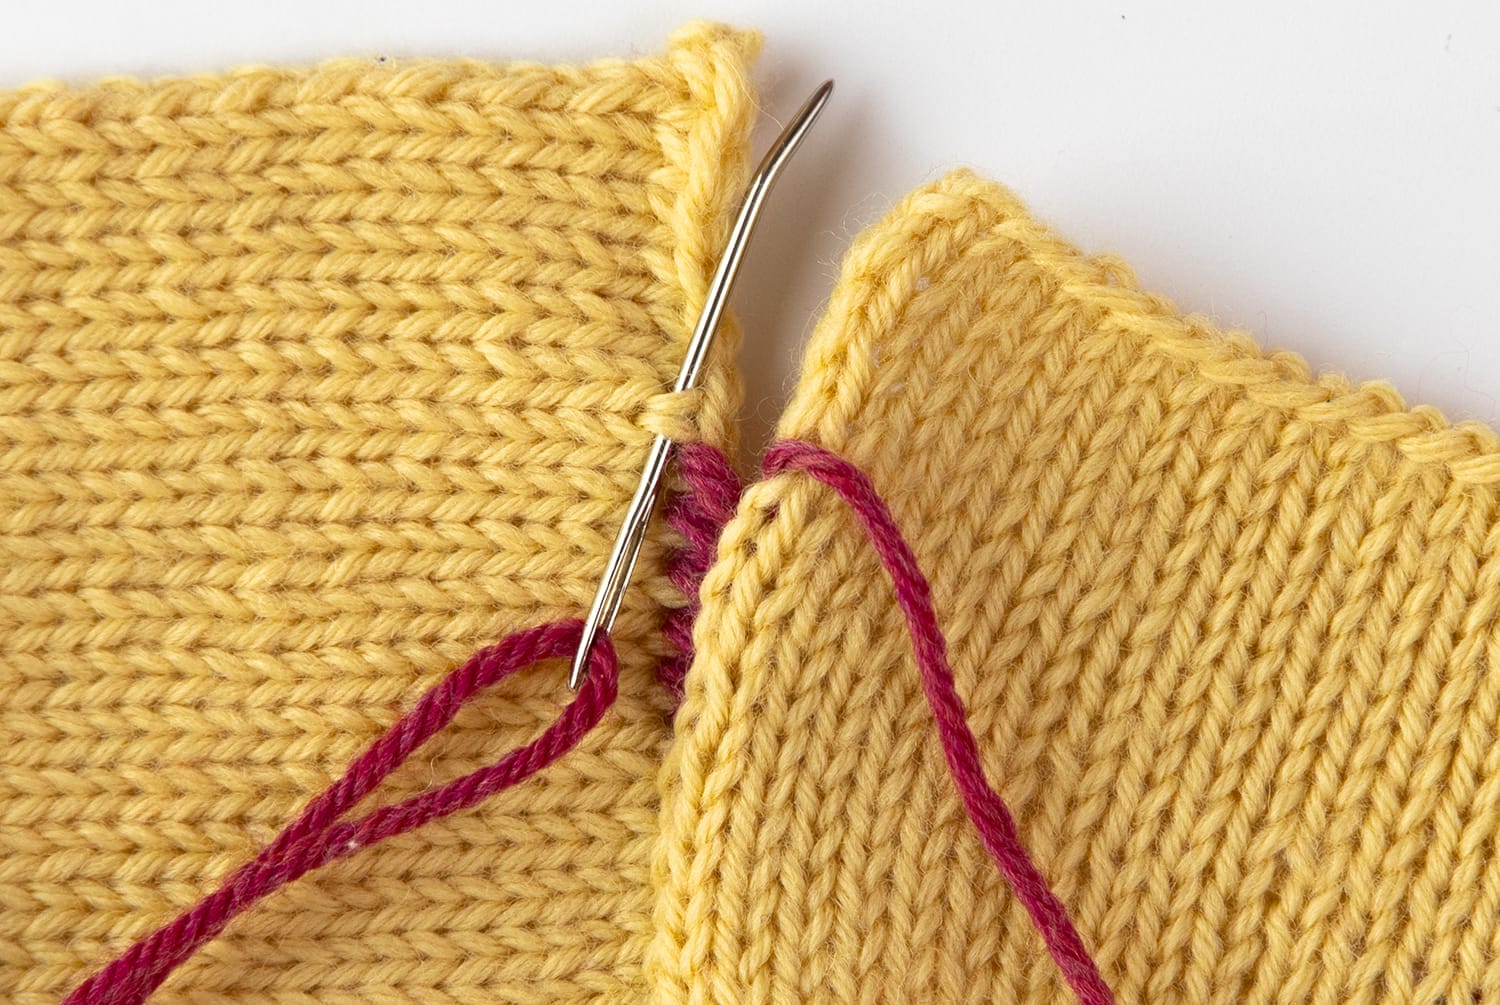
Use a hybrid of mattress stitch and fake grafting to join a vertical edge to a horizontal edge. With the right side facing up and the pieces laid flat next to each other, on the vertical side, capture bars as you would for mattress stitch, and on the horizontal side, capture full stitches. Be aware that the ratio of stitches to rows will not be 1:1 and will be closer to 3 stitches every 4 rows or 2 stitches every 3 rows. Similar to picking up stitches for a button band, the ratio should be based on the gauge. Treat the gauge as a fraction and reduce to the lowest whole numbers. Because knit stitches are not seamed 1:1 with rows, it’s recommended to pull this seam snug to hide the seaming stitches.
Honorable Mention: Crocheted Slip Stitch
Any or all seams can be worked using crocheted slip stitch. Although it adds bulk, it also creates seams that are strong but have some stretch. It also has the added benefit of being quick, and no yarn length estimates are required. It’s worked with the right sides of the pieces facing each other and their wrong sides facing out, and you simply crochet in between the selvage and the rest of the knitting, passing the hook through both layers of fabric.