
Did you know you can experiment with dyeing yarn in your kitchen, using food-safe & low-cost products, and get some really cool results?! What a great way to play with our Bare Yarns!
All the yarns in this post were dyed with Kool-Aid (or sometimes other brands of unsweetened drink mixes), in my kitchen. Above is Bare Capretta, and below is Woodland Tweed. There are lots of different ways you can dye yarn with Kool-Aid; today I’ll show you my latest favorite, in the microwave!
The question I hear the most about dyeing yarn with Kool-Aid is: is it colorfast? Or, does it wash out? The answers are YES, and NOPE! I have yarns I dyed 12 years ago that are still bright and vibrant. I won’t say they are 100% colorfast—some dyed many (over 10) years ago look lighter than I remember, but they’re still colorful and look great, even if slightly faded over a decade+. I do recommend storing items away from direct sunlight and I’ve never seen any dye come out during washing.

If you’re interested in learning more or other methods besides the microwave, google is your friend, and also I wrote several tutorials many years ago: an intro to dyeing with Kool-Aid when I first started doing it, how to dye striping yarn on the stove,
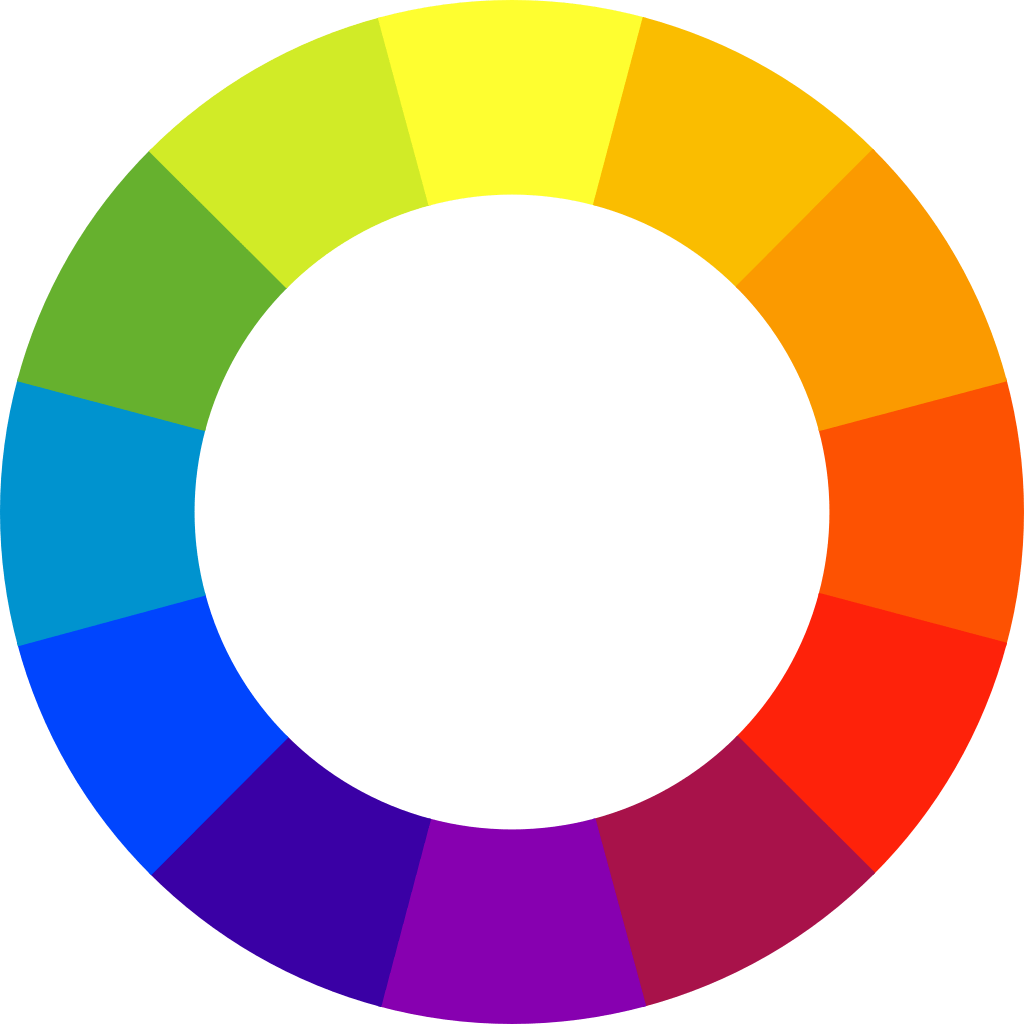
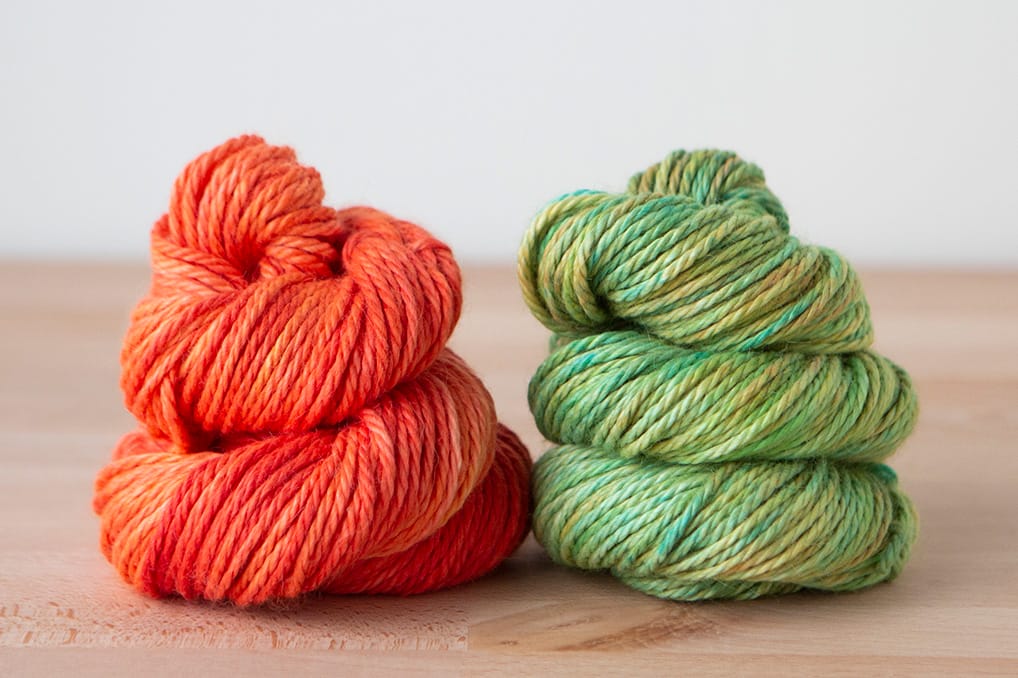
Something else you may want to think about when planning your project is color mixing, how to get the colors you want. Kool-Aid doesn’t limit you to just the base powder colors—you can mix, overlap, and over-dye! The way to darken or mute colors isn’t to use more or less of a color. Instead, adding some of a complementary color (opposite on the color wheel) could achieve exactly the results you’re after. For example, adding a little orange to a blue will make a darker, less vibrant blue, and vice versa. It doesn’t have to be the exact complementary color; you can try mixing colors that you might not think would mix well just to see what results you get. One of my favorites is adding some orange to green to make it a more olive, darker shade of green.
Let’s get to the dyeing tutorial, then I’ll talk a little more about color at the end! I’ll show you exactly how I made the yarn pictured above, which is Bare Superwash Merino Twist. A note before you begin! You’ll want at least THREE ties in your skein so it doesn’t end up a tangled, wet mess—not all of our Bare yarns come with three ties, so you may need to add one yourself. I recommend using a cotton yarn for ties.
Also, this kind of
First, I like to soak my yarn in water with a big splash of white vinegar for an hour or longer. The Kool-Aid has acid in it so it’ll set onto the yarn without the vinegar, but I think the vinegar makes it a bit more colorfast in the long term, and it doesn’t hurt! If I’m going to dye several skeins, then I’ll soak them all in vinegar water in a big bowl or bucket together, then take them each out to dye them one at a time in a separate bowl. In this case, I was just dyeing a single skein, so I soaked it in the same bowl I’d be dyeing it in.
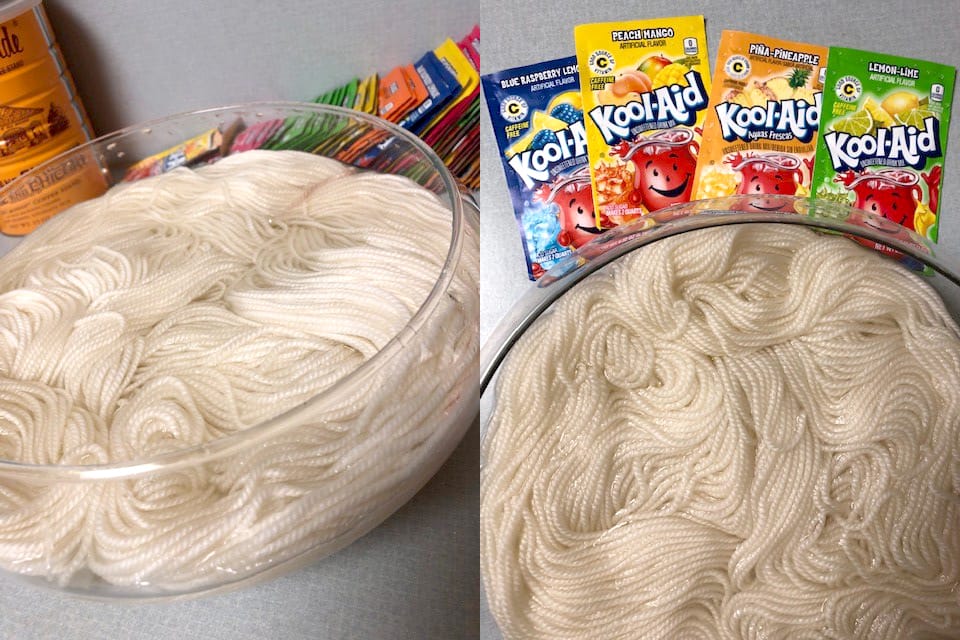
Next, place your skein in a glass (or otherwise microwave-safe) bowl with just enough vinegar water to cover the top of it. If you want to dye the skein in a certain pattern (like different colors on different sections of the loop) then position the yarn intentionally. For my skein, I wanted all-over speckle-y variegation, so I purposely let it be messily positioned in the bowl. Now sprinkle on some powder!
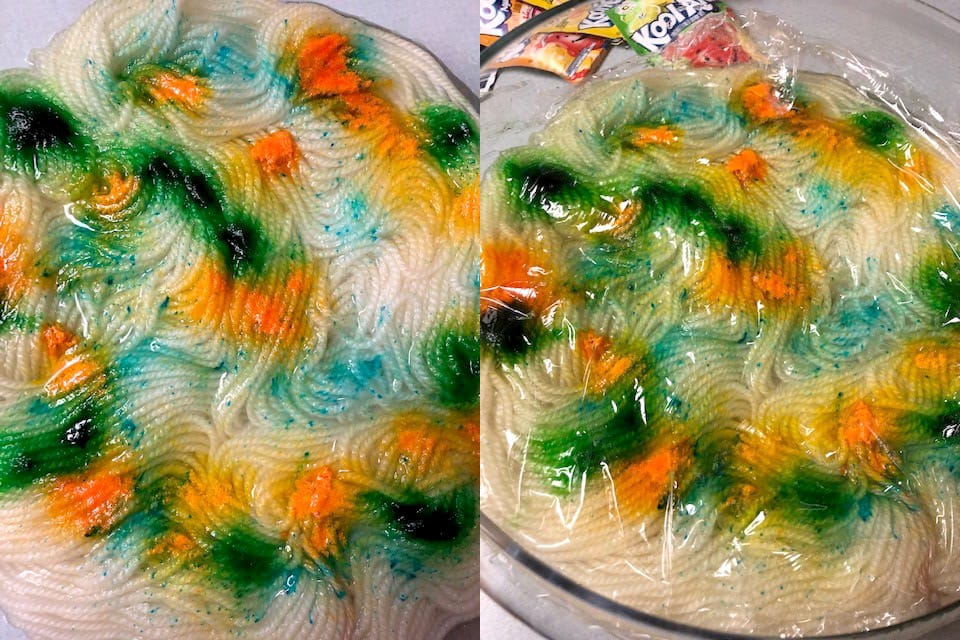
I purposely let the oranges, greens, and blues overlap and mix. Then cover the yarn with plastic wrap and microwave it for 1 minute. (I use maximum power, but I have a small microwave; if you have a high-power microwave, you might want to use a lower power setting.)
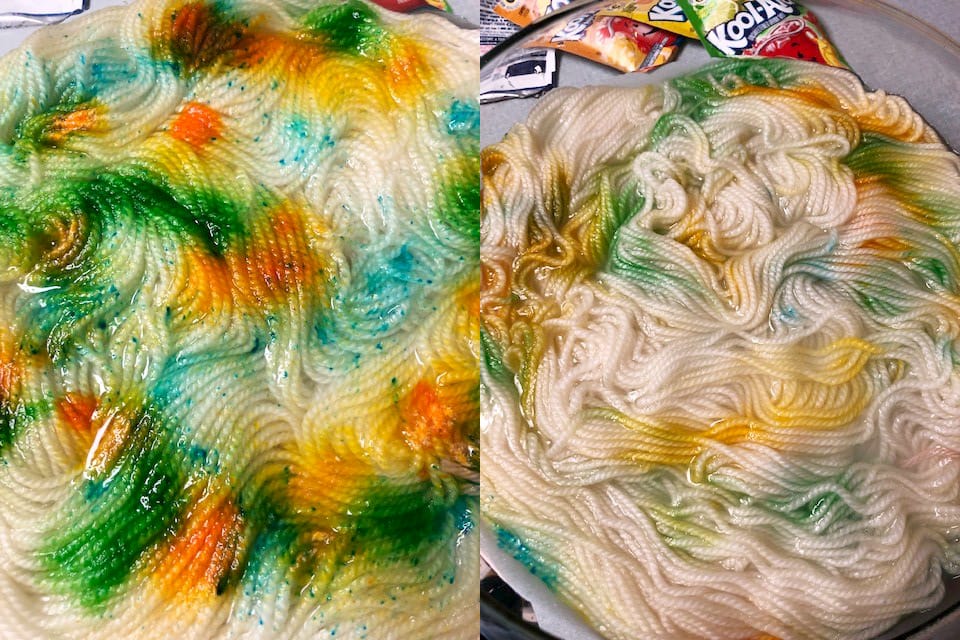
When you take it out, that powder should be mostly absorbed into the yarn. Now you’ll go through the process of adding more dye, and giving it more time in the microwave, until you’re happy with it. Your exact process may vary depending on how you want your yarn to look. I usually flip the skein upside down (that’s what I’d just done in the above right photo), then add more powder, then give it 1 more minute…
…then I repeat one or two more times. Reposition the skein, add more dye, another minute. I usually end up doing four
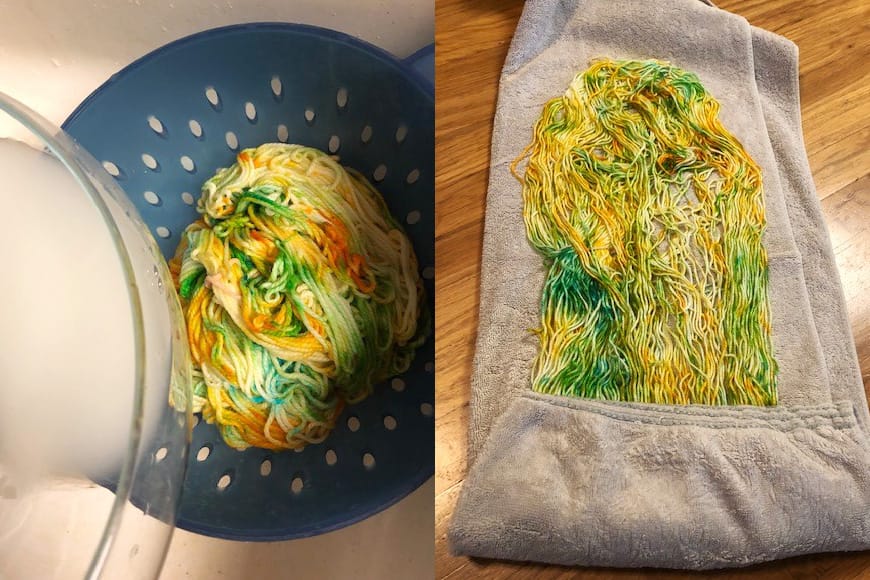
Then rinse it in water (the same temperature as the yarn) very gently. If you want to get the vinegar smell out, you may choose to wash the yarn with a good-smelling wool wash now; I usually just rinse it with water, knowing that I’ll wash the finished object after knitting it up. Gently squeeze the water out in the sink, then roll the skein up in a big towel and gently press on it to squeeze the remaining water out. Shake it out, and hang it to dry over a hanger, shower curtain rod, or coat rack. It could take a couple of days to dry completely (reposition a few times to help it dry).
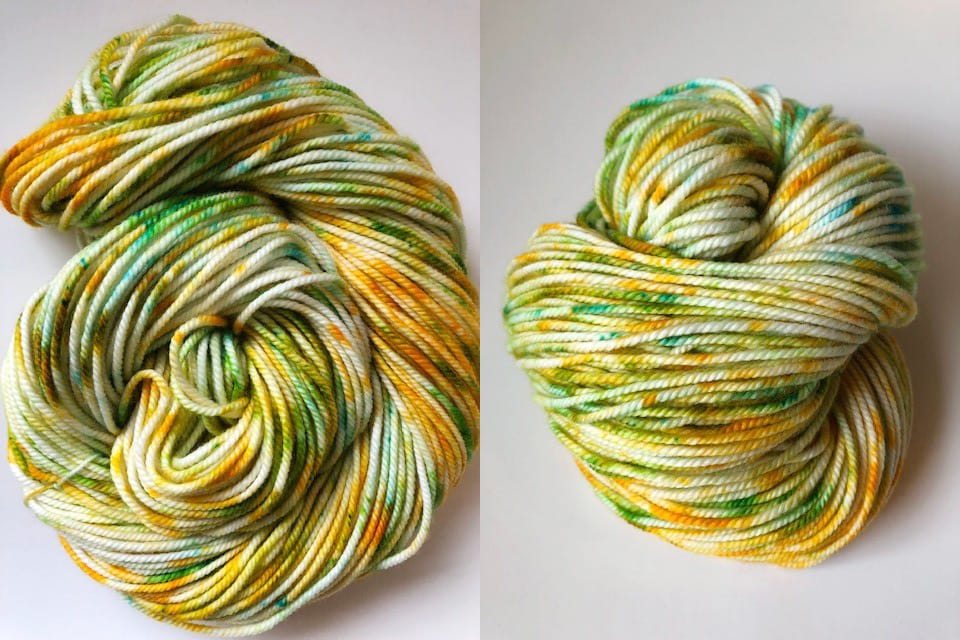
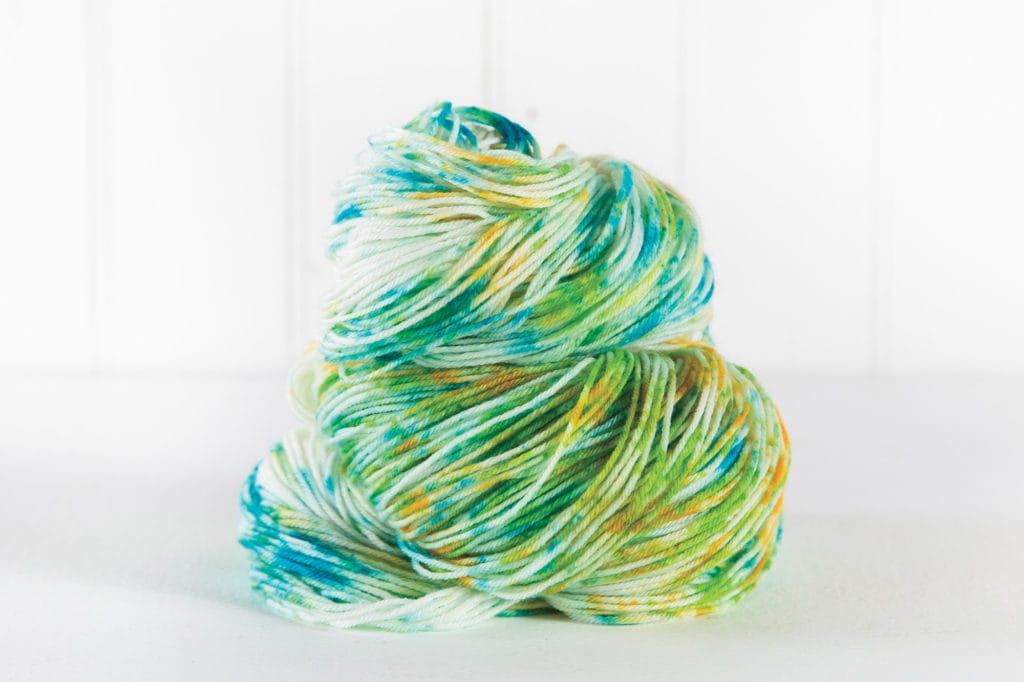
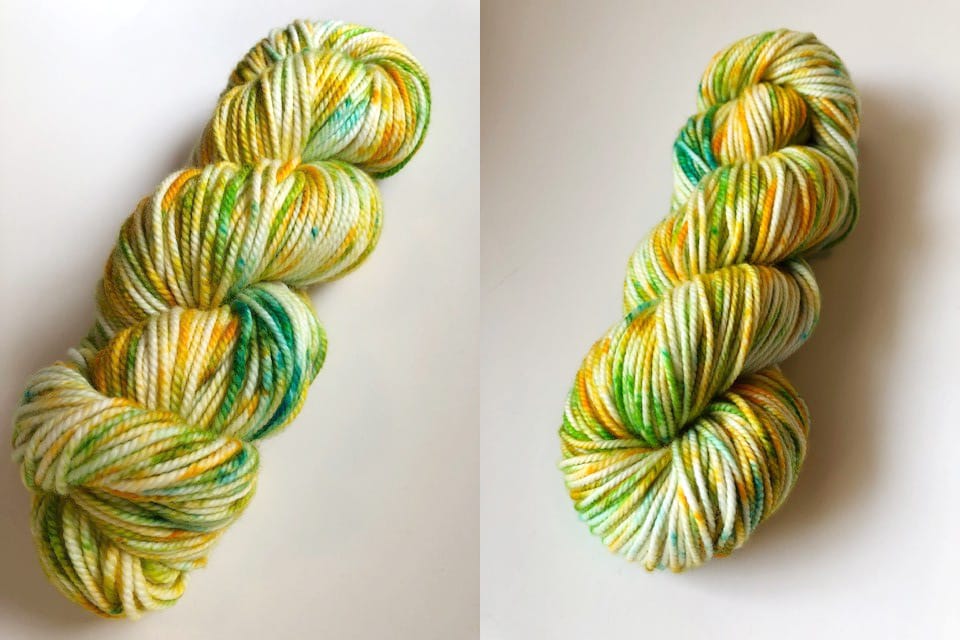
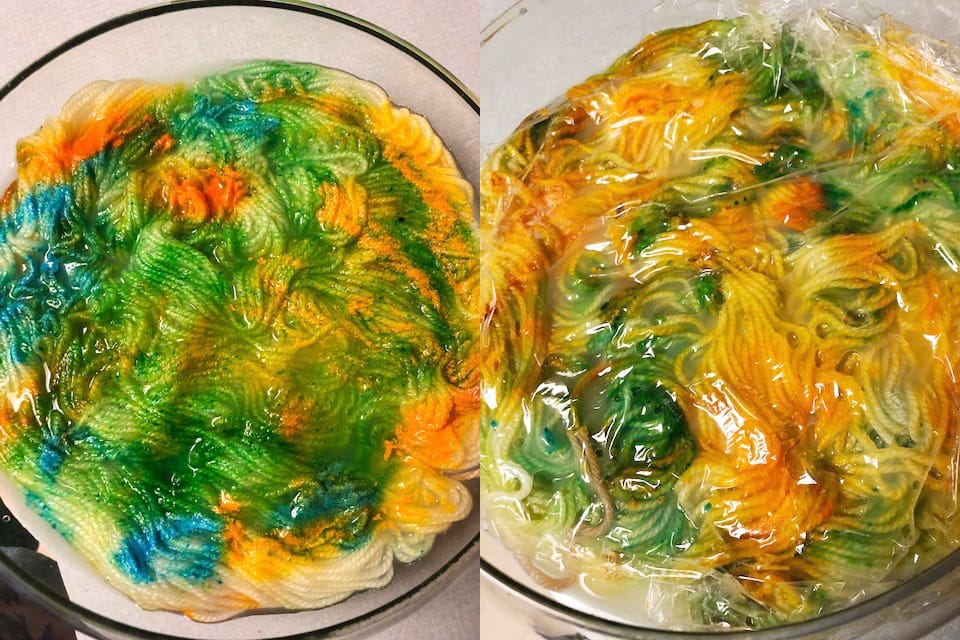
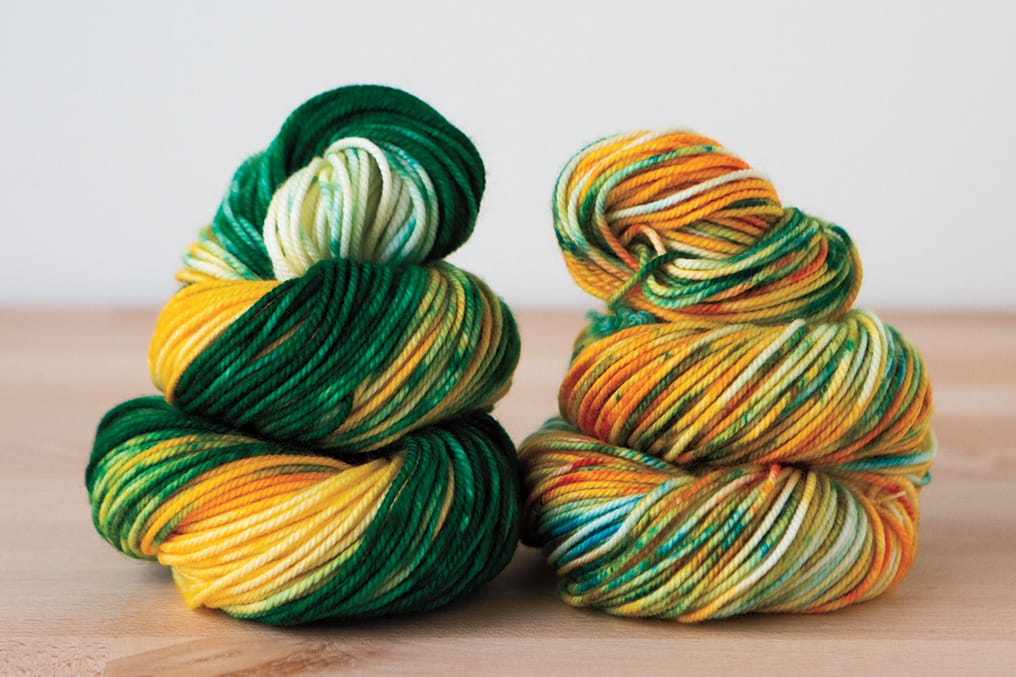
Here’s the finished yarn! This method is great for this kind of look with the white showing through, but if you want a more saturated look, just use a bit more water and stir mix the dye around for full coverage. Below are two more skeins of the same Bare Superwash Merino Twist dyed with similar Kool-Aid colors in different ways. The left-hand one was actually partially dyed on the stove first, for the dark solid green section, and then overdyed more in the microwave, and the right-hand one was using the same microwave method above.
For further color information, you can find Kool-Aid dyeing color charts and blog posts online to get mixing ideas, and you can also try mixing a little in a cup with water, and then dipping a white paper towel into the mixed dye to get an idea of the color you’re making, before using it on your yarn. Also, Kool-Aid can be hard to find in lots of colors (flavors) so your local options may be limited. You can use other brands of drink mix, but—this is important!!—make sure they don’t have sugar! Kool-Aid mix comes unsweetened (you need to add sugar when you make the drink) but many other mixes already have the sugar included. This would be bad news for your yarn! Another pro tip: generally, you can preview the color in the packet by looking at the color of the liquid in glass cup portion of the illustration (and not the color of the packet background).
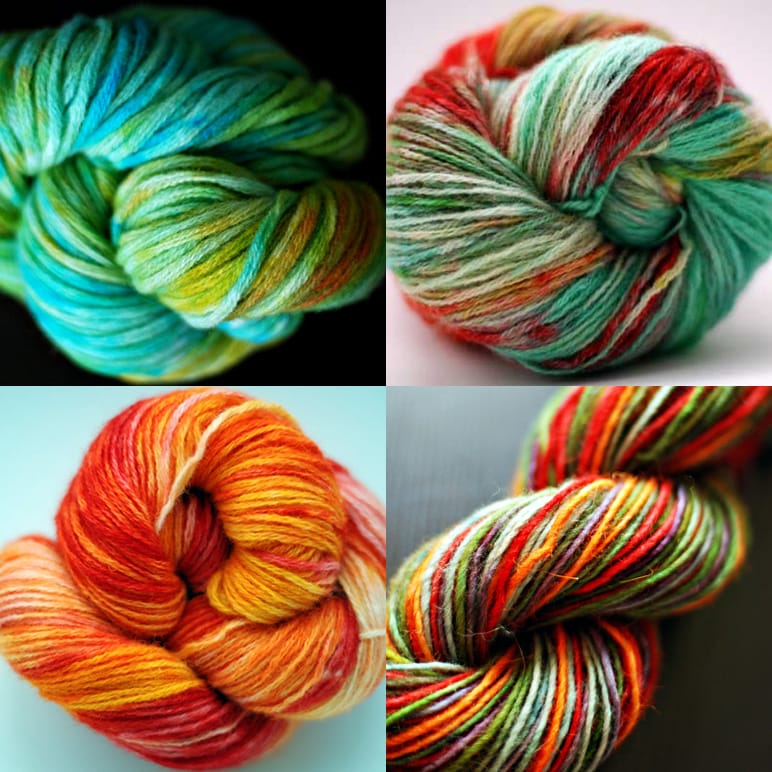
Above are a few old yarns I dyed with Kool-Aid years ago, to show some different color effects. I do tend to prefer bright colors, so the lack of darker/muted shades has more to do with my preferences than with the possibilities!
There’s also the option of dyeing vibrant Kool-Aid colors over the top of other colors. Using our Simply Wool & Simply Alpaca yarns as bases instead of Bare can get you beautiful, darker, toned-down color results! Or dyeing Bare yarn with tea or coffee first, to give it a brown base, or just adding tea or coffee with the Kool-Aid… lots of options!
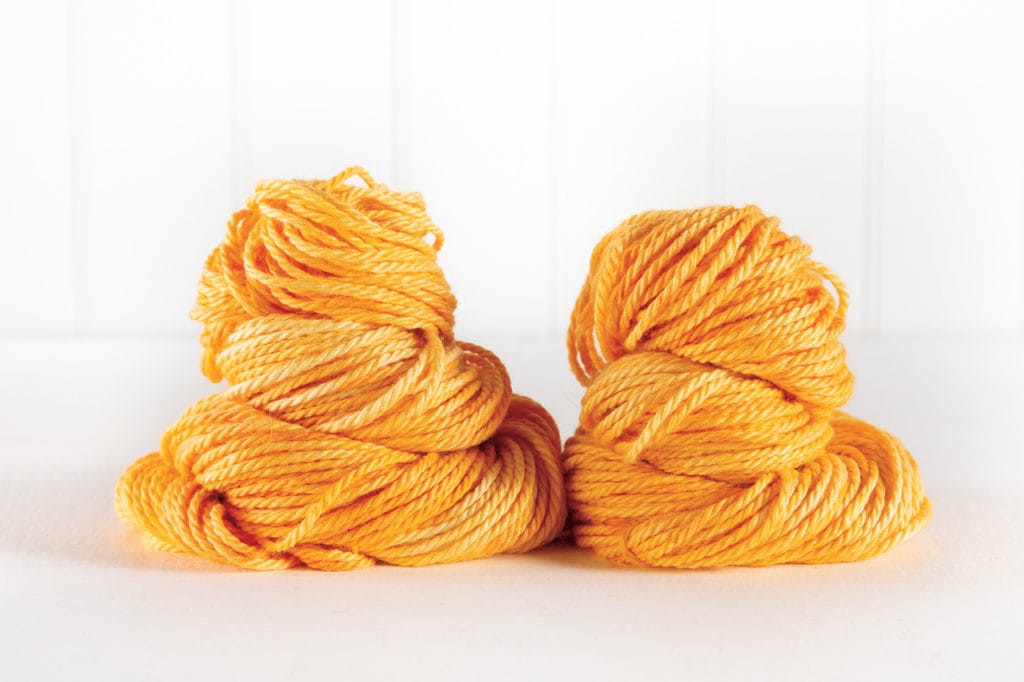
Those are two skeins of Bare Shimmer Bulky that I dyed (using the same microwave method) with a couple of shades of orange/yellow, for a tonal hue. I then over-dyed each skein separately, with totally different colors (below). On one, I overlapped a few shades of red and pink, for kind of a tonal coral; on the other, I used blues and greens, which mixed with the light orange base to be more muted versions of those colors. Orange and blue are complementary colors, so adding blue and green to that orange base worked to tone down the shades… if I’d mixed them all at the same time, it might have been muddier than how it turned out with this over-dyeing method. This kind of color mixing is a lot of experimentation; I wasn’t sure how it would turn out, but I’m happy with the result! You can always dye a very small amount of yarn first to try out a color idea, before using a whole skein.
I love doing this, as a full grown adult knitter, but it would also be a really fun activity to do with kids, to give a hands-on lesson on the basics of color theory, or just to play and have fun! If you dye your own Bare yarn, we’d LOVE to see the results! Post links in comments below, or tag us on instagram, etc. Have fun dyeing!!
