This post was originally sent via email for our Summer Knit Along.

We’re in the final stretch with just one week left of the KAL! If you were knitting the sleeves and button bands in the order the pattern was written, your sleeves will ideally be done and your bands started.
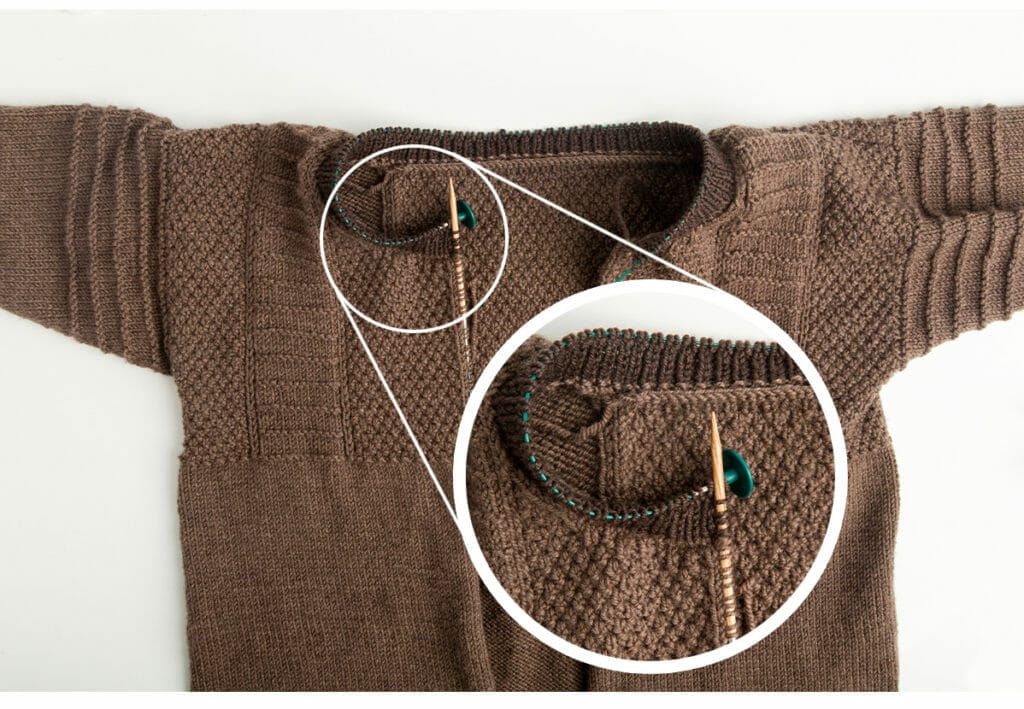
The neckband of Game Day is knit in two steps. First, half of it is knit and then placed on hold. Next the button bands are knit. With the button bands completed, the neckband is picked back up, so the strip of CC extending over the button band from the neckband is the same height as the contrasting stripes, making it appear like the outer stripe turns a corner but without having to fuss with a long mitered band that wraps all around. To enhance that effect, both the MC and the CC are used during the setup row. It adds in two extra tails to weave in, but it’s worth it to create that polished look with ease!

The Buttonhole Band is worked after the neckband is started, and this section is where you’ll need to double check that your sweater body length matches the schematic and plan ahead if you chose to add or remove length from the body. The pattern instructions provide buttonhole placement if your body matches the schematic, but what if you altered the length? The patterns suggestions for picking up at the bottom edges and neckband can be followed, but for the body, some modification is needed. Stitches along the body should be picked up according to the best ratio for the gauge of the rib, which gives you a pick up rate of approximately 3 stitches per 4 rows.
With the stitches picked up to match a modified sweater body length, note down the final stitch count so the second band can be made to match. Then dig out 5-8 locking stitch markers and start planning your buttonholes! Game Day features one-row buttonholes that BO and CO 3 stitches in a secure manner, so those two stitches should factor into your planning. First, place a marker after the first 3 stitches, indicating where to start the first buttonhole. Next, place a marker before the last 7 stitches to indicate where to start the final buttonhole. With the first and last buttonholes marked, and keeping in mind that the buttonholes are 3 stitches long, evenly place the remaining markers in between. If you can’t make them perfectly evenly distributed, aim to only have one or two stitch differences, and hide the too-long or too-short section directly before the last buttonhole. It will be less noticeable lower on the body.
Finishing Resources
More Game Day Knit Along
Use the hashtag #KPGameDayKAL to see more posts on social media, and check out Knit Picks Podcast episodes from June 1st 2022-September 5th 2022, to hear about our hosts Lee and Stacey’s own Game Day cardigans in progress.


