I’m now three weeks into the knitting of hubby’s new sweater. That’s about the longest I can usually pay attention to a project – but I’m only through the sleeves!
I think this proves a couple of rules of knitting for other people. 1: Don’t underestimate how long things take to knit, and 2: If you let the recipient pick the pattern, be prepared to face the consequences!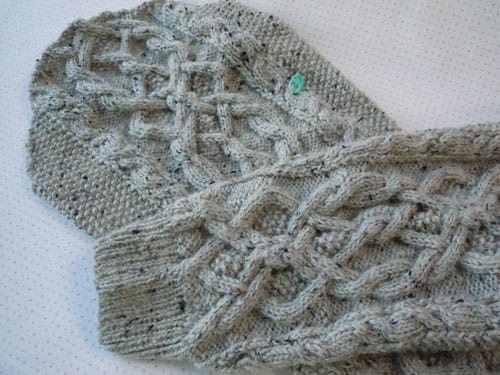
I did some pre-searching through all of my pattern books and found several all-over cable designs that were nice and rhythmic and easy to memorize. I presented these to my hubby, and his reaction was pretty dry. So I let him look through my books, and he picked quite possibly the most difficult cable pattern he could have! It’s the Baroque Cable from Barbara Walker’s third treasury.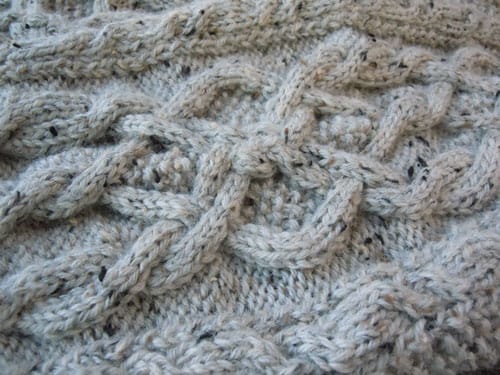
Granted it’s not the cabling itself that’s difficult, but the 42-st x 42-row repeat, changing shift rates of the cables, and the very tight weave of the center of the design. This pattern has slowed my progress considerably – I’d wished to be well into the body by now, but oh well. At least I’ve got this part done!
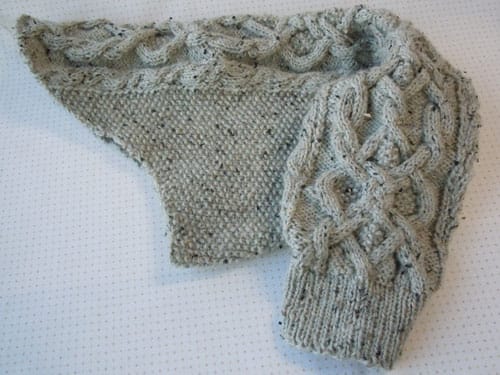
I have a good idea of the body’s patterning as well. This central Baroque cable will be flanked with braids, with panels of simple cables filling out the shoulders’ breadth. Of course, since I let my husband pick out the braid pattern, it’s one of the most difficult I’ve seen – a five ribbed braid with multiple crossing cables. (To see what I mean by multiple crossing, check out the tutorial video I did on the subject!) I think I might just have to quietly change that part so I don’t drive myself completely nuts! Hopefully that won’t dampen Hubby’s very vibrant enthusiasm for the project.
But one thing won’t change, even if I do swap out that cable – the power of planning. Because I swatched a pretty dense cable in this yarn ahead of time, I was able to get a really accurate estimate of the total yarn I would need for the project. The density of the cables made the estimate a worst-case scenario, since a good portion of the sweater is actually in seed stitch, which uses less yarn. Here, at the end of working the sleeves for this sweater, I have used almost exactly as much yarn as I expected to. Now that I’m starting on the body, I’m going to use what I learned from the sleeves to plan how many stitches to cast on.
First, I measured the gauge of the seed stitch, flanking cables and Baroque cable patterns, as well as each cable’s width when at its eventual blocked size. They couldn’t be more different!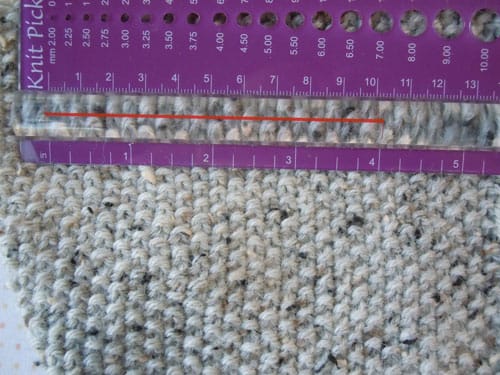
The seed st gauge came out to 4.75 sts/in, or 19 sts/4″.
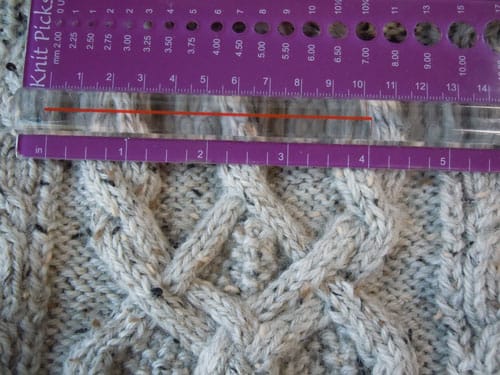
And the entirety of the 42 sts of the main pattern is only 5″! That’s 8.4 sts/in.
I measured each of the flanking cables to be 1.25″ wide – the whole section of them, 7.5″ wide, will take 48 sts. That’s a gauge of 6.4 sts/in.
So, how the heck do you begin to make sense of all of that? Well, diagrams! And some clever math. I drew a to-scale diagram of the body of hubby’s sweater. (The front and back are identical, so it’s just one side here.) I knew that I wanted the seed stitch portions to fit under the armscyes, which are 3″ wide. The center panel is 5″, and what’s left, the flanking cables, totals 15″ for a grand total of 26″ wide. Then, I counted the stitch breakdown to get that to work out.
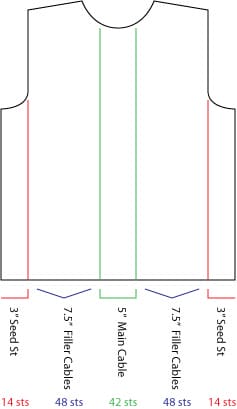
Now, you could see what would happen if you cast on the full 166 sts shown here and worked ribbing – you’d end up with some seriously compacted, rippling ribbing in the front where the gauge is the tightest. So, for the purposes of ribbing, I chose to cast on the number of stitches I would use were I to make the entire thing in seed stitch. For this sweater, 26″ wide x 4.75 sts/in = 123.5 sts, rounded up to 124. That means that after the ribbing, i will have to add 44 stitches to achieve the final number of 166. Now, where to add those?
Again, it’s down to the breakdown. For the flanking cables, I’ll need 48 sts in each section. As it stands, over that 7.5″, I will have 36 sts, according to my seed stitch gauge calculation. So, in each of those sections, I will add 12 stitches. That’s 24 added – simple deduction tells me that I’ll be adding 20 of the 42 stitches of the center panel. And wouldn’t you know, there are 20 sts of cables in that pattern. Isn’t math wonderful?
So, there’s a perfect example of how much gauge matters, and how a little bit of planning can save a lot of headaches! Now, it’s time to go cast on!


