How to Work a Sl-K3-PSSO

As the Sedona Sunset KAL gets started, we wanted to take a closer look at a special stitch featured on the wrap that might not feel as familiar as the other stitches. A Sl-K3-PSSO is used to add texture and interest, and it’s a brand new stitch for a few of our KAL participants in the office. Here’s how to do it!
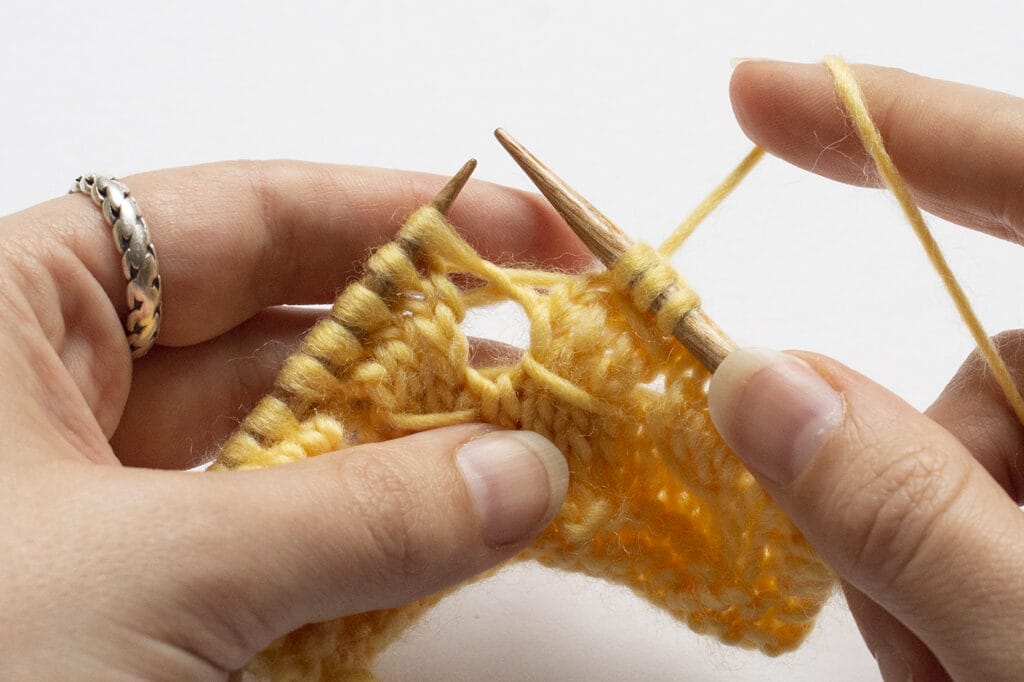
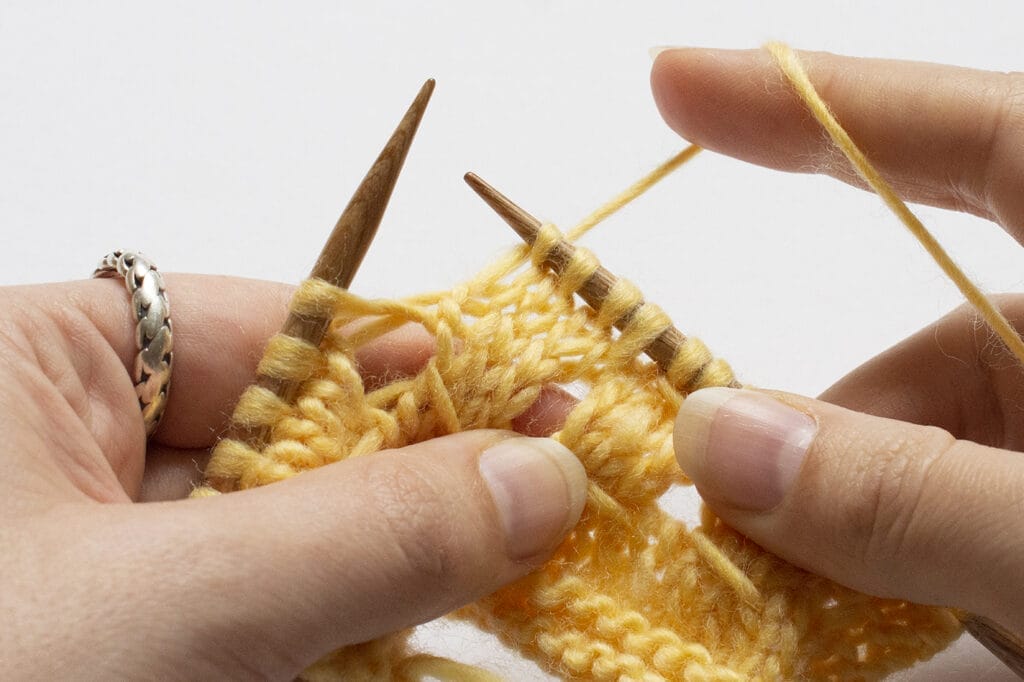
The Sl-K3-PSSO is worked over four stitches. In the swatch shown, the lace from the Sedona Sunset Wrap has already been established. A Sl-K3-PSSO row was knit four rows down from the current row to show how the stitches will stack up on a Sedona Sunset Wrap.
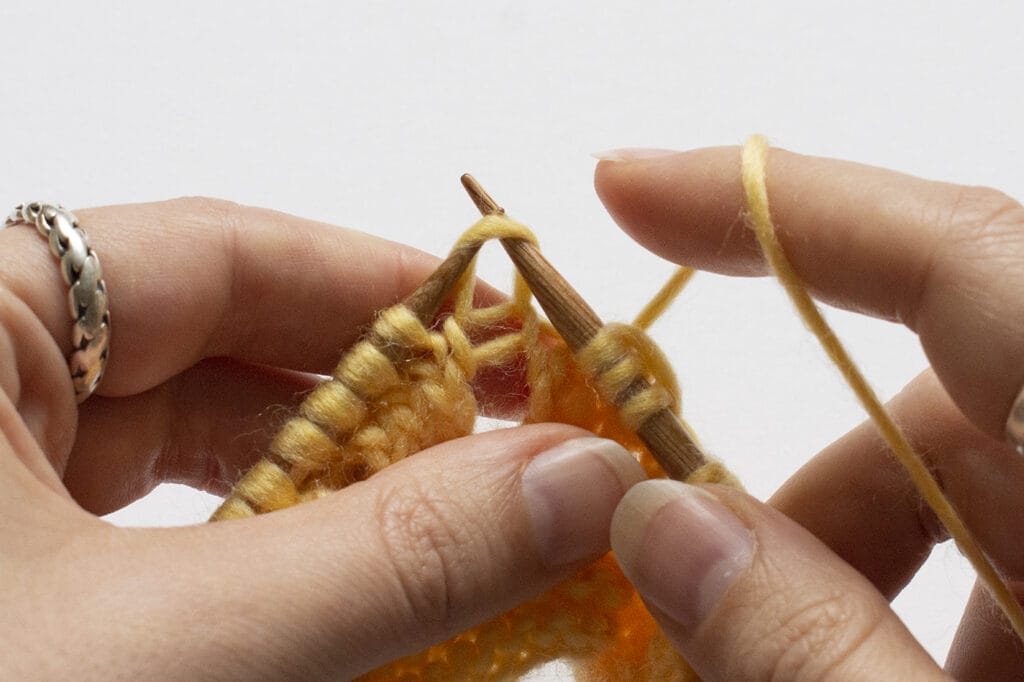
Slip one stitch knitwise with the yarn held to the back.
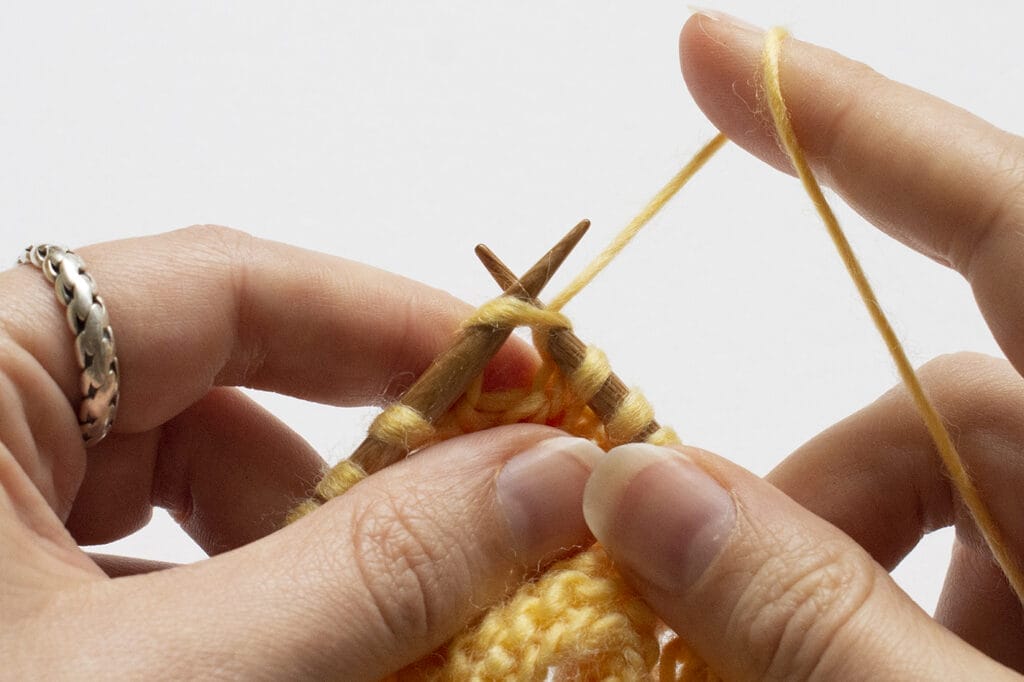
Carry the yarn across the back of the slipped stitch and knit three stitches from the left needle.
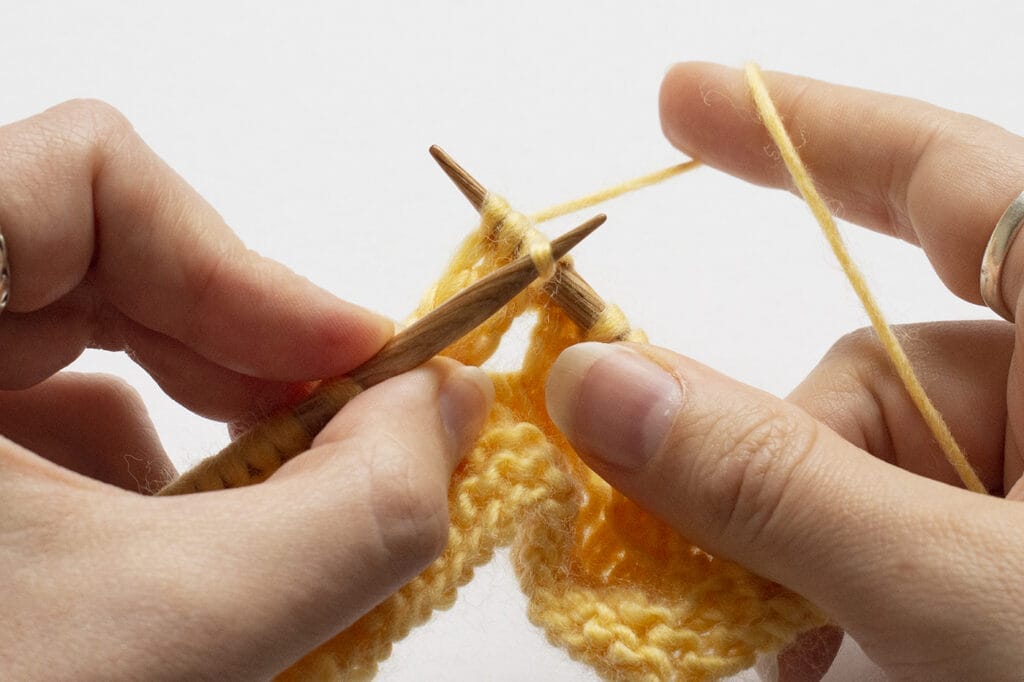
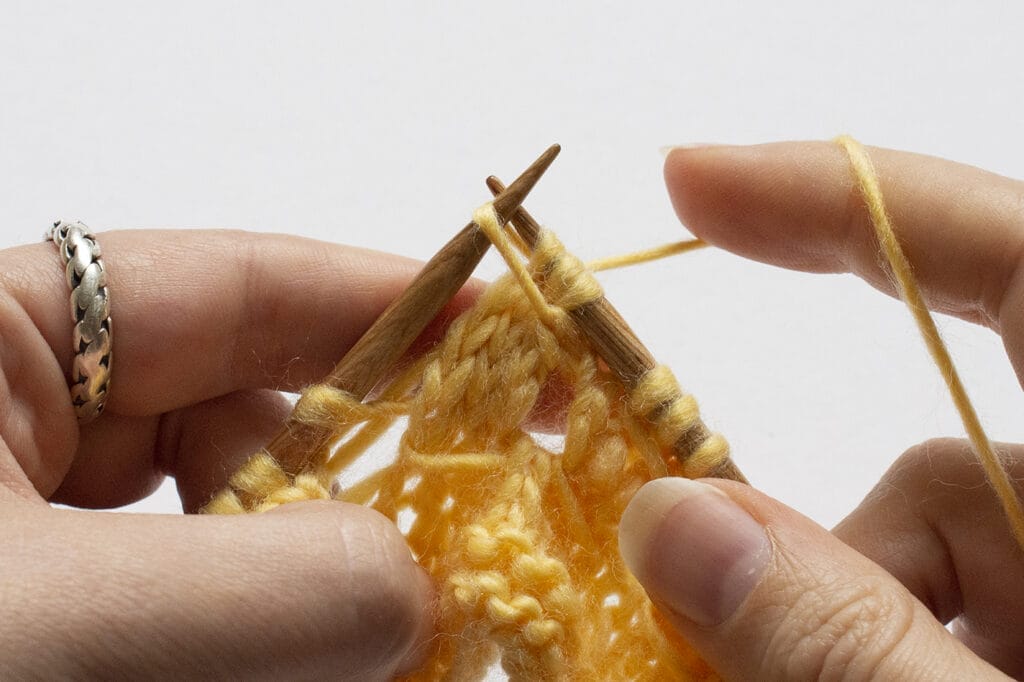
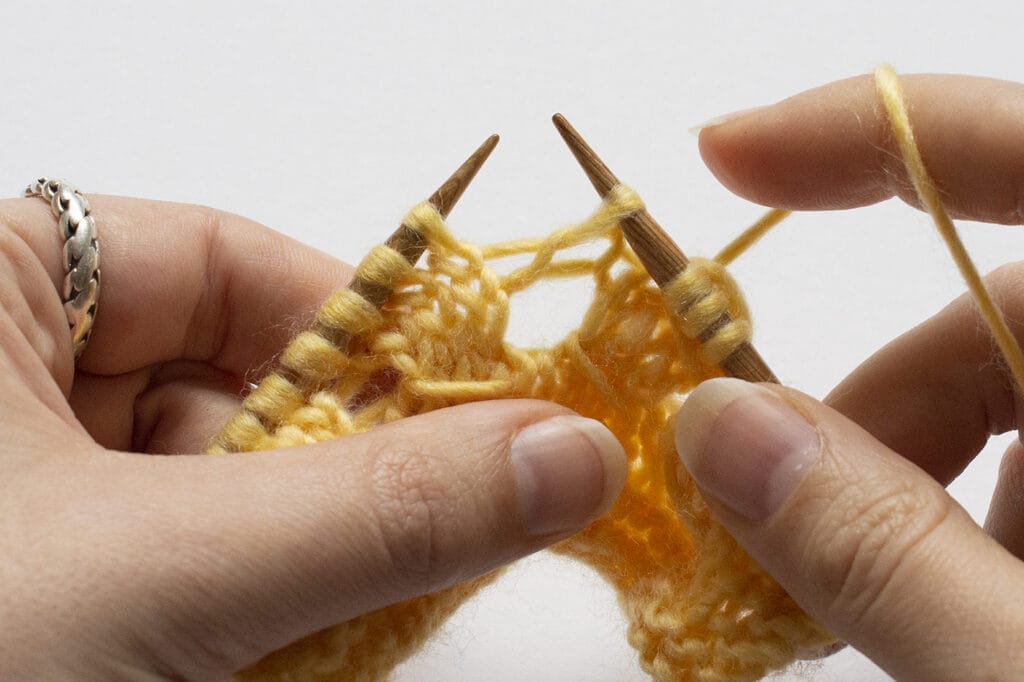
Using the tip of the left needle, lift the slipped stitch. It will be the fourth stitch from the tip of the right needle. Pass it over the three knit stitches.

Drop the slipped stitch off the needles, so it’s now wrapping the three knit stitches. That’s it! We’ve worked one Sl-K3-PSSO and decreased one stitch.
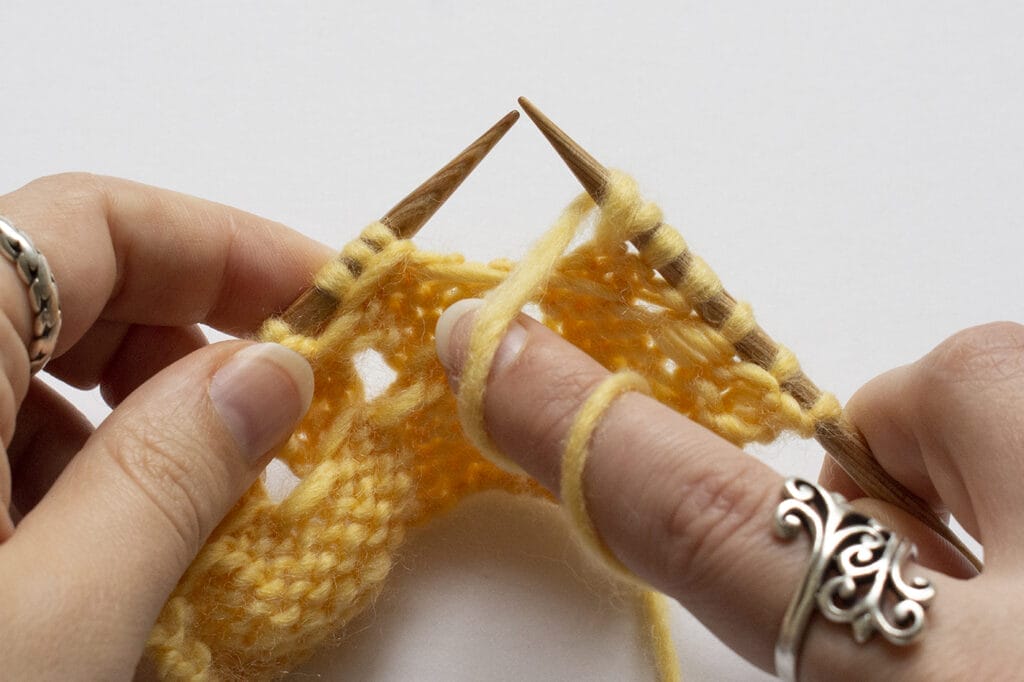
On the row following one with an Sl-K3-PSSO, the Sedona Sunset Wrap has YOs worked everywhere a stitch was slipped and passed. In addition to adding an eyelet, this YO acts as an increase to balance the stitch that was decreased as part of the Sl-K3-PSSO.

\It’s truly that simple, but beware of how the Sl-K3-PSSO temporarily changes your stitch count on the Sedona Sunset Wrap! The rows with Sl-K3-PSSO will not match the stitch count given for a section. We recommend waiting at least until the row after a Sl-K3-PSSO row to check your work, or use the next plain row.


7 comments

  1. Tik2thyzem / August 5, 2024 / Reply

    Set out on an thrilling journey to delve into a world of sensual content with our vast array of high-end adult sites. Lose yourself in a domain where cravings know no bounds.
    Savor a broad plethora of genres, addressing every taste. From subtle romance to intense encounters, our choices span the entire spectrum of adult entertainment.
    Investigate distinct categories and find what truly excites you. Our easy-to-use interface makes it easy to track down your ideal content.

  2. Deb / June 5, 2024 / Reply

    Probably a silly question, but…I just finished the small lace increasing chart, and the pattern says to proceed with the large lace midsection chart. It should say the large lace increasing chart, right?

    • Andi Satterlund / June 6, 2024 / Reply

      After the small lace increasing chart is the “Increasing Stockinette” section.

      If your version of the pattern does not include the photos of the orange, pink, and green version of the wrap at the end of the pattern, you might have an old version of the pattern.

    • Deb / June 6, 2024 / Reply

      @Andi,
      That was the problem! I just downloaded the new version, and what a difference an edit makes. A very quick look shows some seriously improved clarity of organization. Thanks so much for calling it to my attention 🙏

      • Deb / June 6, 2024 / Reply

        Please ignore the preceding: the problem was a quirk of the improved visibility setting of my Adobe Reader app, which somehow displaced certain portions of the instructions! When I switched that on in the newly downloaded pattern, suddenly it went back to the problematic formatting of my earlier experience. Sorry to have bothered you about this, but without your reply, I wouldn’t have seen what had happened.

        • Andi Satterlund / June 6, 2024 / Reply

          The problem got solved, and that’s what’s important! Enjoy your knitting.

  3. Annie / June 5, 2024 / Reply

    Thank-you sooooo much for the tutorial!
    It is really helpful!
    Thank-you so much!
    Sincerely, Annie

Reply