

This tubular cast on is an excellent way to cast on for any 1×1 ribbed project, making a beautiful rounded edge that looks like the stitches travel smoothly around the edge. Use it on necks, cuffs, bottom edges, brims, anything that begins with K1, P1 ribbing!
For this tutorial, you’ll see the tail yarn and working yarn as two different colors (to better show the technique), but you should work this cast on in your working yarn, not two different yarns as we do here!
Edited to reiterate: Do not use 2 different yarns, only your working yarn! There is no waste yarn used for this technique.
Getting Set Up
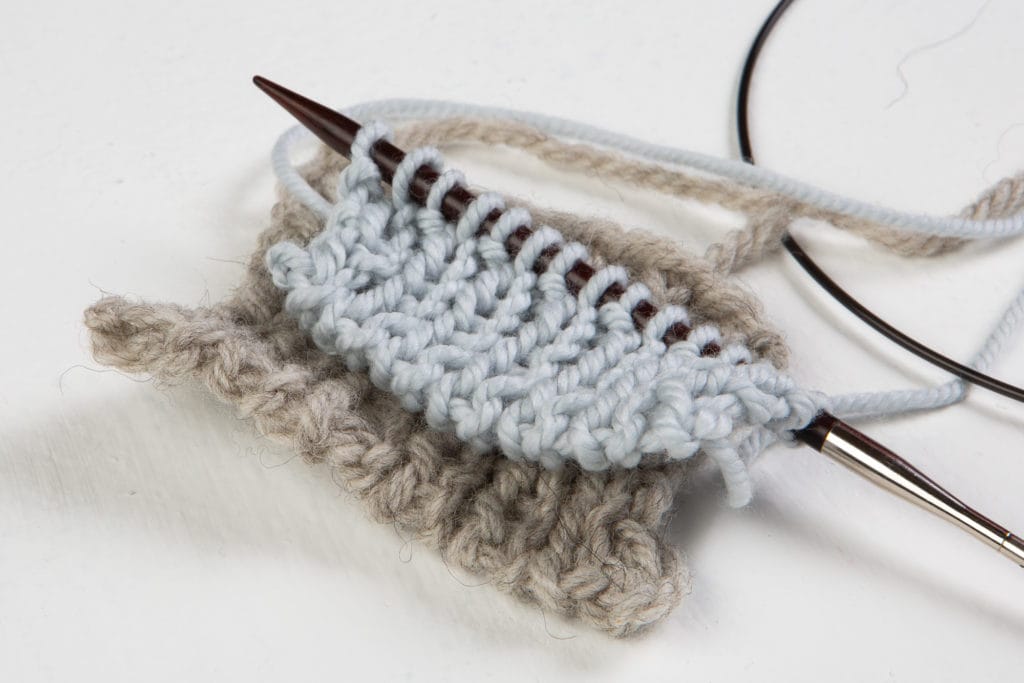
Begin by setting up your yarn as for the Long Tail Cast On technique: make a slip knot with a tail approximately three times the length of your cast-on row, slip it onto your needle, and hold the yarn with the tail wrapping down around your thumb, and the working yarn (attached to the ball) wrapping up around your index finger, and then both yarns held in place with your other fingers, as seen below.
Throughout this photo tutorial, the yarn that is your working yarn is grey and the yarn that is your tail yarn is light blue. Remember, YOUR project will use two strands of your working yarn, not two different colors. The slip knot is the first cast-on stitch.
We will call the working yarn the “top yarn” and the tail yarn the “bottom yarn” because this is how they’re placed as you work the cast on.
As a rule, stitches in this cast on must always switch between knit and purl. In this case, we’re treating the first stitch (the slip knot) as a knit stitch, so our first step will be a purl cast-on stitch.
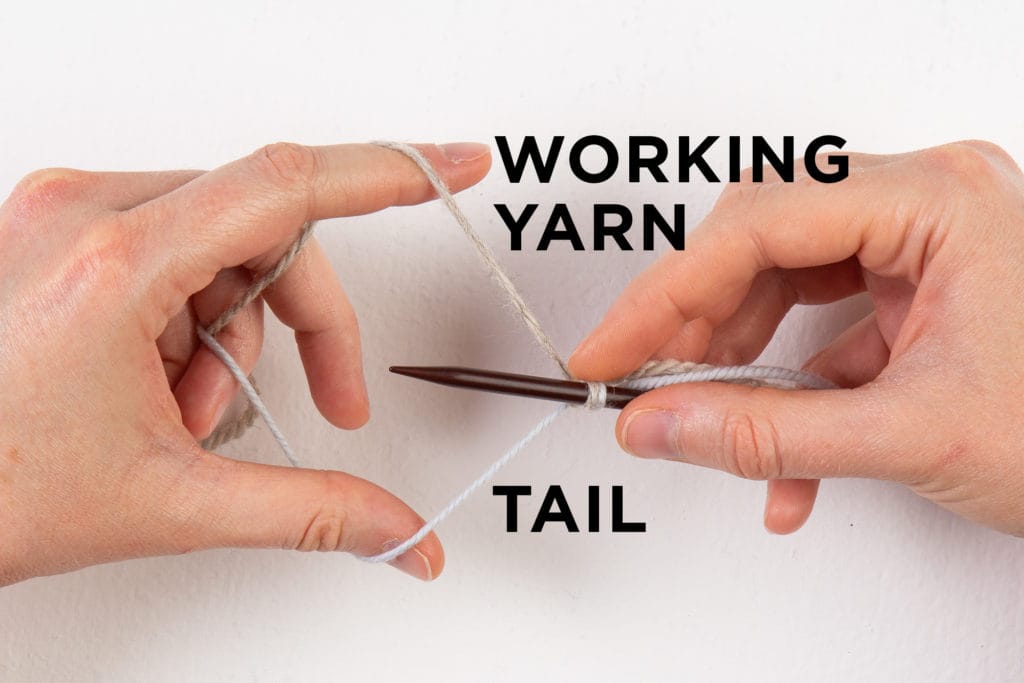
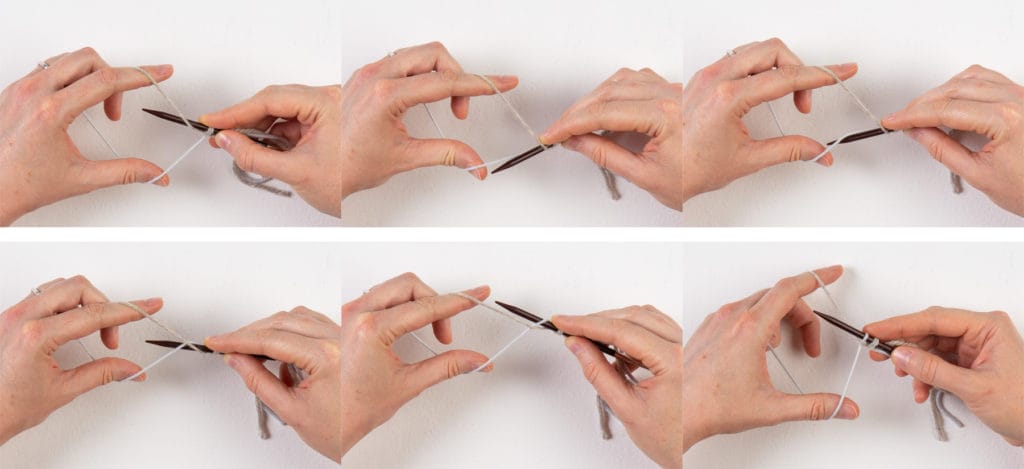
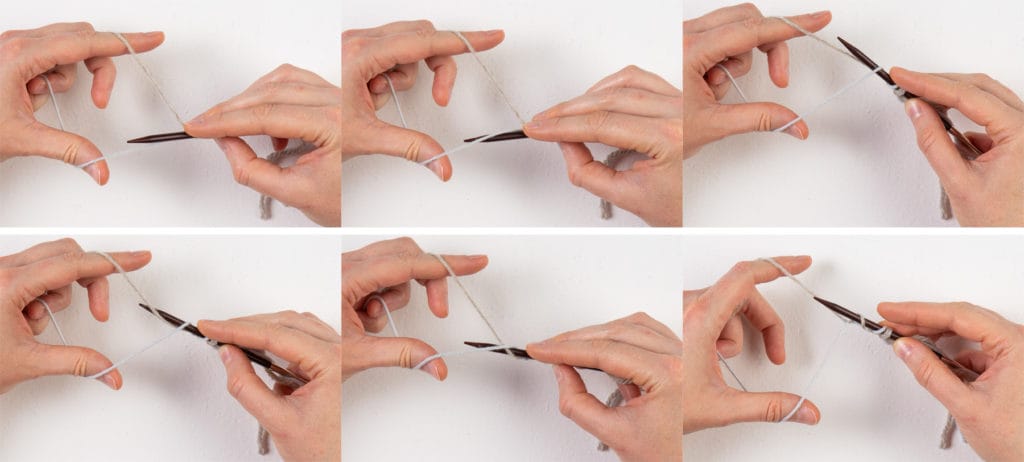
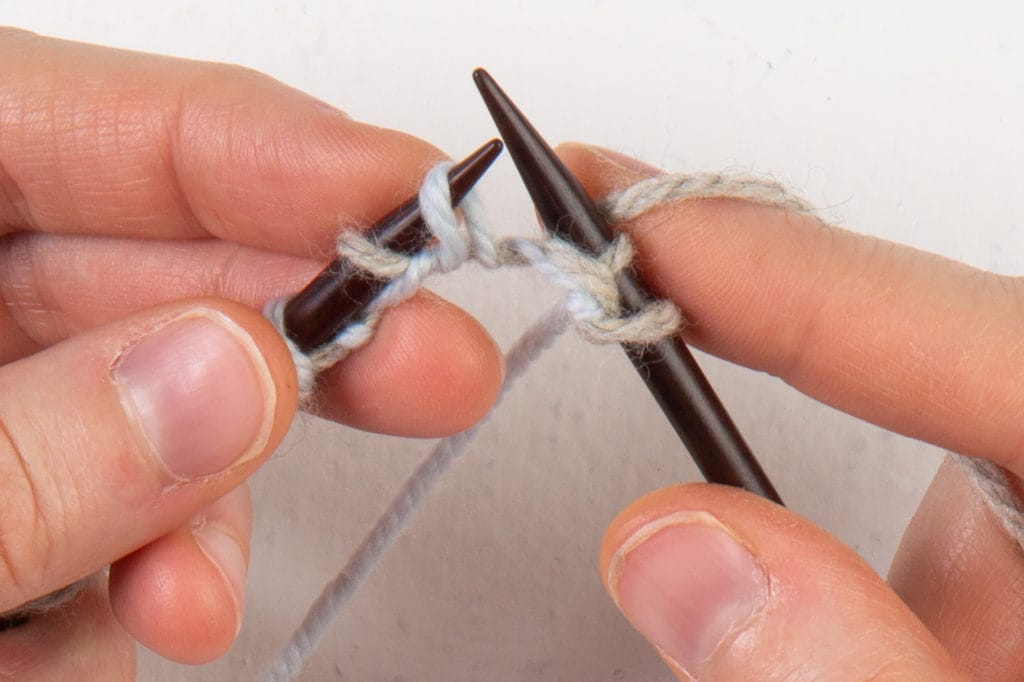
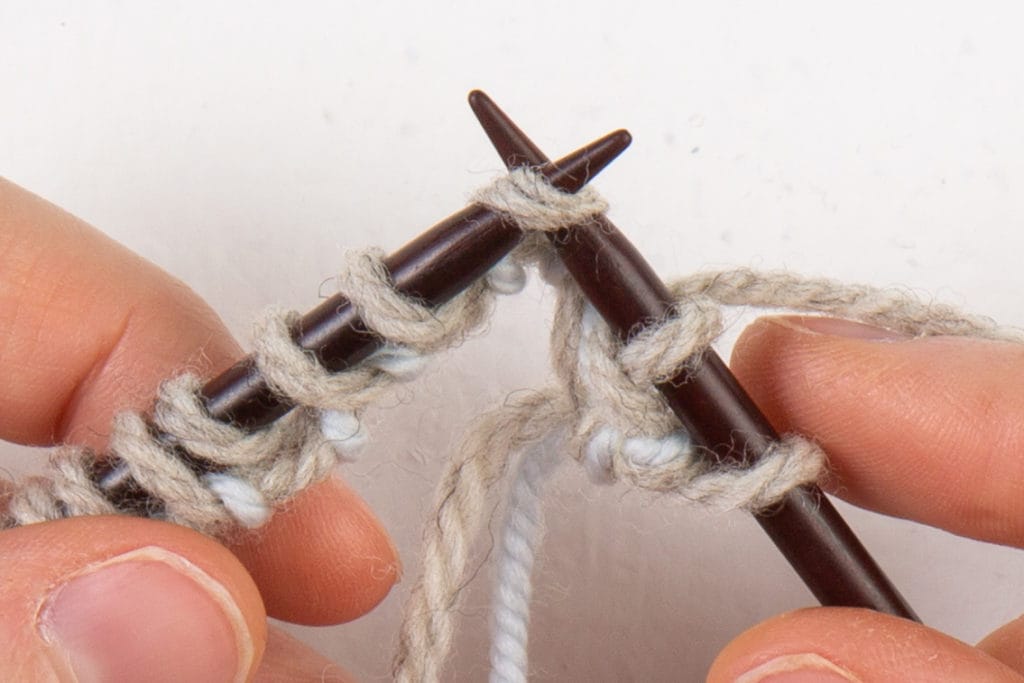
Cast On a Purl Stitch
To cast on a purl stitch, bring the needle:
- up over the top yarn
- around behind the top yarn and down
- down over the bottom yarn
- around behind the bottom yarn and up
- back behind the top yarn and over to the front
(Steps are illustrated in gif animation below.) Then pull the two yarns to tighten on a stitch on the needle. You can see how the stitch has a little bump below it like a purl stitch.

And here are the purl stitch steps in still images:
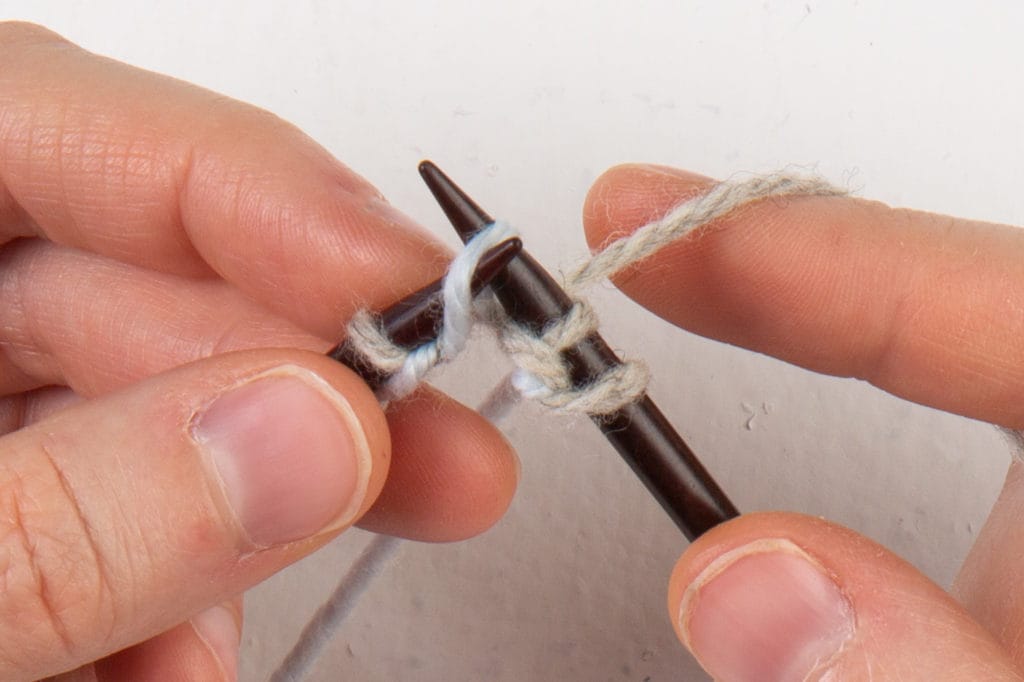
Cast On a Knit Stitch
For a knit stitch, it’s basically the reverse of a purl stitch. Bring the needle:
- down over the bottom yarn
- around behind the bottom yarn and up
- up over the top yarn
- around behind the top yarn and down
- back behind the bottom yarn and under to the front

Tighten the stitch by pulling both yarns snug; you can see how the knit stitch has no bump below it. The knit stitch steps in still images:
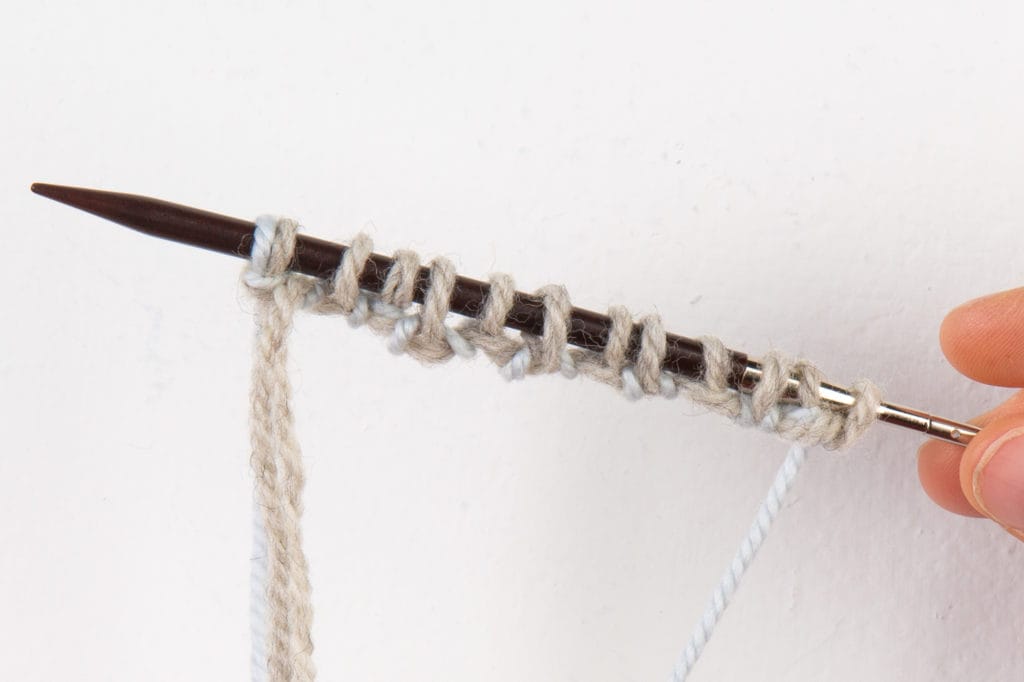
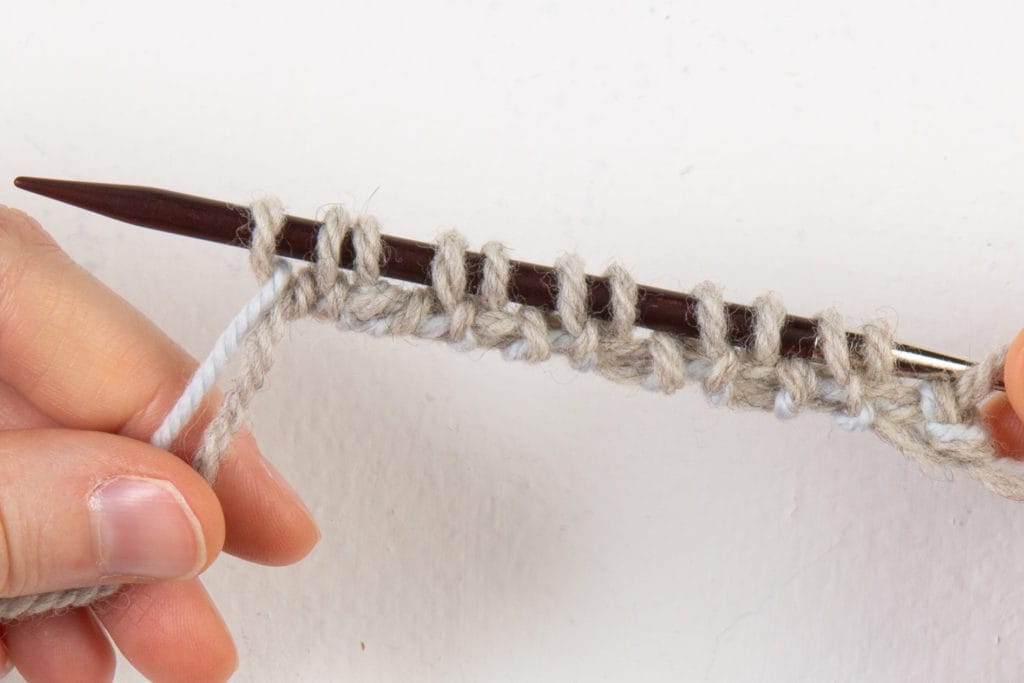
Here is what the cast-on row looks like with six stitches worked (ending with a knit stitch):
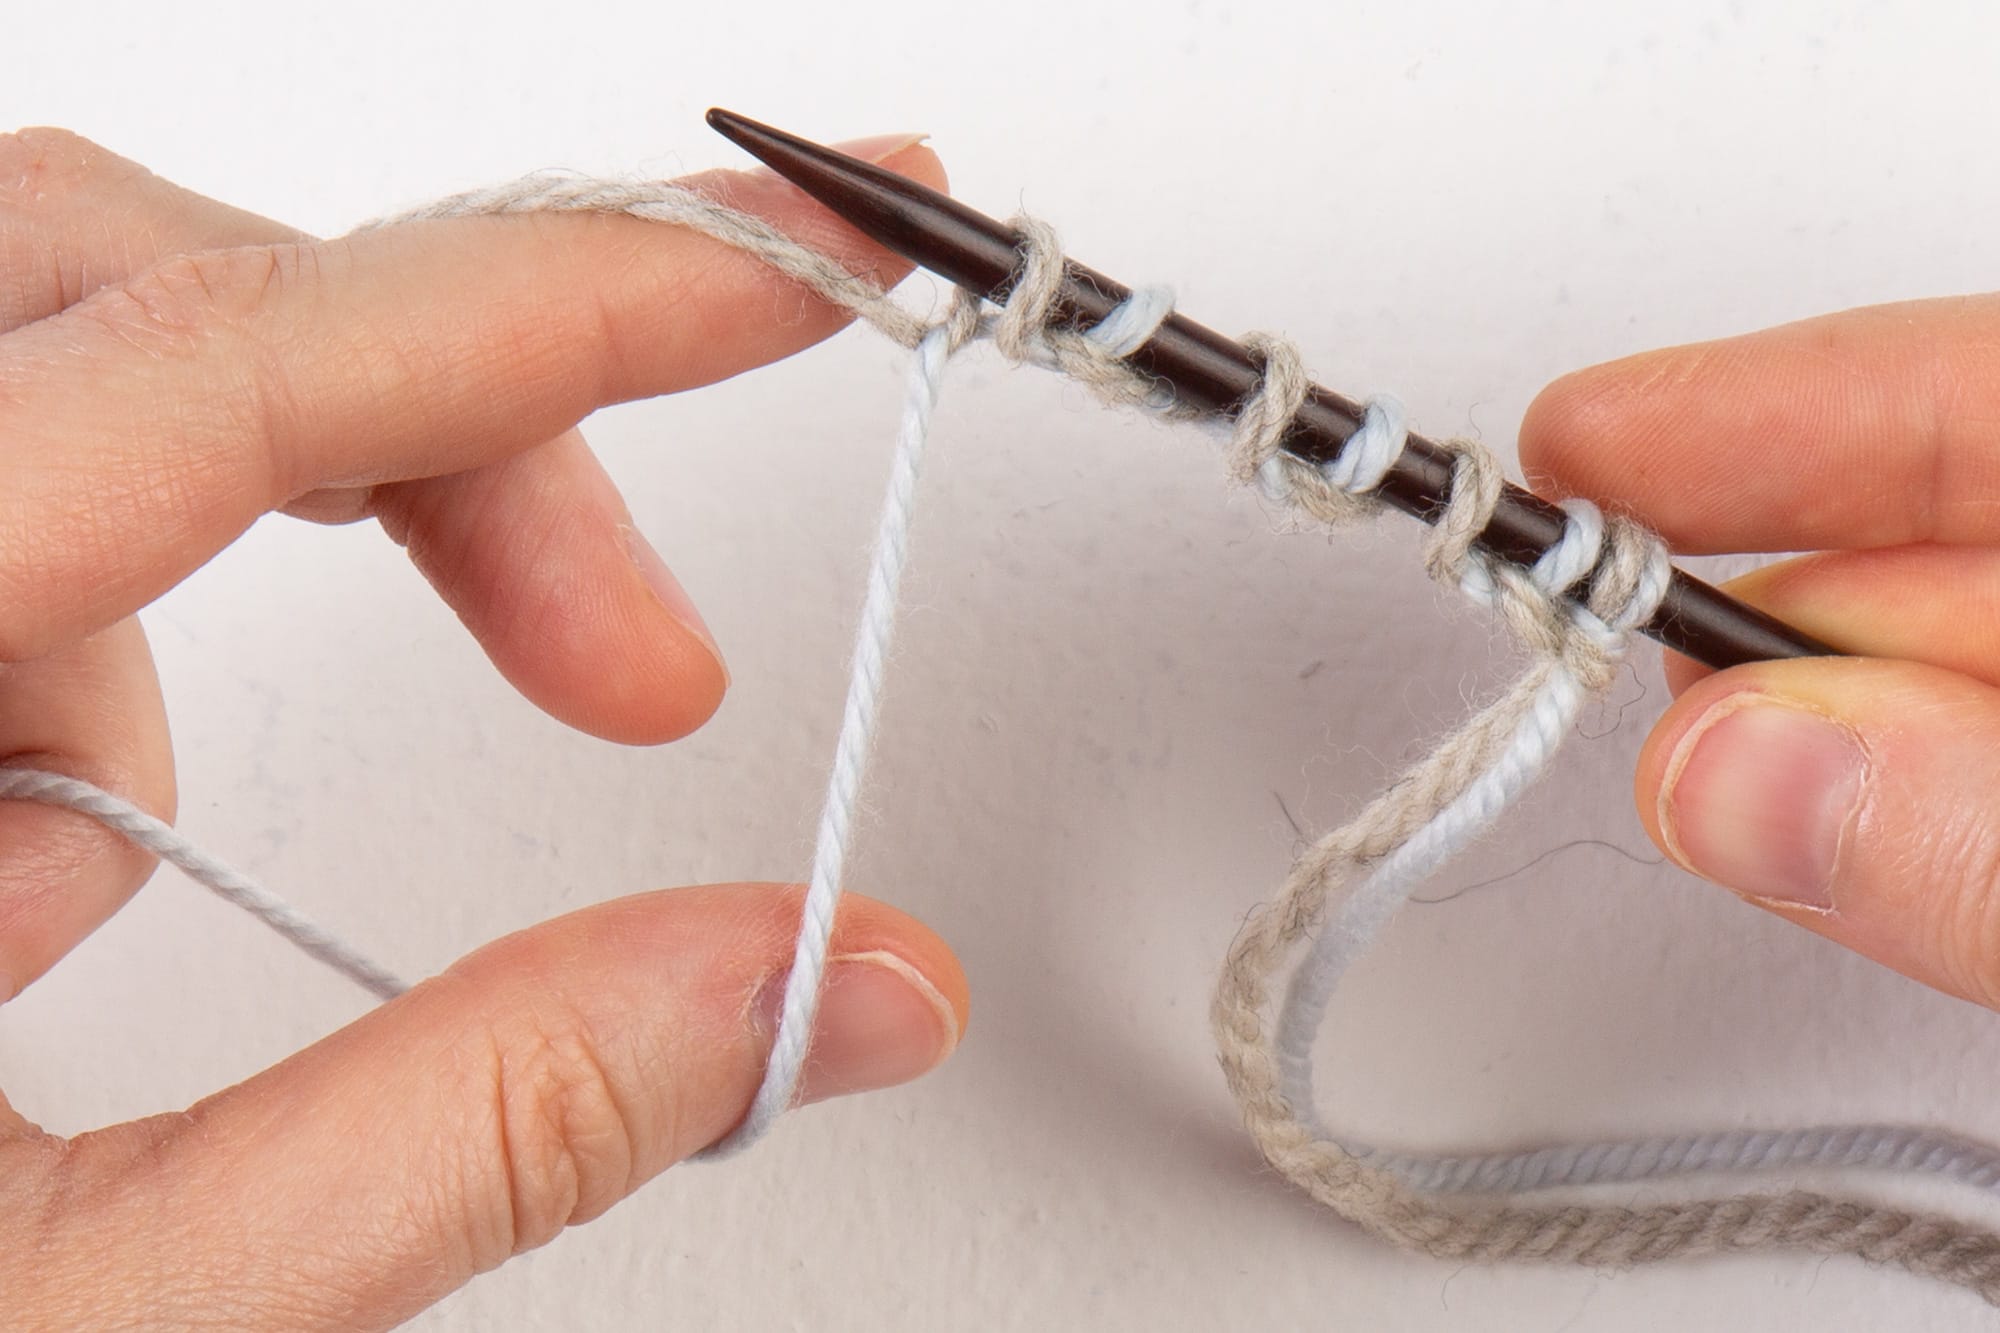
Ending Cast On
You can end after a knit or a purl, depending on your pattern. Cast on the number of stitches needed; in this case, we’re casting on an even number, so we’re ending with a purl stitch:
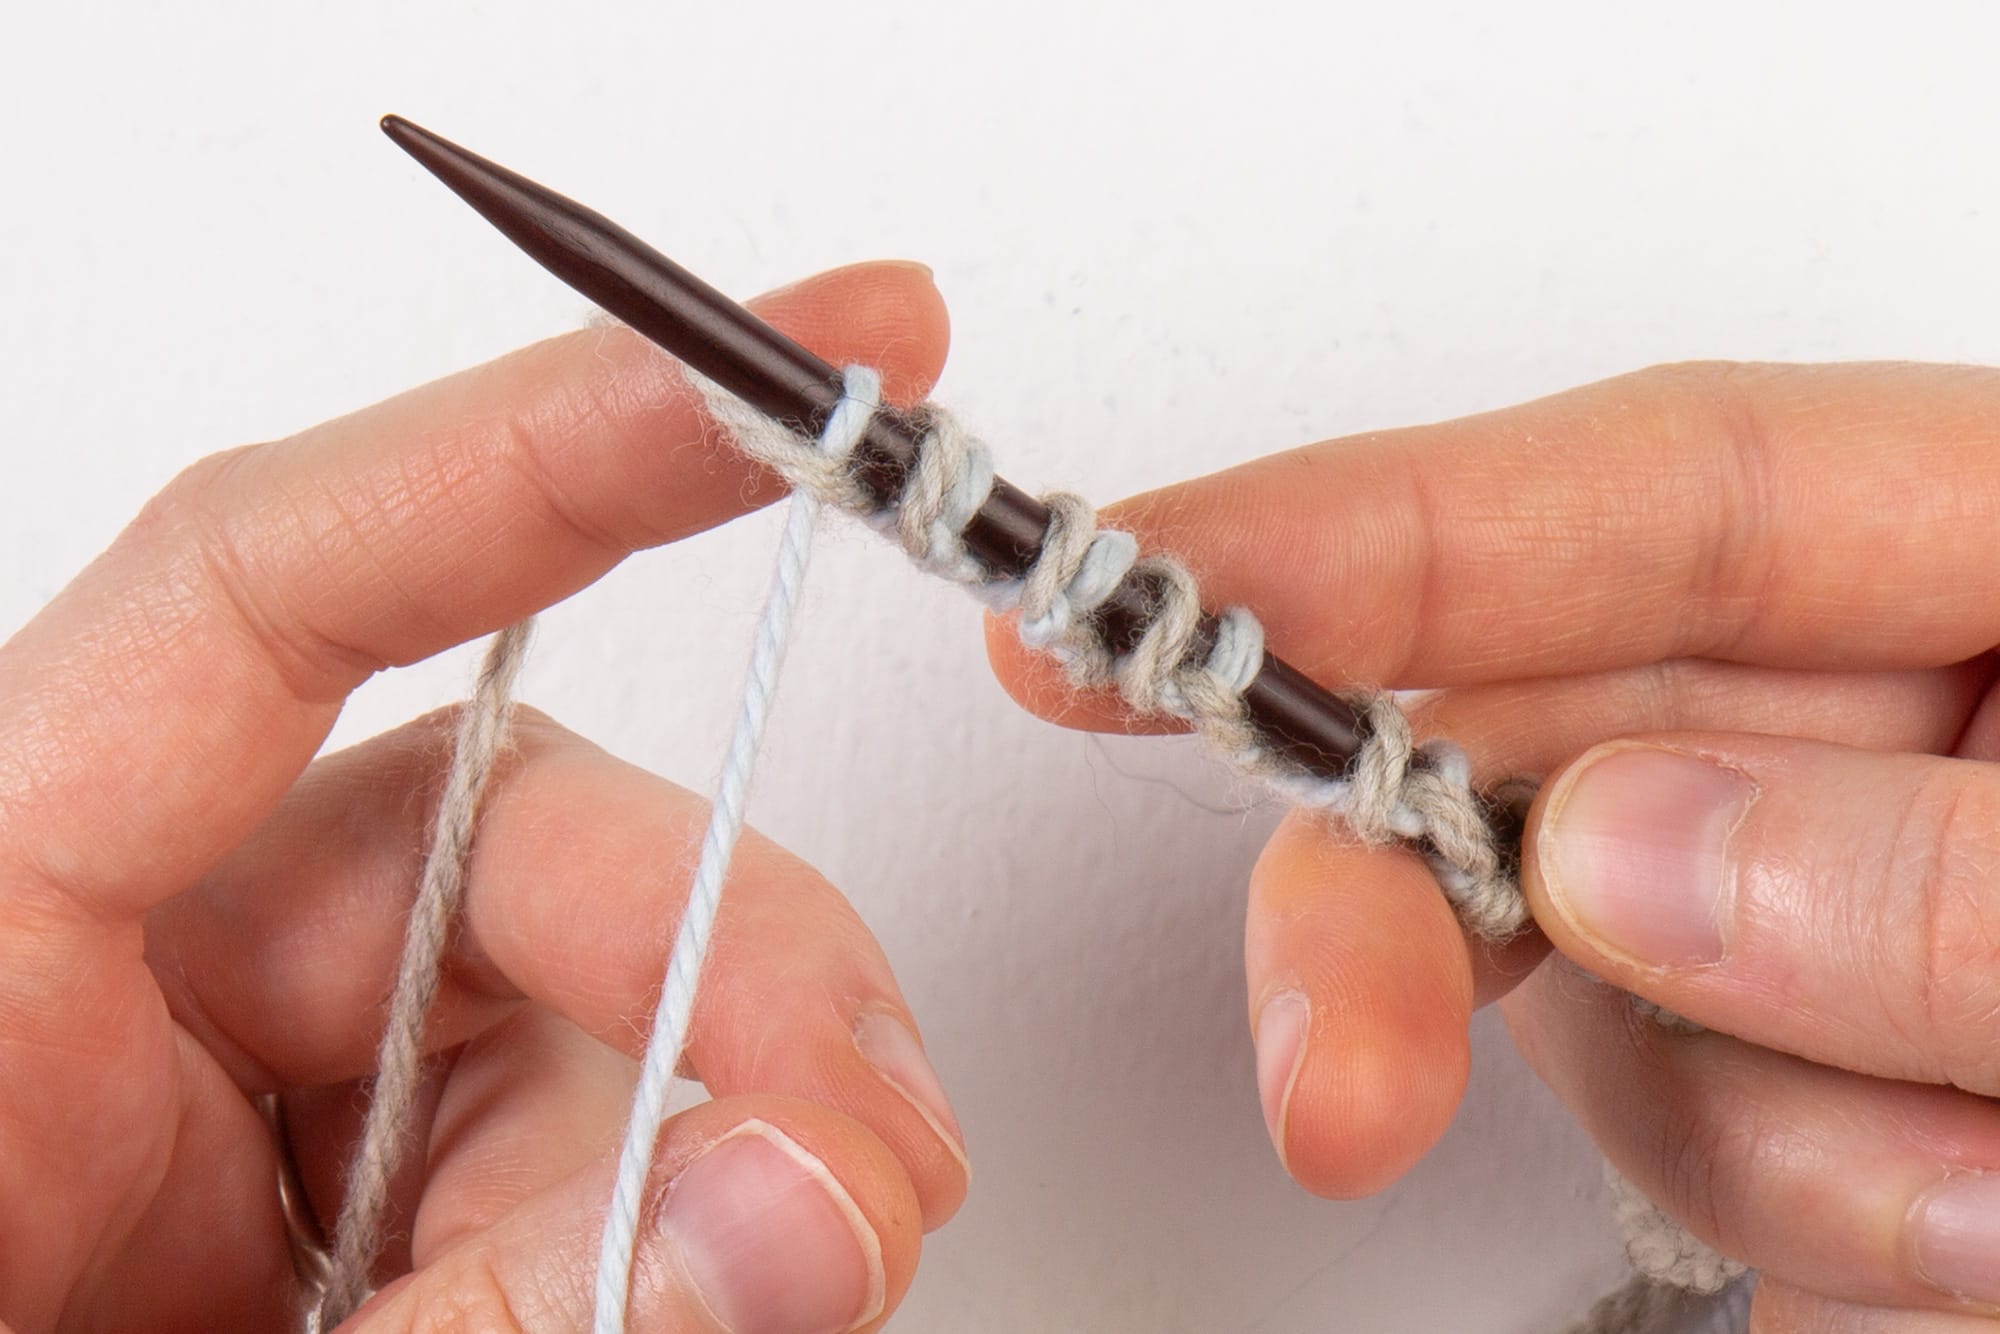
Setup Row 1
This cast-on method requires two setup rows, which are always worked flat, even if your pattern is in the round! So turn your needle to work the first setup row flat.
You’ll be working the stitches during the set up rows with your working yarn. While knitting or purling, hold the tail yarn snugly while working the first few stitches, to hold things in place. This cast on is very loosely held together and can fall apart if you let the tail go while beginning the setup row.
For our sample, the first stitch is a knit stitch; if your first stitch is a purl stitch, skip to the purl stitch instruction below.
To work each knit stitch, knit through the back loop, because the knit stitches are twisted on the needle (the front loop goes to the left instead of to the right) so knitting through the back will orient them correctly.

For the first knit stitch, be sure to hold the tail snugly while working it, then pull it to tighten the stitch on the needle afterwards.
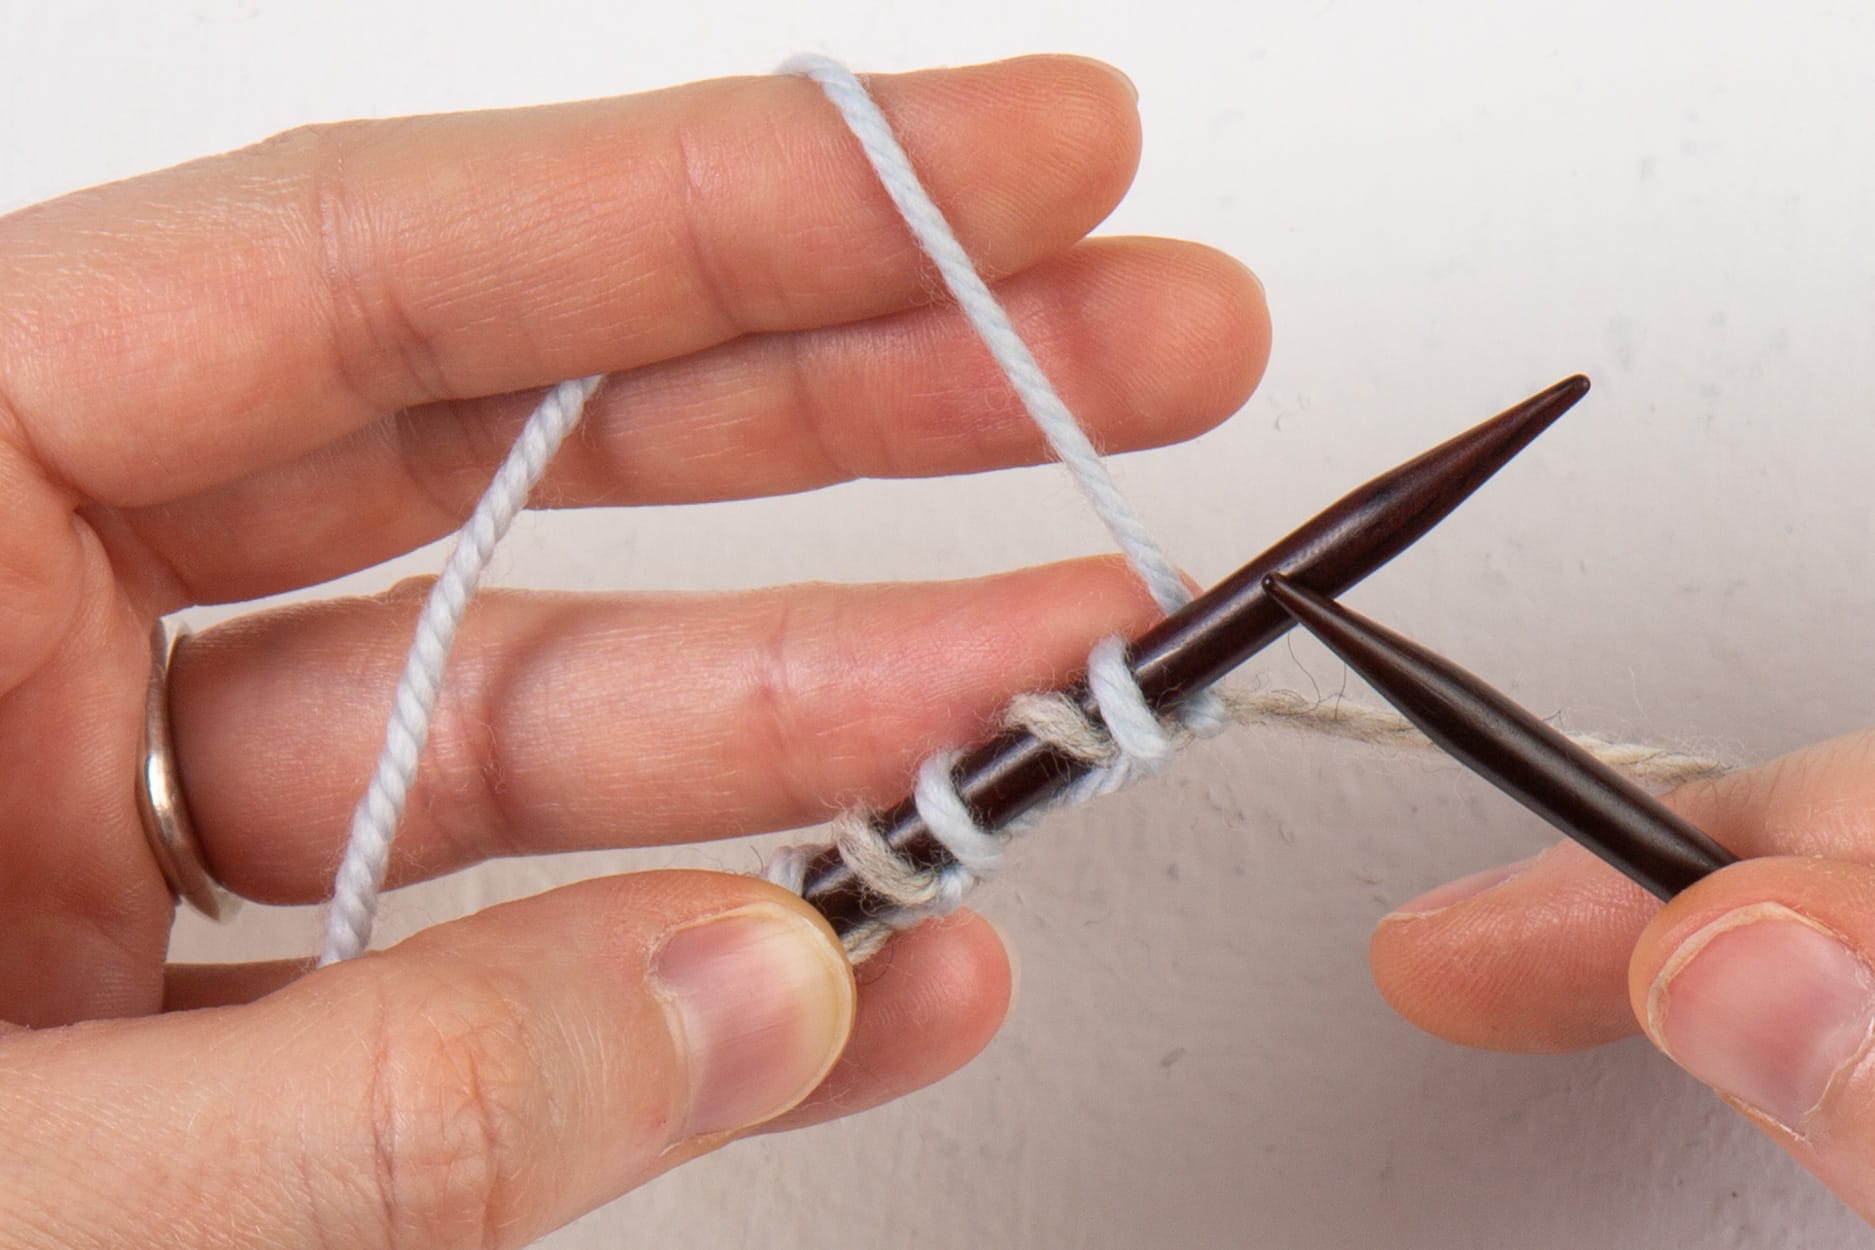
To work each purl stitch, bring yarn to front, then slip the stitch purlwise.

Bring yarn back to the back to work the next knit stitch, knitting through the back loop.
Work the whole row in that pattern: (K1 through the back loop, Sl1 with yarn in front) to end, always knitting the knit stitches and slipping the purl stitches.
Here’s our first row finished, which ended with a purl stitch so it was slipped:
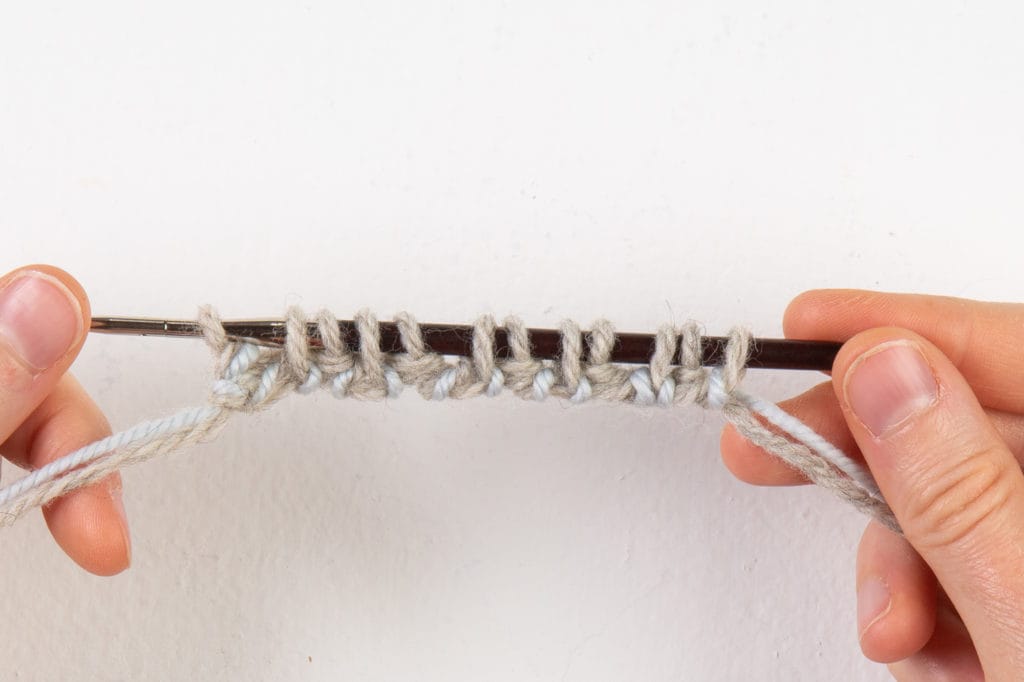
Setup Row 2
Turn to work the second row flat:

The second row is worked the same as the first, except that the knit stitches are oriented correctly now so they don’t need to be knit through the back loops. So, beginning with whichever stitch is first for you: (Knit the knit stitches, slip the purl stitches with yarn in front) to end.
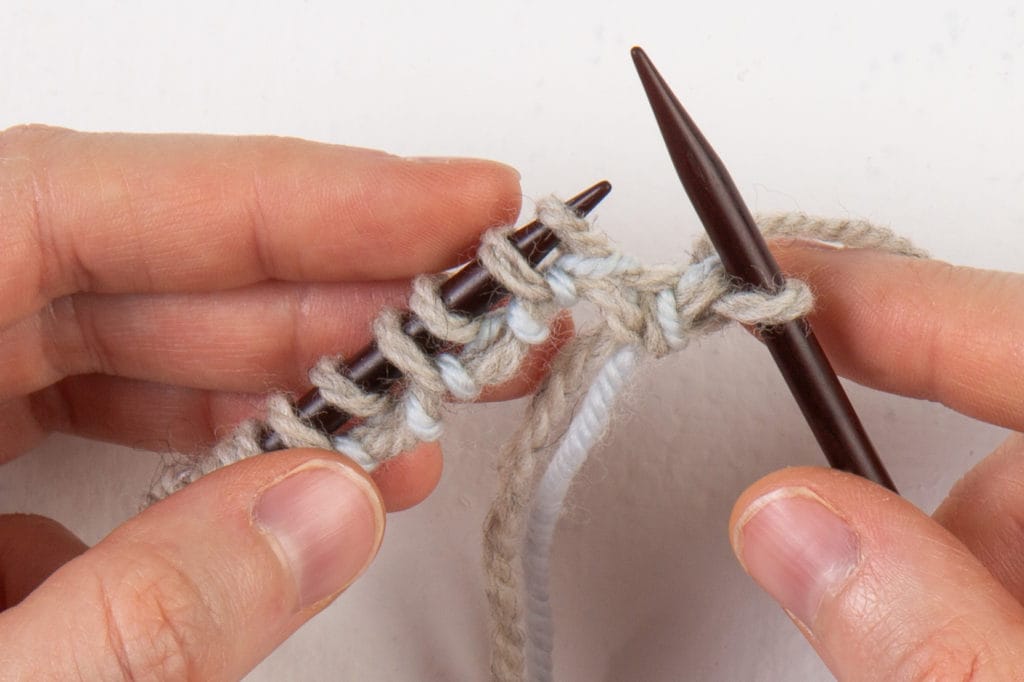
We started with a knit stitch, so next is slipping the purl stitch with yarn in front:

Repeat to the end, working the knit stitches normally:
And here’s our completed second setup row, ending the cast on steps!
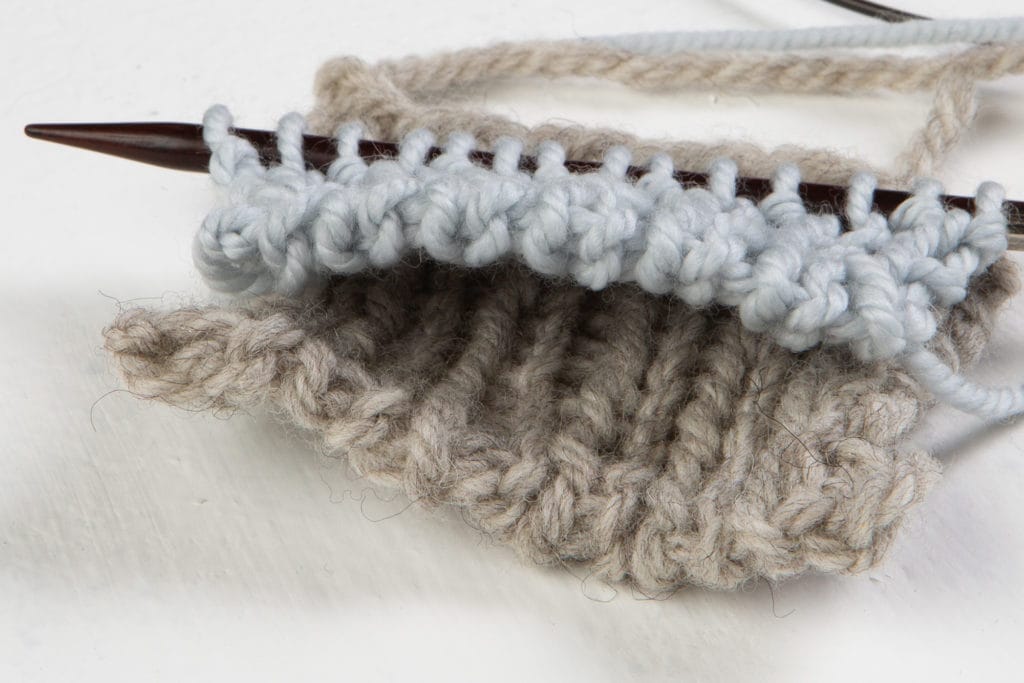
Cast On is Finished
Either turn to work your first normal row flat, or join to work in the round.
Work normal K1, P1 ribbing, knitting the knit stitches and purling the purl stitches.
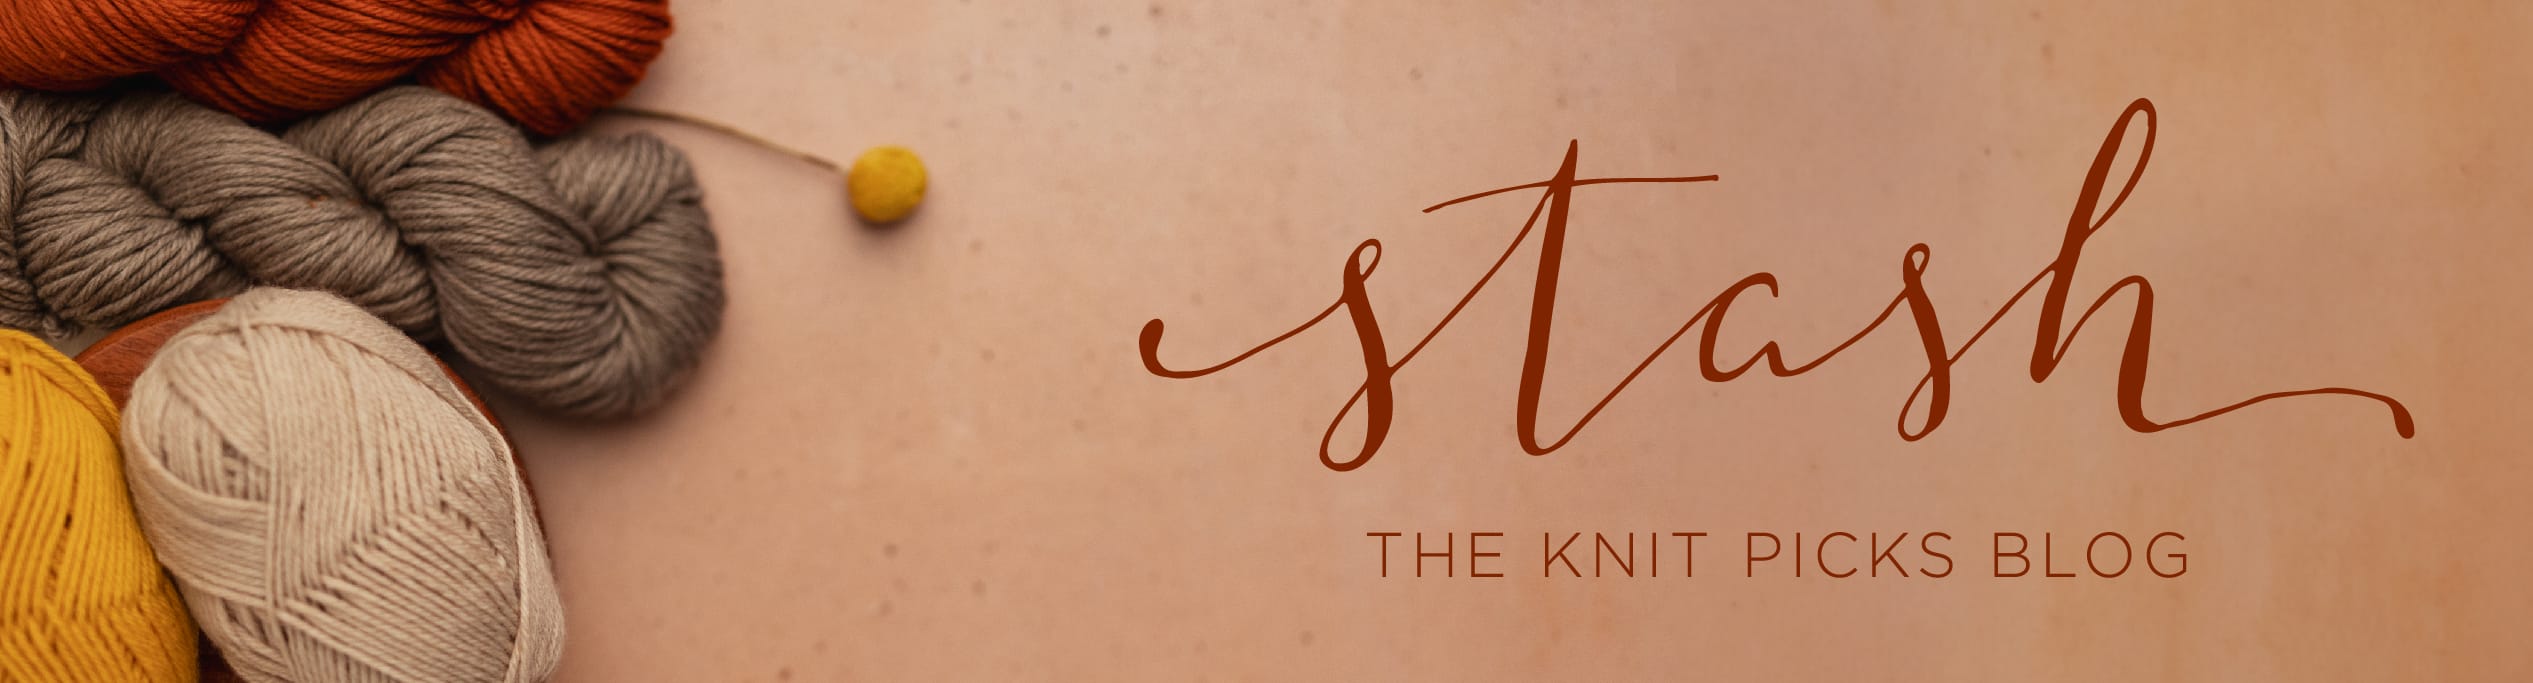
Here’s the cast-on edge in two different swatches (worked normally, each with just the one yarn):
Now enjoy this new technique being in your knitting tool-belt and make some gorgeous ribbed edges!
