|
by Knit Picks Staff on October 29, 2012
Hi there! As you'll see in this week's video, my sweater is coming along swimmingly! Now that I am deep in the process of working the waist shaping, I am remembering why my row counter is my best friend! This week, we'll be discussing how to calculate the increases and decreases that will shape the torso of your sweater to the finished dimensions you desire. It may be helpful for you to look over and print out this week's handout so that you can follow along with the video lesson, in which I'll be walking you through all the math required in this step. I promise, it's not terribly hard :) Click the link below to get the handout: Lesson 3 - Shaping the Torso And check out the videos below! |
Category Archives: Tutorials
|
by Knit Picks Staff on October 29, 2012
The yoke is the most complicated part of a raglan sweater, but I think you’ll find that if you take it slow and workcarefully, it is not very hard at all! The trickiest thing is that the raglan decreases and neckline shaping will be workedat the same time.This is also the most exciting part of the sweater--we arenearing the finish line and for the first time, you’ll get to see your work really start to come together. Pun intended.Let’s get started! Read on for the videos and worksheet: |
 |
by Jenny K on October 25, 2012
To round out our embroidery tutorial series, this week's technique is all about duplicate stitch! This particular stitch lets you embroider on top of your existing stitches of stockinette fabric in a contrasting color. It also mimics the structure of your stitches, making it a fairly seamless way to add colorful motifs or other designs onto your knitting. And I must say - this is the perfect technique for smaller projects when I don't feel up to using stranded knitting or intarsia to create the motif or pattern. So to help you get started with the duplicate stitch, check out Kerin's video tutorial on this technique. |
 |
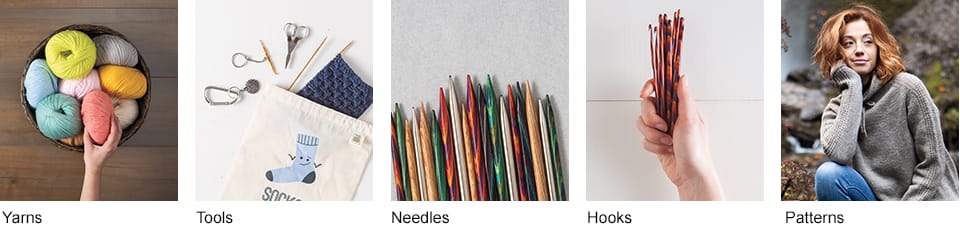
by Knit Picks Staff on October 17, 2012
It's that time of year again: time to put away the sandals and dig through my collection of warm, comforting handknit socks. The only problem is that my sock drawer is empty - all of my socks are in the darning pile! I've often heard folks say, "Darning? That's when I say "darn!" as I toss them out!" I, however, prefer the old wartime motto: 'Use it up, wear it out, make it do or do without.' |
 |
by Jenny K on October 17, 2012
Keeping in the theme of embroidery, this week's technique highlights the crochet chain stitch! This embroidery technique allows you to easily create outlines for shapes and motifs with a stitch that actually resembles the shape of a knit stitch. Whether you outline an intarsia pattern or you create freeform shapes across a pillow or blanket, the possibility for using this stitch to introduce fun pops of color into your next project are endless. The beauty of this particular stitch is that you can really create curves and shapes, making it up as you go right on top of the surface of your knitted fabric. And to help you embellish your knits, watch Kerin's video tutorial on the crochet chain to get started! |
 |
by Jenny K on September 25, 2012
For last week's technique of the week, we started our embroidery series with an introduction to the back stitch. This week, we are going to keep with our embroidery obsession and show off the satin stitch! This embroidery technique uses a series of flat stitches (short or long depending on your motif) to completely cover a section of your fabric or knitting. This makes the satin stitch a great technique for when you need to fill in an area of a motif that is already outlined with the back stitch or crochet chain stitch. Here is Kerin's finished motif that shows off the satin stitch to fill in the petals. To help you get started, check out our new video tutorial that shows you how to do the satin stitch! |
 |
by Knit Picks Staff on September 21, 2012
A very common question I get is, "how do I pick colors for my colorwork project?" The short answer is that that's a really personal decision. You know what colors you like or that you like to wear, and there's no set aesthetic regarding what colors 'should' go together. (believe me, since art school, my personal color palette includes all of them!) Generally, a safe bet for a 2-color sweater is to go with a light and dark version of the same color. So, that means a dark red and light red, dark blue and light blue, and so on. These colors can be interchangeable, so it can be a light or dark background. This is great if you have a favorite color in mind, or want to be completely sure that the colors will look good together. If you want to use two colors that you know go well together, be sure to use a light version of one and a dark version of the other. That said, choosing a basic palette for a garment starts with a few basic steps. |
 |
by Jenny K on September 19, 2012
Every couple of months, I get the urge to break out of my little knitting bubble to try my hand at some other crafty craft. My latest adventure has been with crochet. I've dabbled in crochet here and there but I've never undertaken more than a small toy (yet at the moment, I am completely obsessed with working on my first-ever crochet blanket!). However, a few months back when I got the itch to try something new with my yarn collection - I fell in love with the world of embroidery! This was a whole new way to explore color and texture, it was almost like drawing (slowly) with yarn. I even bought a shadow box to frame my little embroidery sampler that I was working on as a fun way of meshing my crafty explorations with pretty home decor. So it was no surprise that my interest in embroidery was revived when I saw Kerin's latest design - the Suzani Jacket! This pattern incorporates four different types of embroidery to embelish and beautify this colorful cardigan. If you've had your eye on this pattern but haven't had much experience with these techniques (or maybe you just want more fun and unique ways to use up those odds and ends!), we've created a series of video tutorials that focus on different embroidery techniques. For this week's technique of the week, we're highlighting the versatile back stitch! |
|
by Jenny K on September 11, 2012
After investing a great deal of time into knitting a sweater, you want to give it a beautiful finish. This often involves blocking the sweater to the proper dimensions. When you block a sweater, you are setting the stitches and evening out the fabric in addition to preserving the correct sizing. Generally, sweaters can be wet blocked (good for cotton and linen), spray blocked (good for wool and alpaca) or steam blocked (good for wool and alpaca) depending on their fiber content. And to make sure that your first sweater blocking session is a success, we have a handy video tutorial that walks you through all of the steps! The video also shows you what to do for the three different blocking methods (wet, spray and steam). That way you can match a blocking technique that is best suited for the fiber type of your sweater. |
 |
by Jenny K on August 28, 2012
Alpacas are known for their cuteness, but they do have a few other tricks up their woolly sleeves! Hailing from South America, Alpacas belong to the camelid family (which also includes camels and llamas) and are known for its fleece that spins into luxurious yarns. In centuries past, the Alpaca was an incredibly valuable animal, even more so than precious gems - although if you ask a knitter or crocheter today, they still might be inclined to agree with that sentiment. So in honor of Reverie, our newest Alpaca blend yarn, let’s explore the properties of Alpaca and just what exactly makes it so wonderful for us fiber fanatics! Our newest addition, Reverie! |