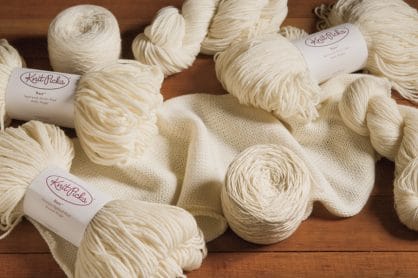
As the sugar high of chocolate, jelly beans, and Peeps finally wears off, you might find a box or two of leftover Easter egg dye lying around the kitchen. Instead of tossing them back in the cupboards, grab some of your favorite Bare yarns and start dyeing! You might be surprised to learn that a lot of unconventional dyes, like Easter egg dye and food coloring, are a wonderful way of dyeing protein based fibers like wool, alpaca and silk. In addition to being inexpensive, these are dyes you can easily find at your local grocery store. Another great thing about dyeing with Easter egg dye and food coloring is that these are nontoxic dyes, making them ideal for a fun afternoon crafting project with children. And if you are anything like me, you might already know that right after the holiday is the best time to stock up on Easter egg dye packages for year-round yarn dyeing fun!
In addition to your favorite Bare yarn and Easter egg dye or food coloring, you’ll also need a few other tools that you might already have around the house. First, you’ll want a large non-aluminum pot or crock pot. This might be the hardest part to gather for your dyeing adventures, however thrift stores are great for finding cheap crock pots and other larger pots. And all though the dyes are nontoxic, it is a good idea to use a dedicated pot that you’ll use only for dyeing. Additionally, you’ll need white vinegar, a large spoon for stirring (again, a good idea to get one dedicated to dyeing only), and rubber gloves to help avoid the dye from staining your hand.
Once you have all your supplies together, simply follow the instructions below to get started on creating your own custom colorways!
1. Wet your bare yarn or dye blank and let it soak in a water and vinegar mixture for at least 30 minutes until it is fully saturated. The vinegar will change the pH balance of the yarn, and help it to absorb the dye. Use ¼ cup of vinegar for every quart of water.
2. Prepare a dye bath in a crock pot or large pot on the stove. Take the yarn out of the water and vinegar mixture, and put it aside. Heat up the water and vinegar mixture to a simmer.
3. Add your dye. Since different food coloring dyes are different colors, start with a few drops of color and work your way up to the intensity that you want. If you want to duplicate the color in the future, keep notes. Remember that you will use a lot more food coloring to dye yarn than food. To preview a color, dab some dye on a paper towel.
4. Once the dye bath is your desired color, add the yarn again. Heat your yarn until it has absorbed or “exhausted” all of the dye. Then turn off the heat source and allow your yarn and dye solution to cool down to room temperature.
5. Rinse any excess dye from your yarn, and hang your yarn up to dry. Wind into a ball and cast on!
The thing I love about dyeing my own yarn is that there is always a small element of surprise in how the yarn looks when it is rinsed and dry! In addition to using the kettle dyeing method as described above, these food coloring dyes also work well for hand painting, dip dyeing, or any other method you can think of. And most importantly – remember to have fun!
You can find this tutorial and many other dyeing technique on the Knit Picks tutorials page here:
What is your favorite method of dyeing Bare yarns?


