Follow along and discover your next inspiration as we cast on for projects we love, explore new techniques, and dish about the latest and greatest from Knit Picks.
Meet the team »
As the days get longer, knitters often head outside with their crafting. On this episode of the Knit Picks Podcast, we are talking about natural yarn dyeing with bare yarns.
First up Lee and Stacey catch up on what they did for World Wide Knit In Public Day and some recently finished projects. They talk about their love of Knit Picks Bare Yarns, undyed yarns. Knit Picks carries all the same yarns you have grown to love and some additional ones in the Bare yarn line. Stacey is a big fan of the Knit Picks Bare Woodland Tweed and the Bare Woolen Cotton.
Next Lee interviews Anna Canning who is a hobby natural yarn dyer. Anna has spent a lot of her personal time researching different natural dyeing techniques. She has experimented with items found at the grocery store as well as items she finds on walks around her neighborhood. Listen in to hear about her insider tricks to get started today dyeing your own Bare Yarns from items around the house.
Timestamps: 0:00 Lee and Stacey check in 13:11 Lee interviews Anna 30:16 We’re having a summer sale 31:02 Lee continues to interview Anna 46:48 The Credits
We’re recording these episodes from our homes scattered across Portland, Oregon. We may be apart but our enthusiasm for all things yarn and crafting bring us together! Today, we’re taking a small departure from knitting or crochet to talk about dyeing yarns. No matter what craft you’re passionate about, being able to make your unique, custom colorway is an exciting and fun project that you can do at home with things you probably already have around the house!
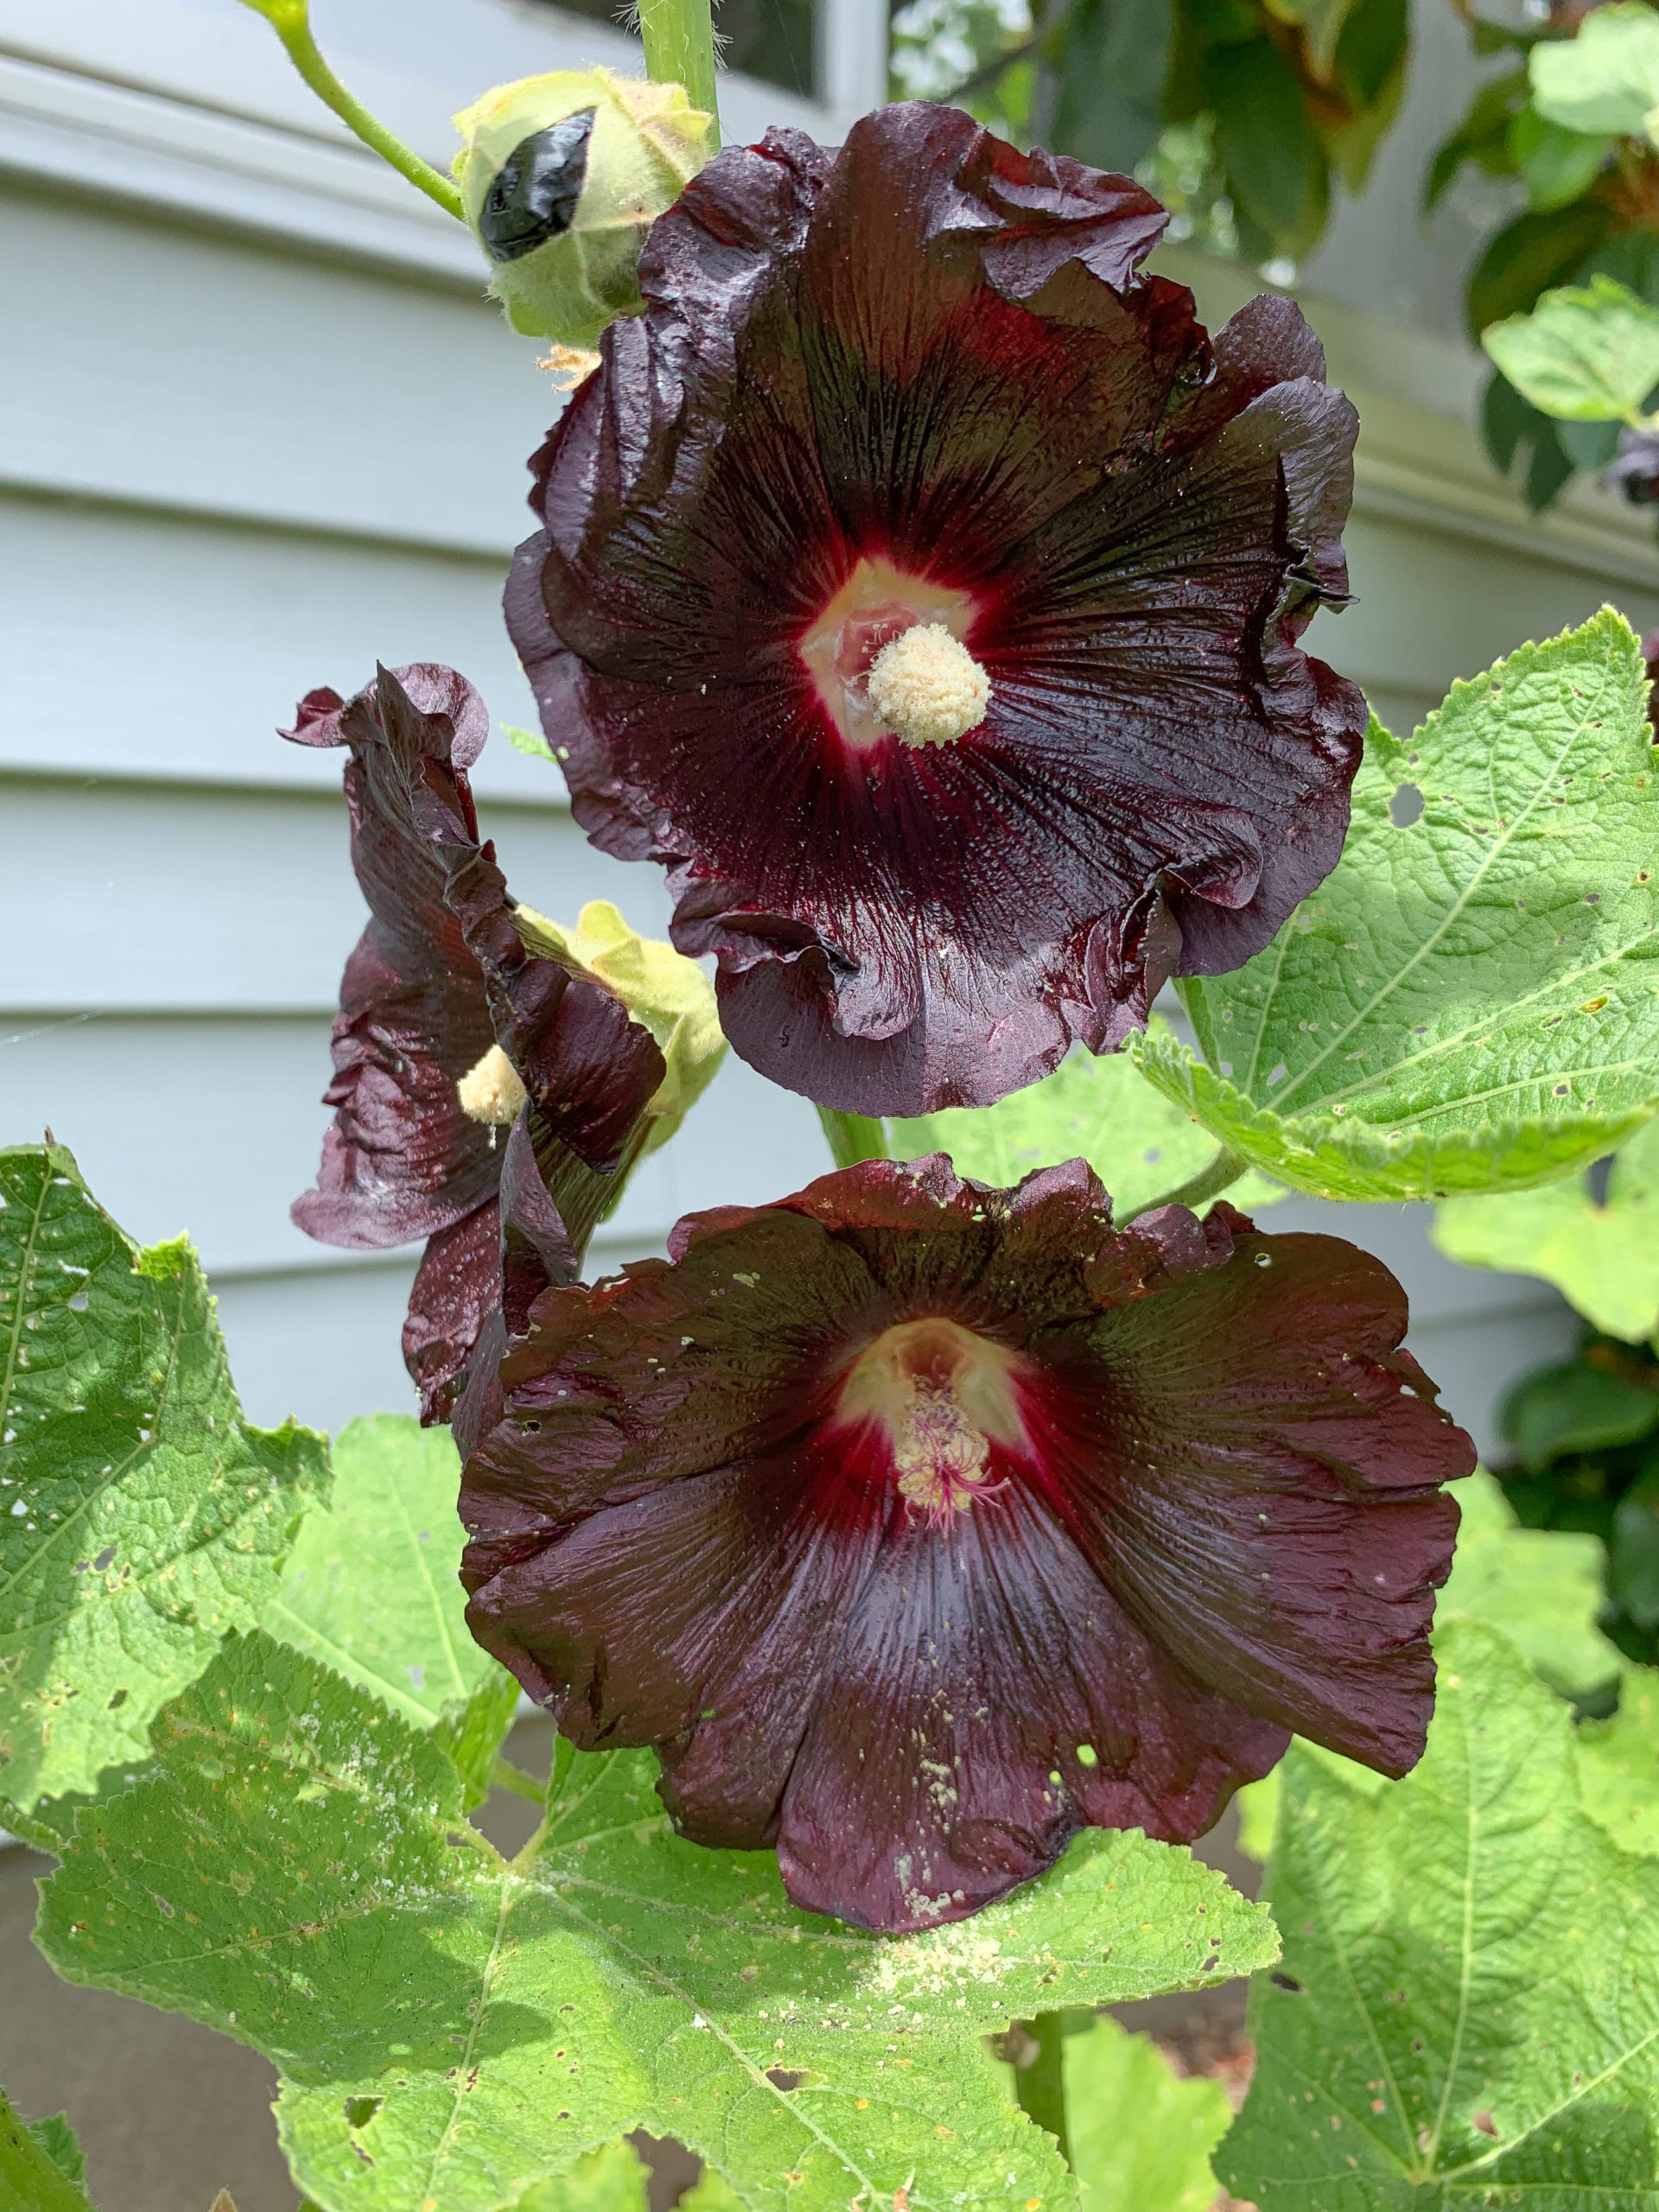
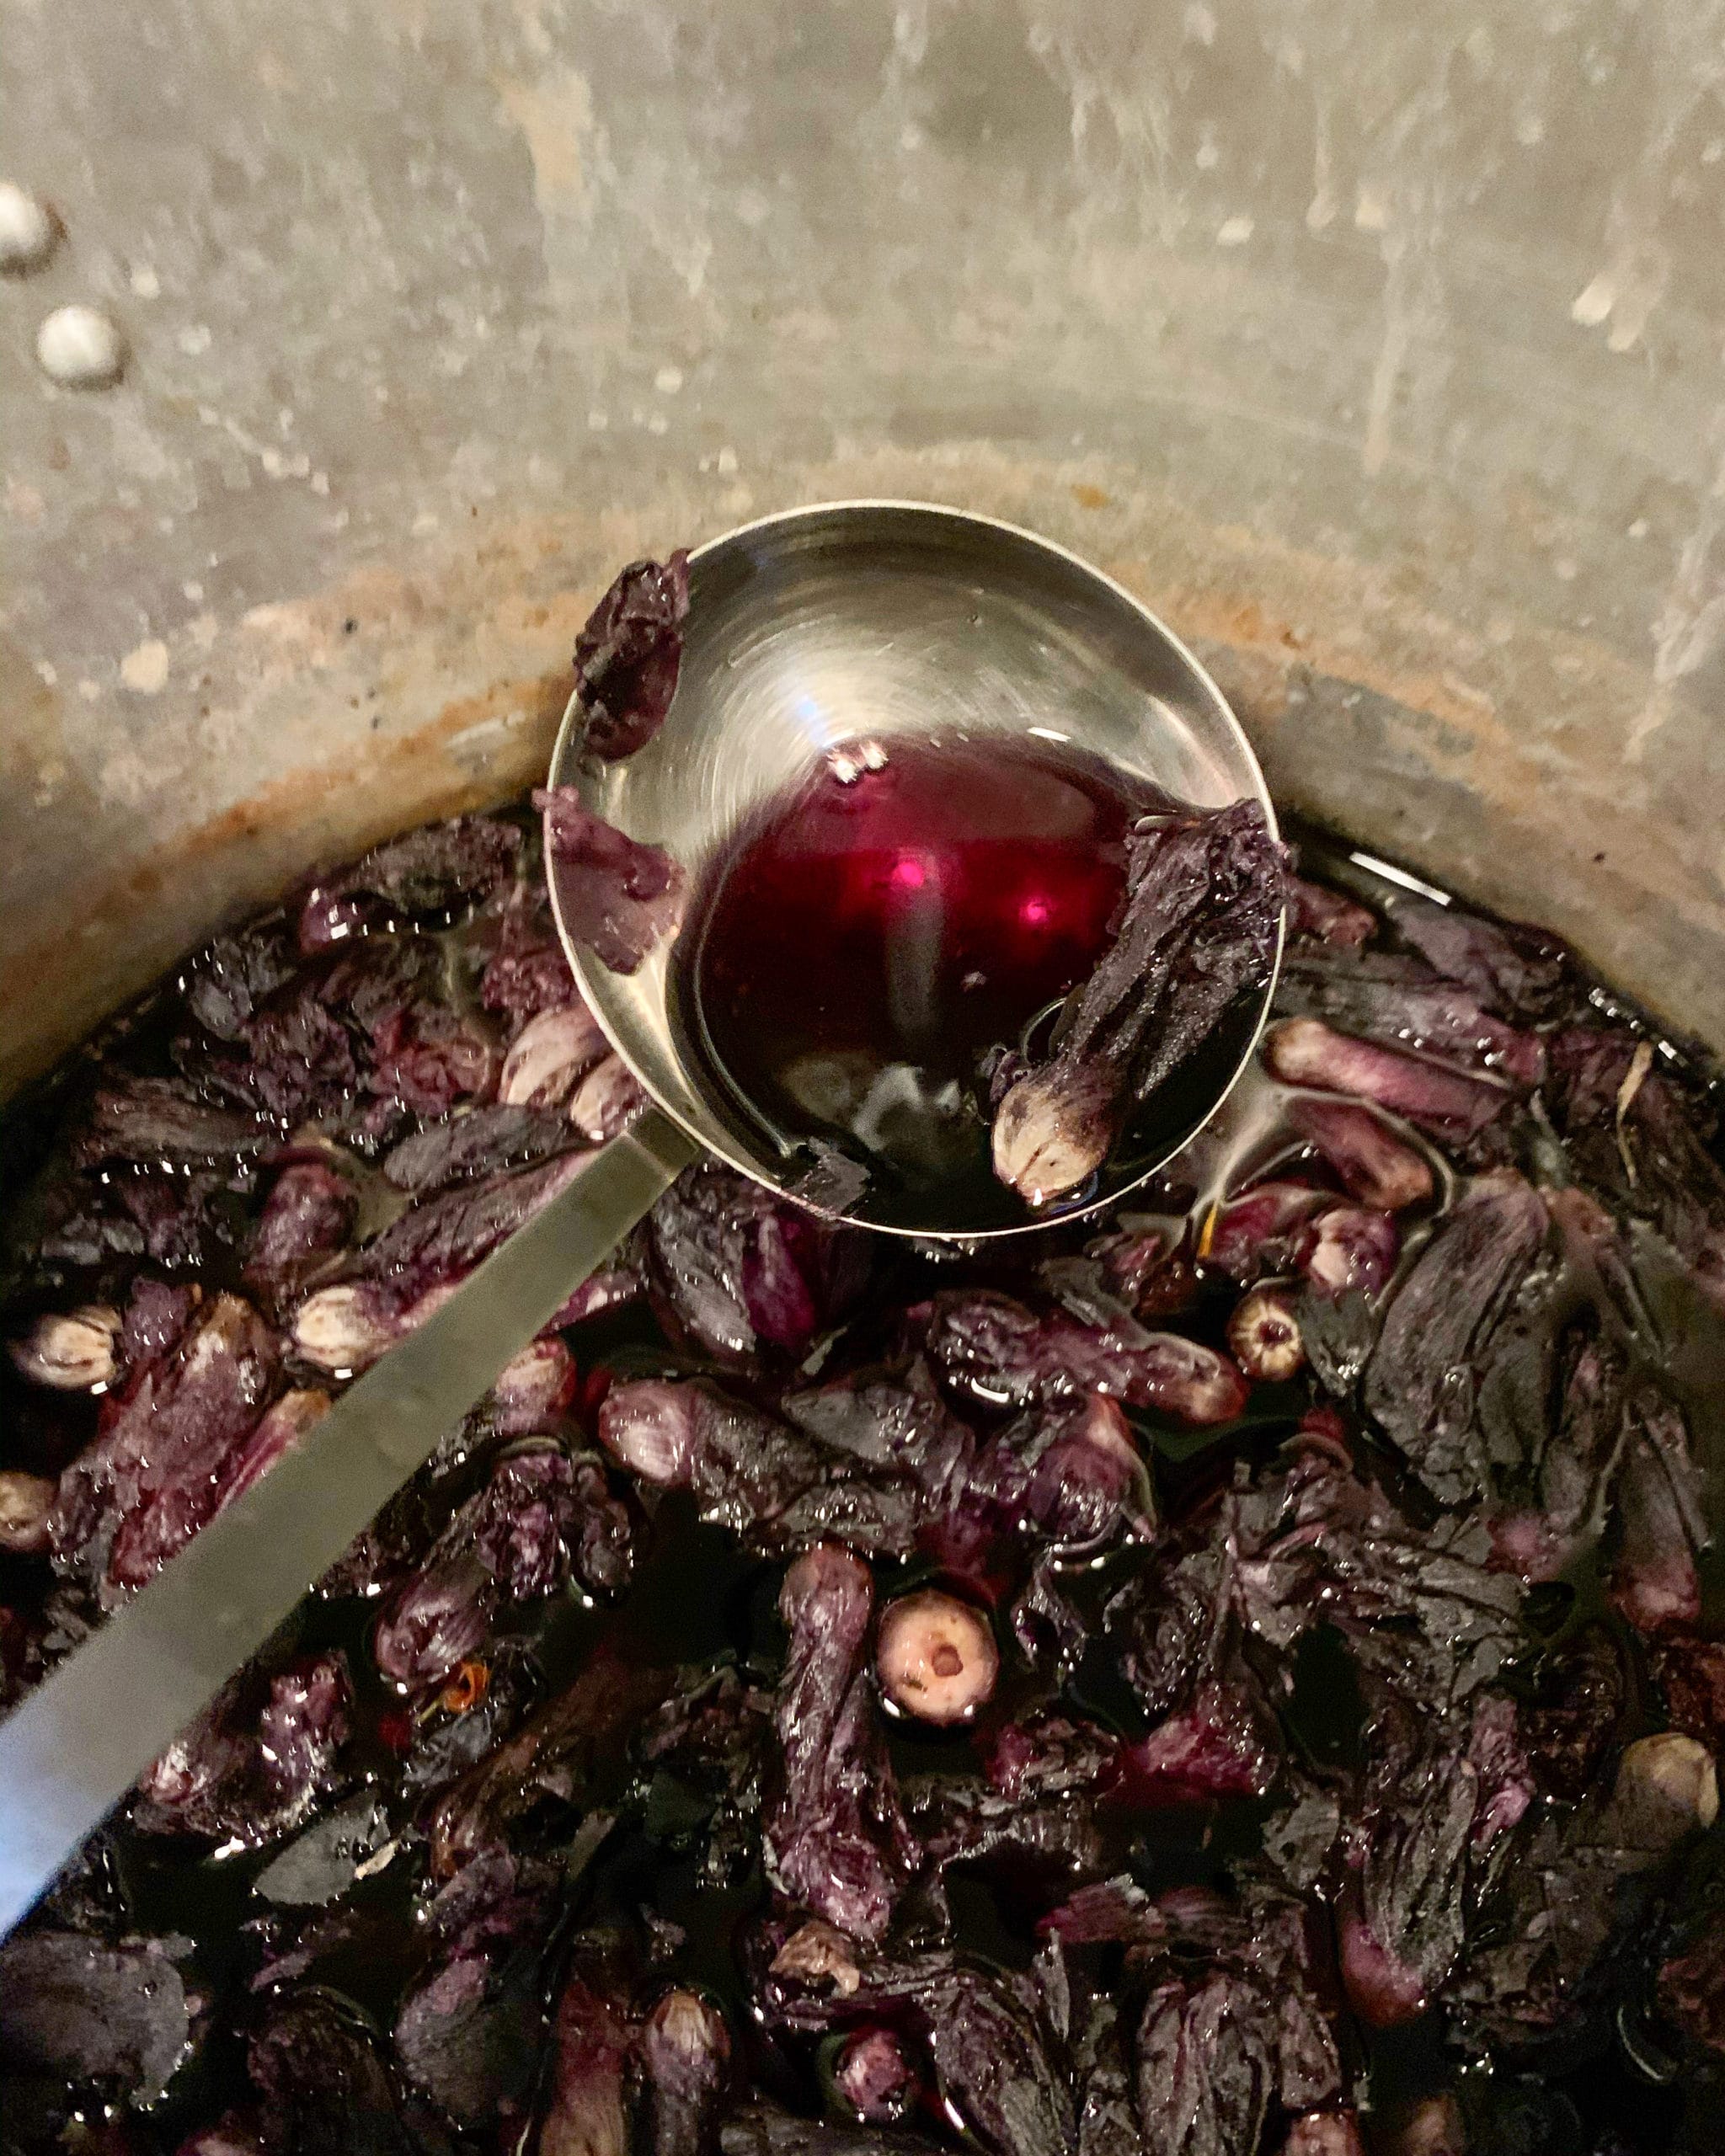
First up, Regan and Hannah chat about natural dyes. You can get stunning washes of color from tree bark, spices, and common vegetables with just a little bit of time and effort. Regan shares his experiments with our Earthues dye kit and Hannah touches on some of her experience dyeing with flowers and other plants grown in the garden.
Next, Stacey and Lee chat about other dye techniques. From speckles to using kool aid to dye yarns, you’ll learn about what fun effects we’re seeing in yarns these days!
As always, if you have a question or want to talk about something you’re working on you can call in! Drop us a line at 360-334-4847and record your message, we’ll be checking our voicemail often and might be using your messages in future podcast episodes. We really love hearing from you. You can also record a Voice Memo on your phone and send that audio file to podcast@knitpicks.com. In the meantime, as always… happy knitting.
0:00 Hannah’s Introduction 1:38 Hannah and Regan talk natural dyes 13:48 Listener Voicemail and follow up 15:44 Lee and Stacy talk acid-based dyes 37:11 Credits
Welcome to the amateur dyeing adventures of me, Regan, one of the photographers for Knit Picks! I want to preface this by saying that this is not a tutorial. I’m just having a fun time experimenting! So join the ride as I create a mess of my kitchen.
Muse // Woodland Tweed // Twill
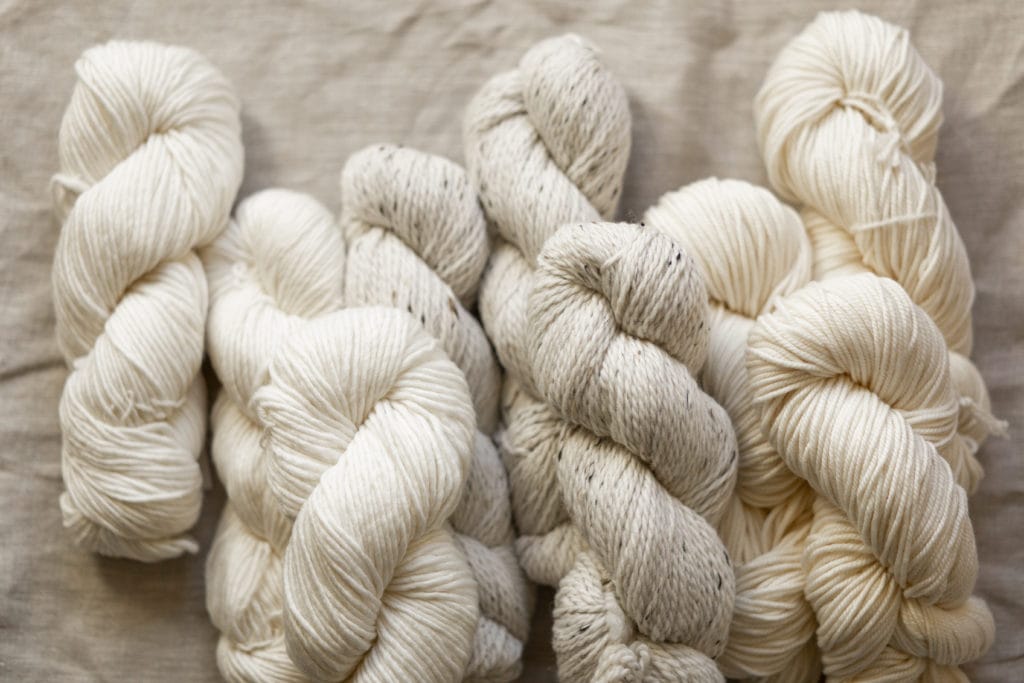
For this journey I used Knit Picks Bare Muse, Bare Twill, and Bare Woodland Tweed. I’ve recently discovered that I love 100% Merino wool, so Twill and Muse have been two of my favorite yarns. I chose Woodland Tweed so I had some variation from my obvious favoritism. All in all, I had six of each yarn (18 total) to experiment with.
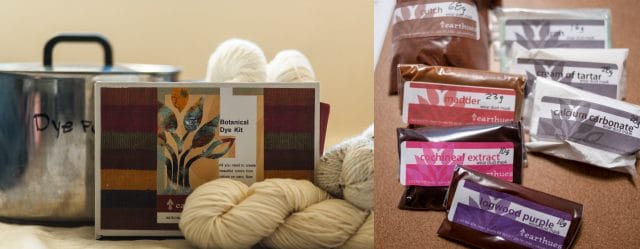
I’ve had a small amount of experience with natural dyeing, but this is my first time on a large scale. To aid in my adventure I used the Earthhues Botanical Dye Kit. The kit comes with everything one might need, which includes:
Cutch – a coffee, caramel color
Madder – burnt orange
Cochineal – red
Logwood – purple
Osage – yellow/red
Mordants: alum, cream of tartar, and calcium carbonate
Iron (used with logwood)
Pair of gloves
Mask (to protect from all the powders)
The kit also comes with instructions and different ratios to achieve specific colors. However, me being me, I decided to completely disregard instructions and wing this entire operation.
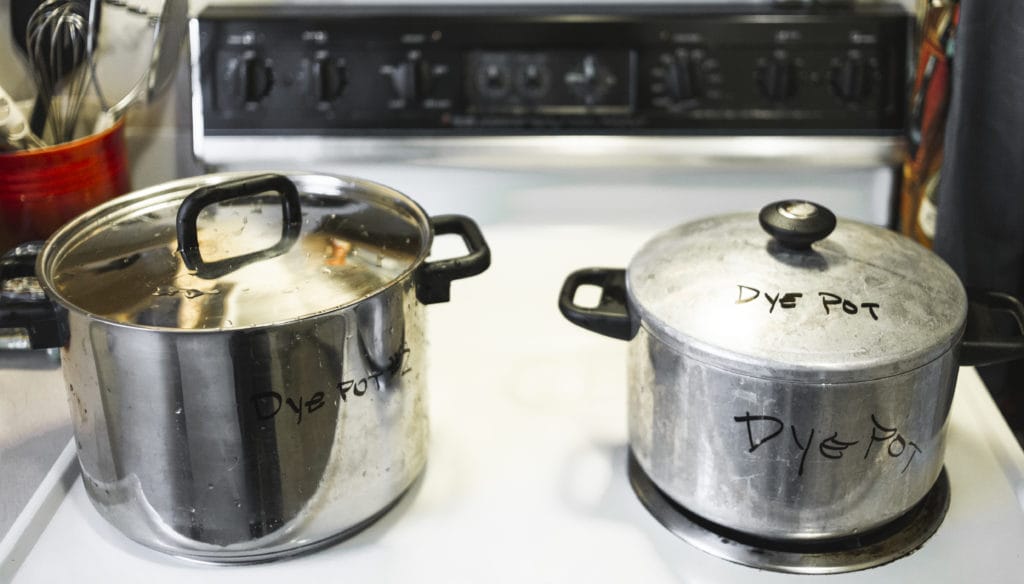
My two pot setup
I definitely didn’t want to use a pot I cook with for this, so I used two pots I found at Goodwill. That way, these can get as messy as needed and can stay designated for dyeing-specific needs. This goes for any other tools I used as well.
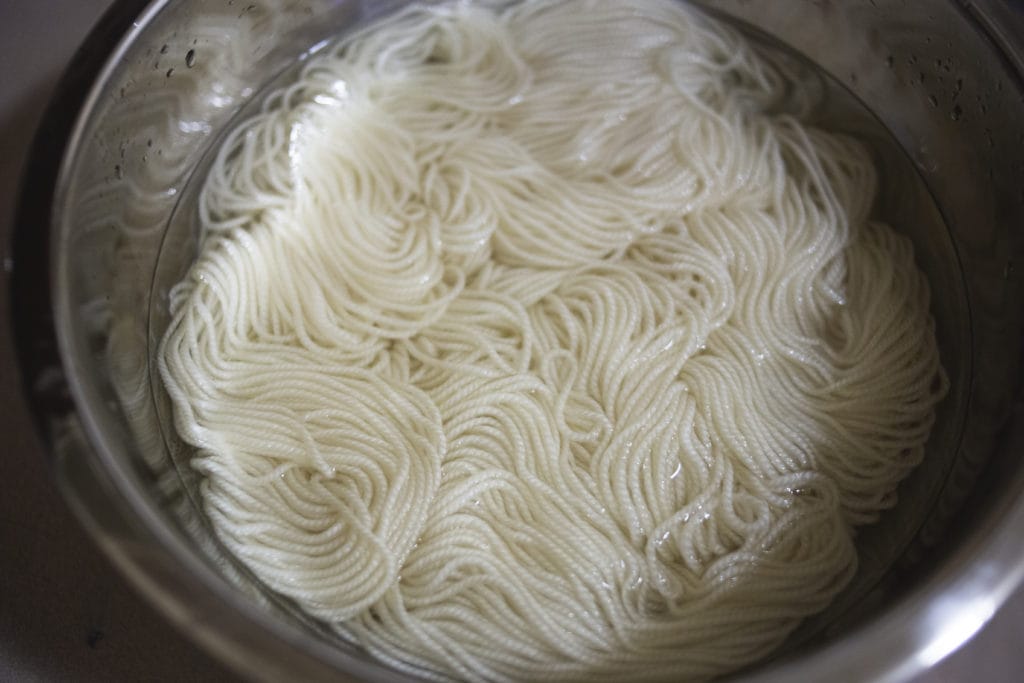
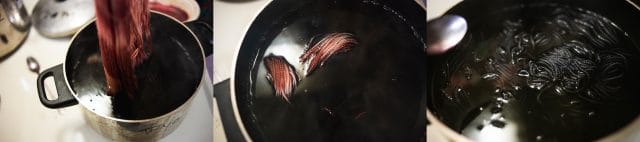
My first batch of dyeing were the six Bare Twills. To begin I dissolved my mordants in water and threw my yarn in there to soak. I’m really looking for that spaghetti consistency to make sure it’s fully saturated.
Pre-soaking the yarn is a great way to apply mordants and also makes it easier for the fibers to absorb the dye. After letting the yarn soak for an hour or so, I squeezed out the excess water to prepare submersion into the dye.
I also want to quickly note, if you live with others you might consider cracking a window or turning on a fan. There was quite an aroma created from the dyes, and it definitely fills the air.
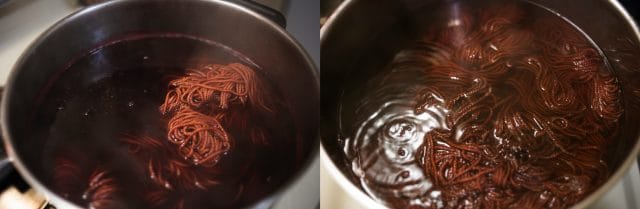
First putting in the yarn and at the 30 minute check-in
I didn’t take photos of every color and yarn. But for this first batch I used two color concoctions:
Cochineal, madder, and cutch to create a darker red.
Logwood and iron to create a grayish blue.
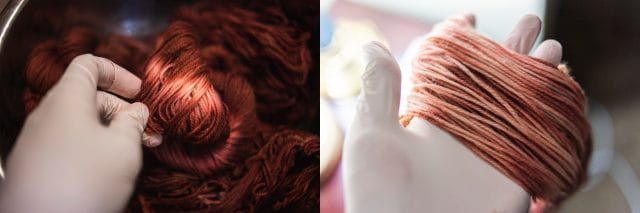
With the red, I put in two full skeins of yarn as well as two skeins that were still twisted together. A quick side-note is that I put in the twisted skeins completely dry. My hope here is that the color would soak the outer layer and still leave some of the bare in the middle for a true kettle dye color effect.
Gloves for safety!
After letting the yarn soak in the dye for about an hour and a half, I let it cool down and rest for another half hour. The image above shows that my twist had worked, at least partially. I was left with some bare showing, which I intended to overdye with the logwood.
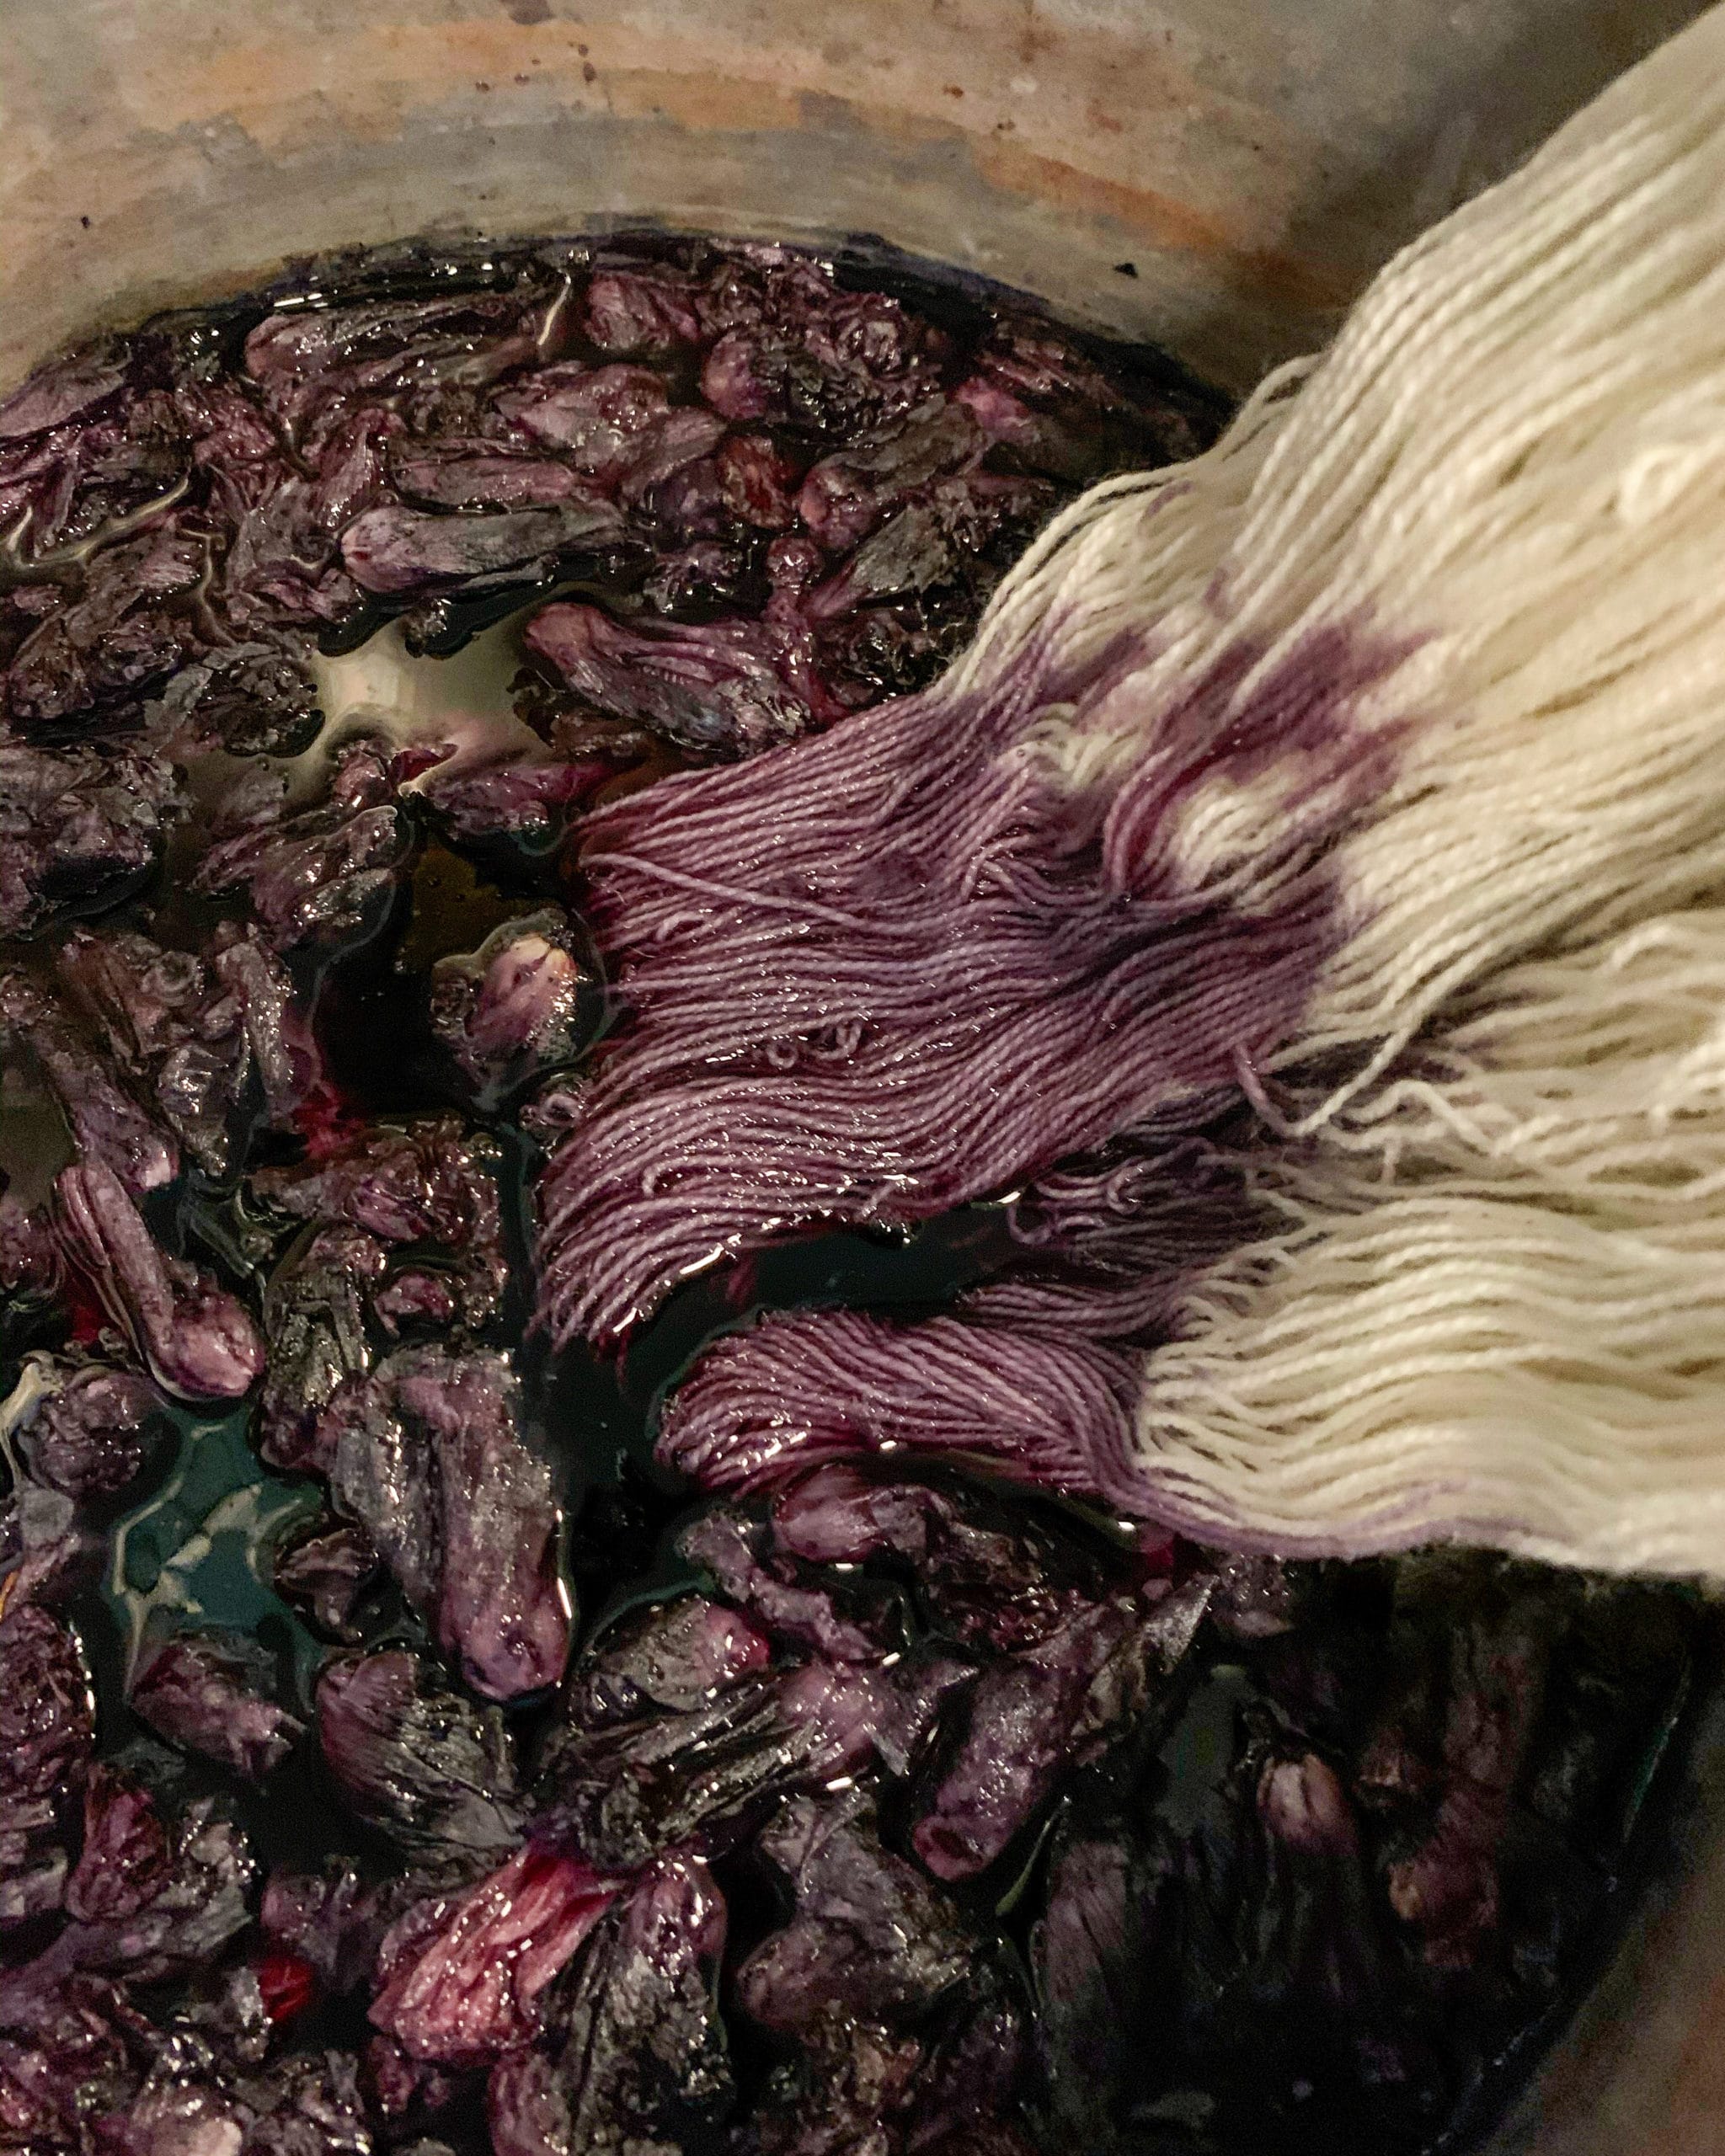
Logwood is normally a purpley red, but by mixing in the iron oxide, it turns into a more blueish gray. With the logwood concoction ready, I put in one full hank, as well as the two half dyed yarns to overdye.
Closer look at the results of the overdyeing
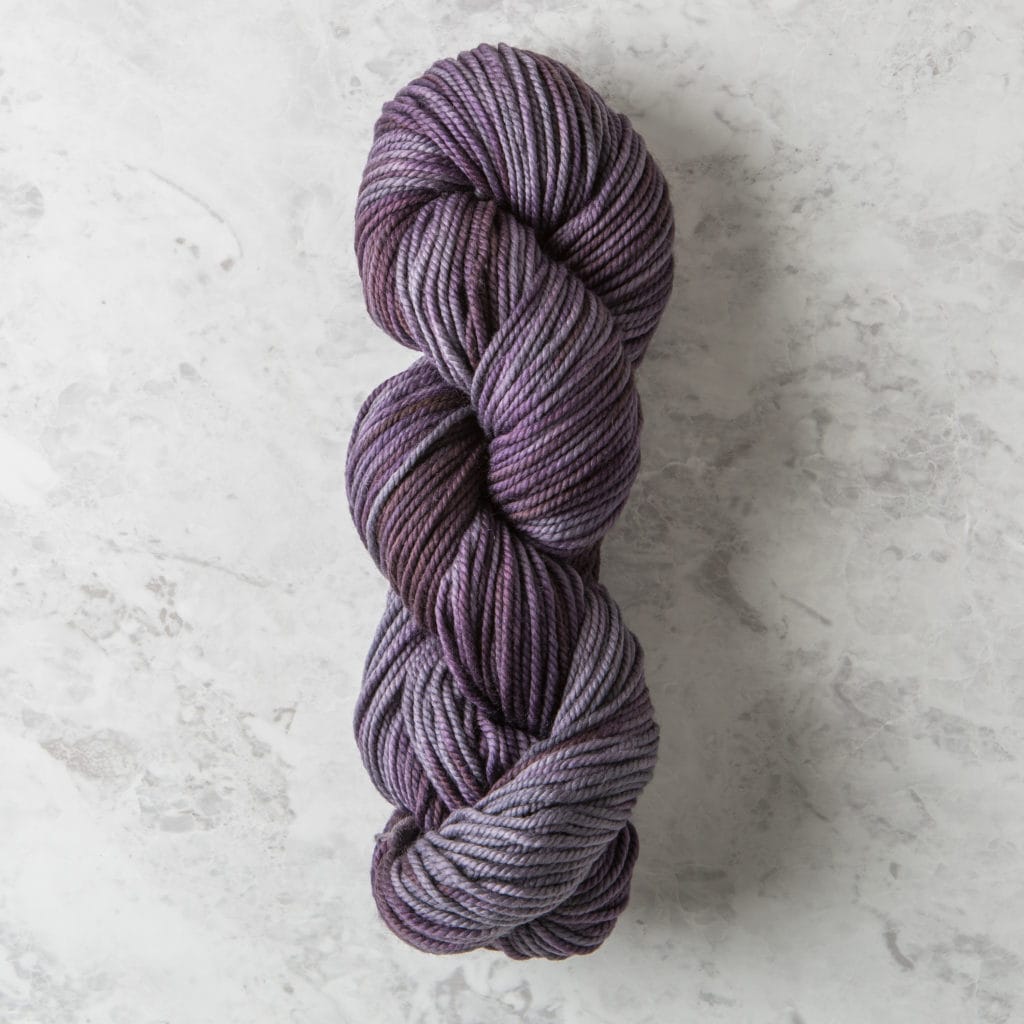
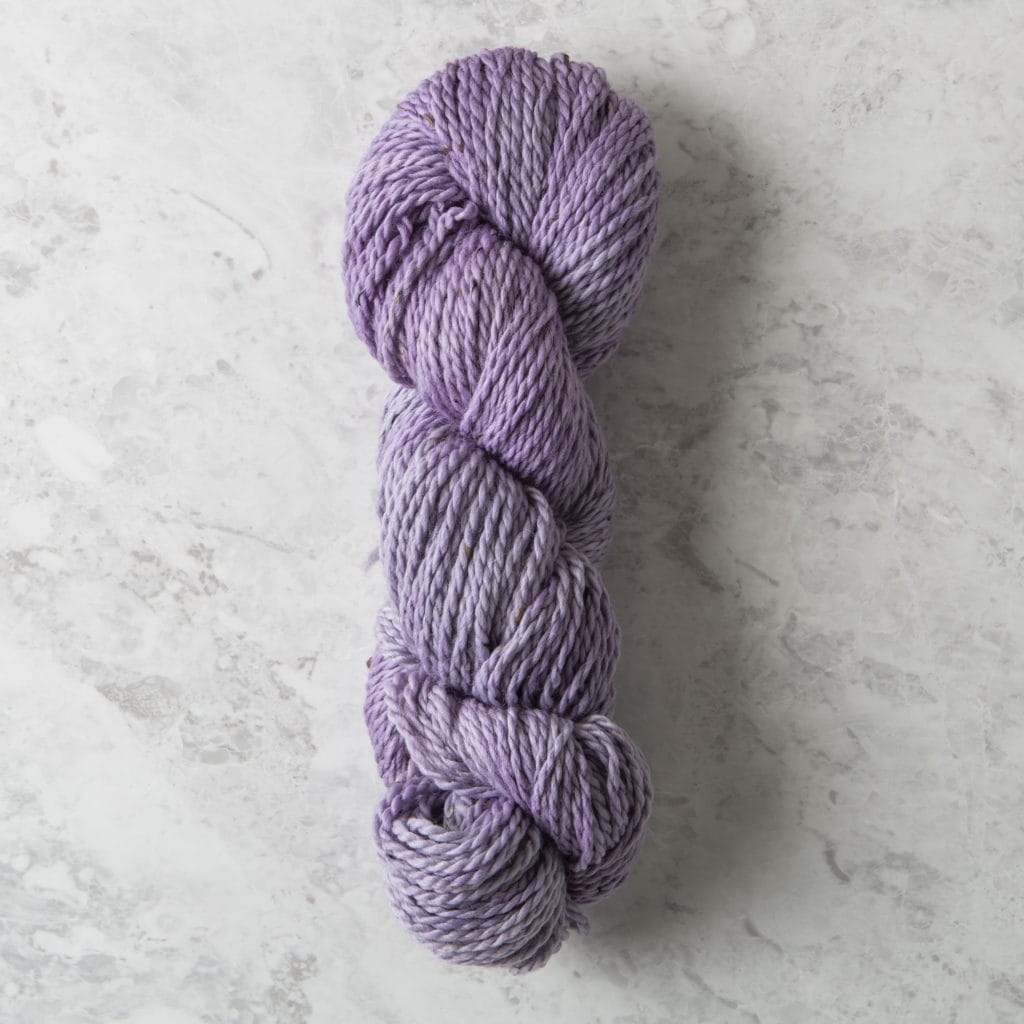
While the overdyeing didn’t come out exactly as I had intended, I was still happy with the results. The cooler tones of the logwood mixed with the cochineal and created a beautiful purple. And since I had left some of the yarn bare, there was a nice mixture of the more gray tones of the logwood.
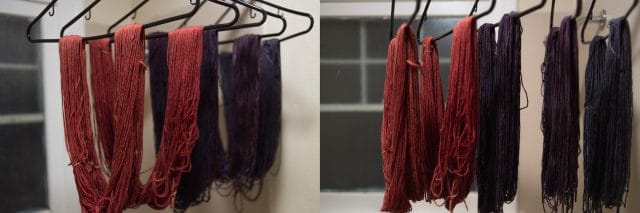
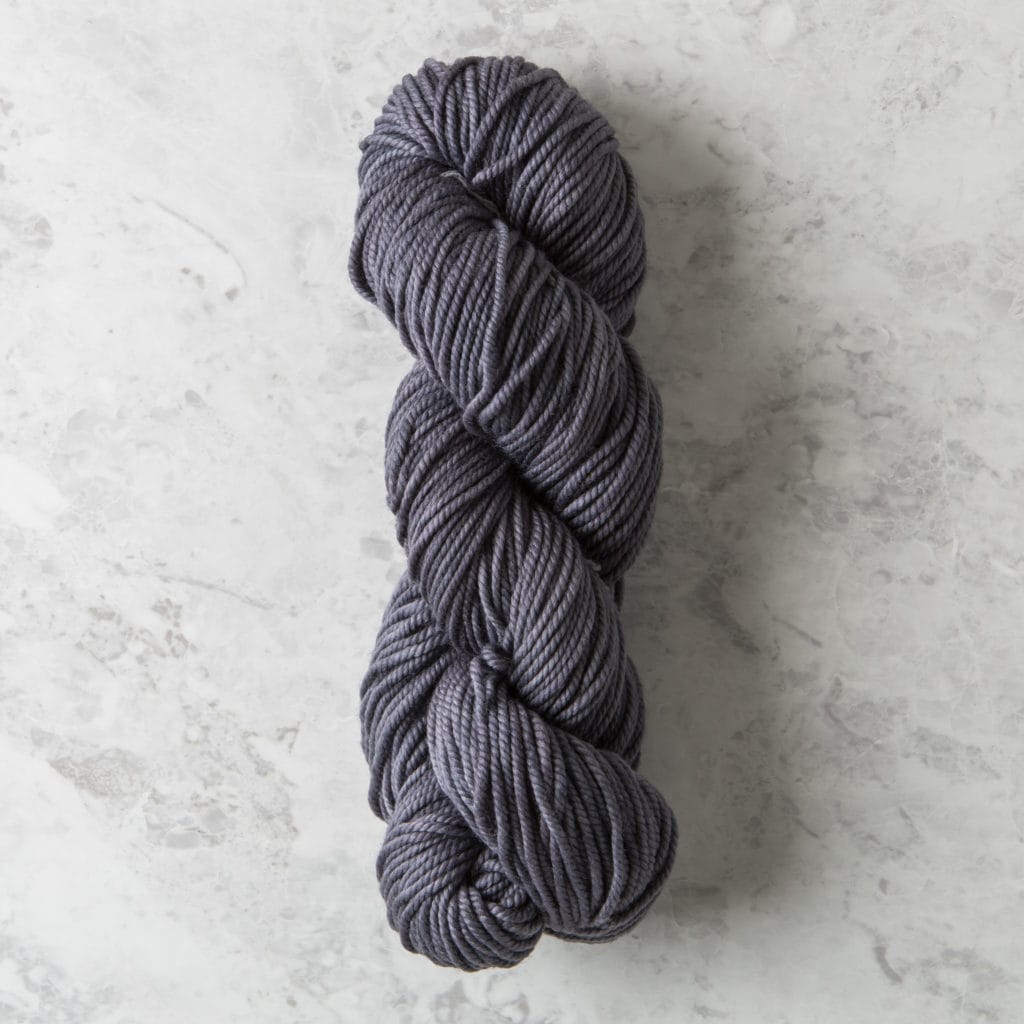
cochineal // cochineal overdyed with logwood // logwood-iron
Once the yarns soaked up as much of the dye as they could, I rinsed them out and hung them up to dry. I moved them around the house throughout the next few days for more air exposure.
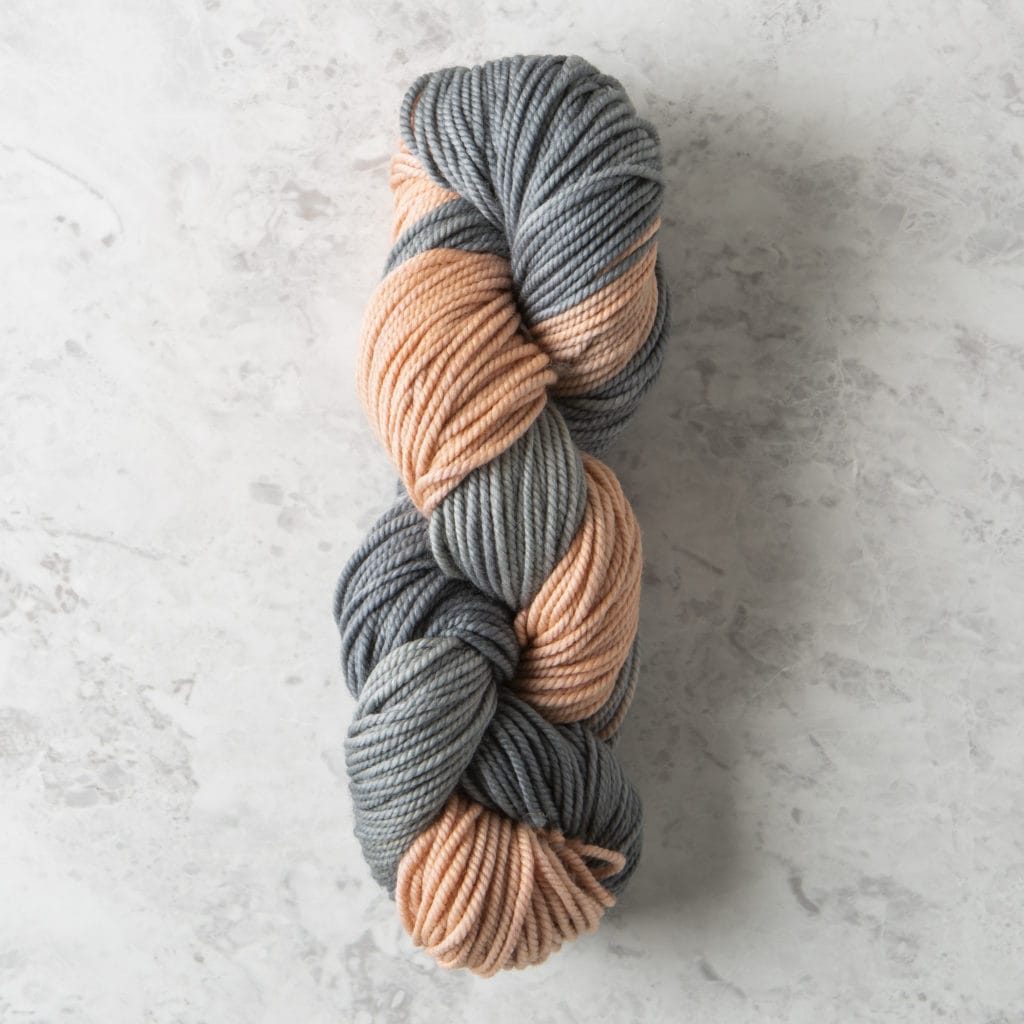
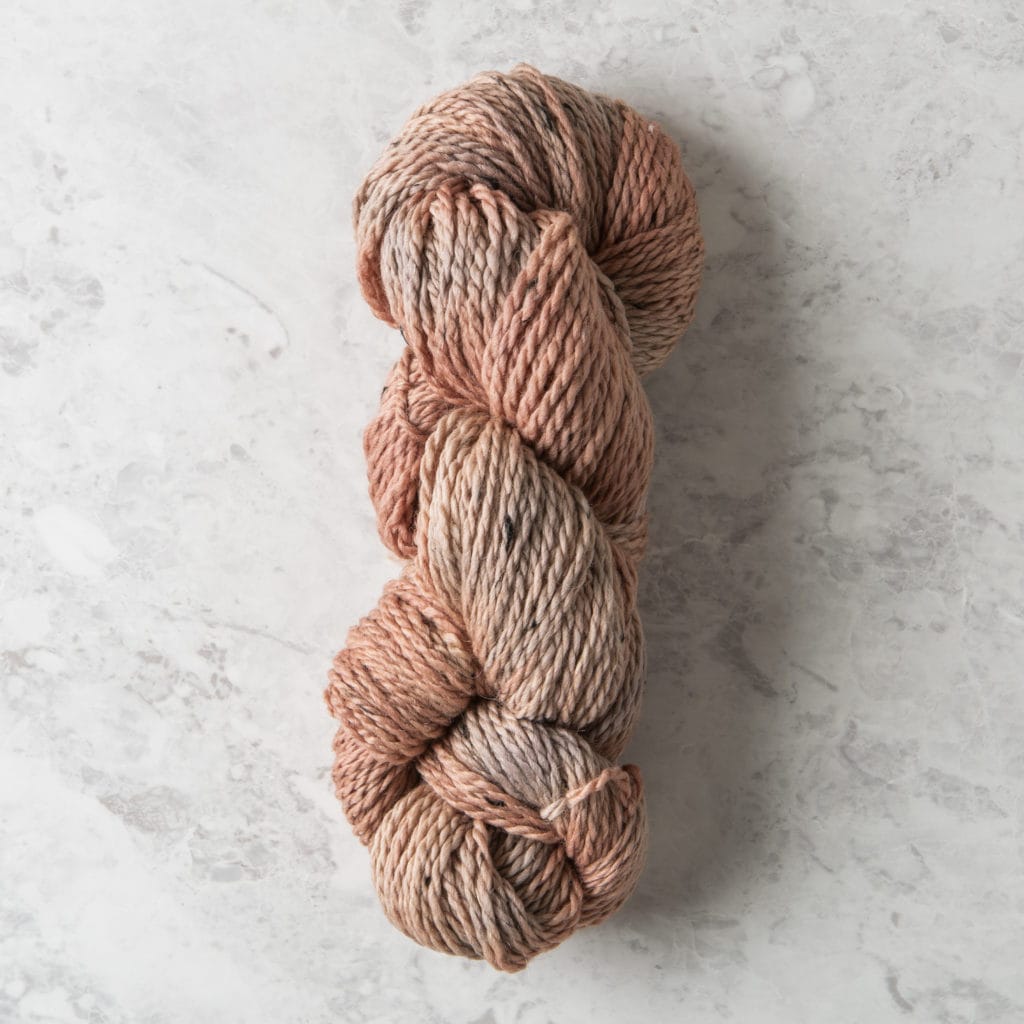
With the leftover dye in the pots I had one last twill skein to use, so I let it soak in both pots to create a two toned outcome. It’s amazing how much dye is soaked up in the initial bath. The final result of this experiment was much less saturated but still created a beautiful coral and light gray. It can be seen in the group shot below (6th yarn in from the left).
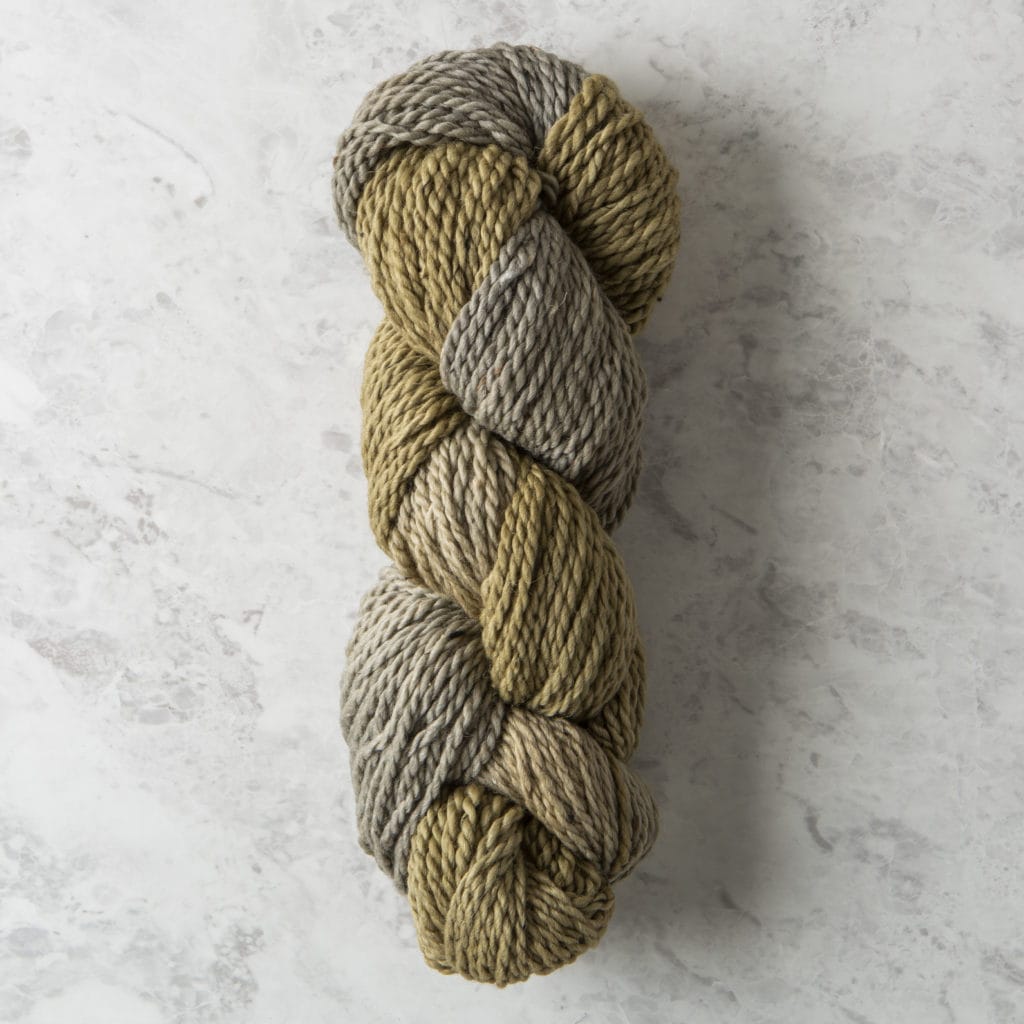
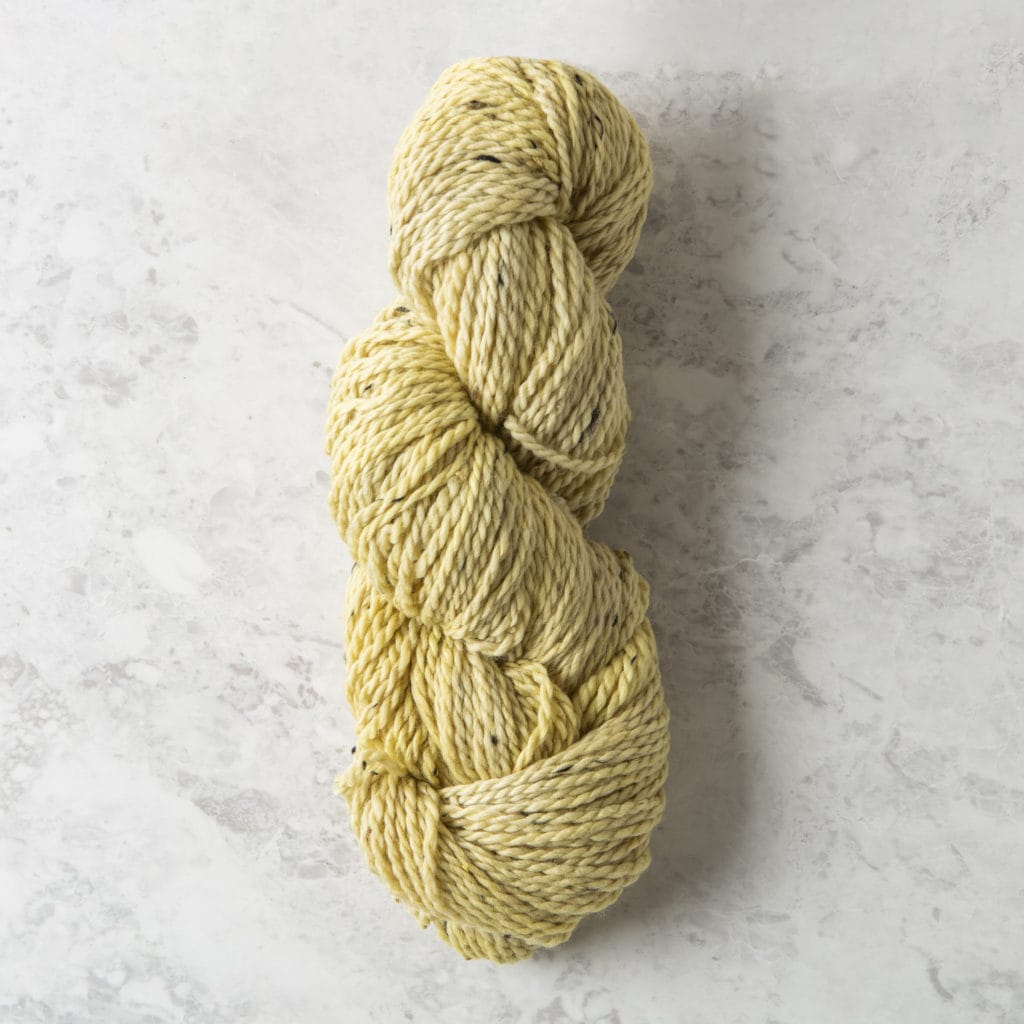
For my second batch, I brought out the Woodland Tweed. This yarn has a more gray undertone compared to the yellow undertones of Muse and Twill. I kept this in mind as I went forward with the next color experiment: mixing dyes. Using my art degree to its fullest, I knew that mixing blue and yellow would give me a green, and on top of the gray undertones of Woodland, I was hoping for a darker moss. The logwood and iron creates a blueish gray, though it stays on the warm side, and I had the osage and madder. I figured by mixing the two I could create some kind of greenish color.
I started out by mixing in a smaller container so I didn’t waste a bunch of water/dye if it didn’t work out. Going back and forth, I would add a bit of osage or madder to bring more saturation and some cutch to try and make it darker/muted. This combination gave me a warm kind of olive color, and at some point I realized I wasn’t going to break the color threshold that I had created. Since the logwood and osage/madder are both warmer tones, it was pretty much impossible to create anything like a forest green. I ended up with more of a warm mossy green, and while it may not have been the most attractive color, I decided I wanted to try it out.
To help and balance it out, I created a two tone with the mossy green on one side and the logwood/iron on the other. It made it more neutral in tone, and added a bit more interest. The end result was alright; it’s not my favorite of my outcomes, but I am happy that I tried achieving a different color that was not originally part of the package.
On the third batch I used the Muse. At this point, I didn’t take any more photos since I didn’t feel like I needed to show the same process. So here’s a giant paragraph to read instead:
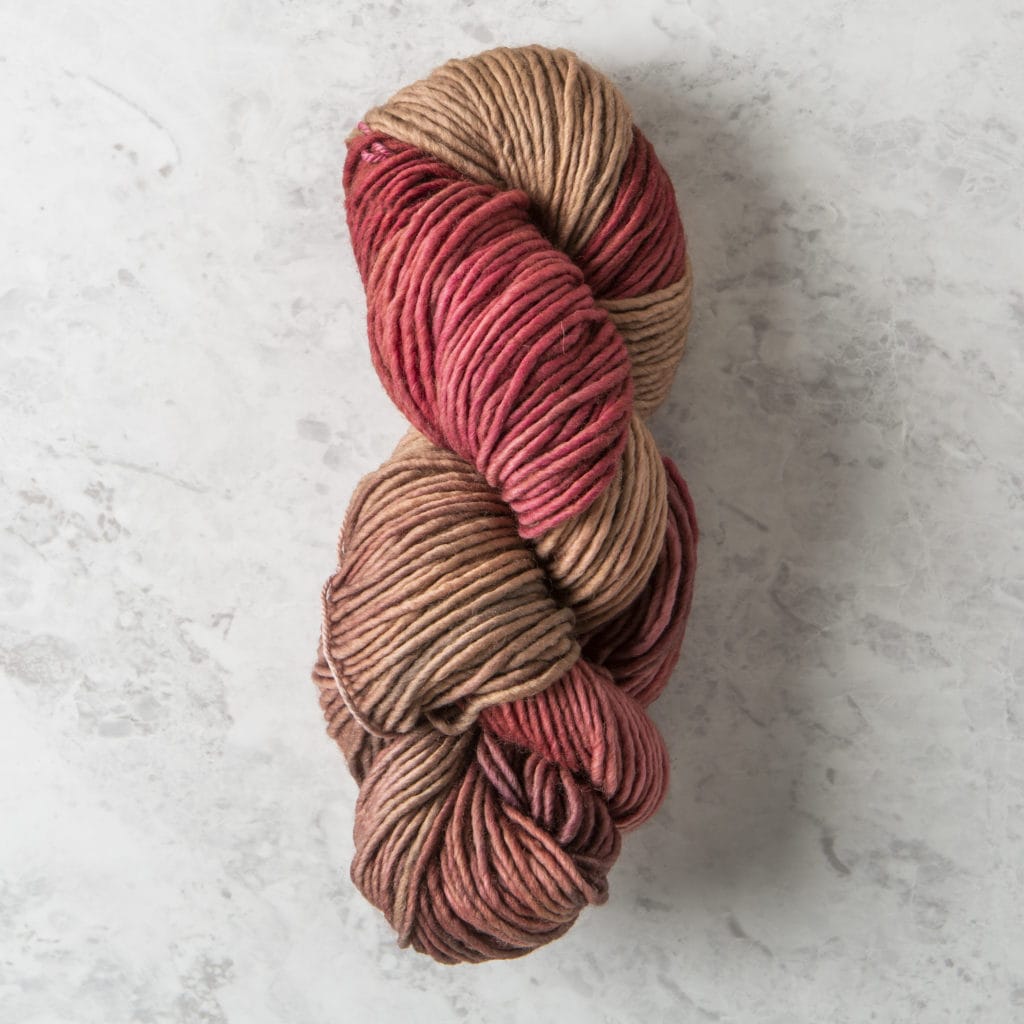
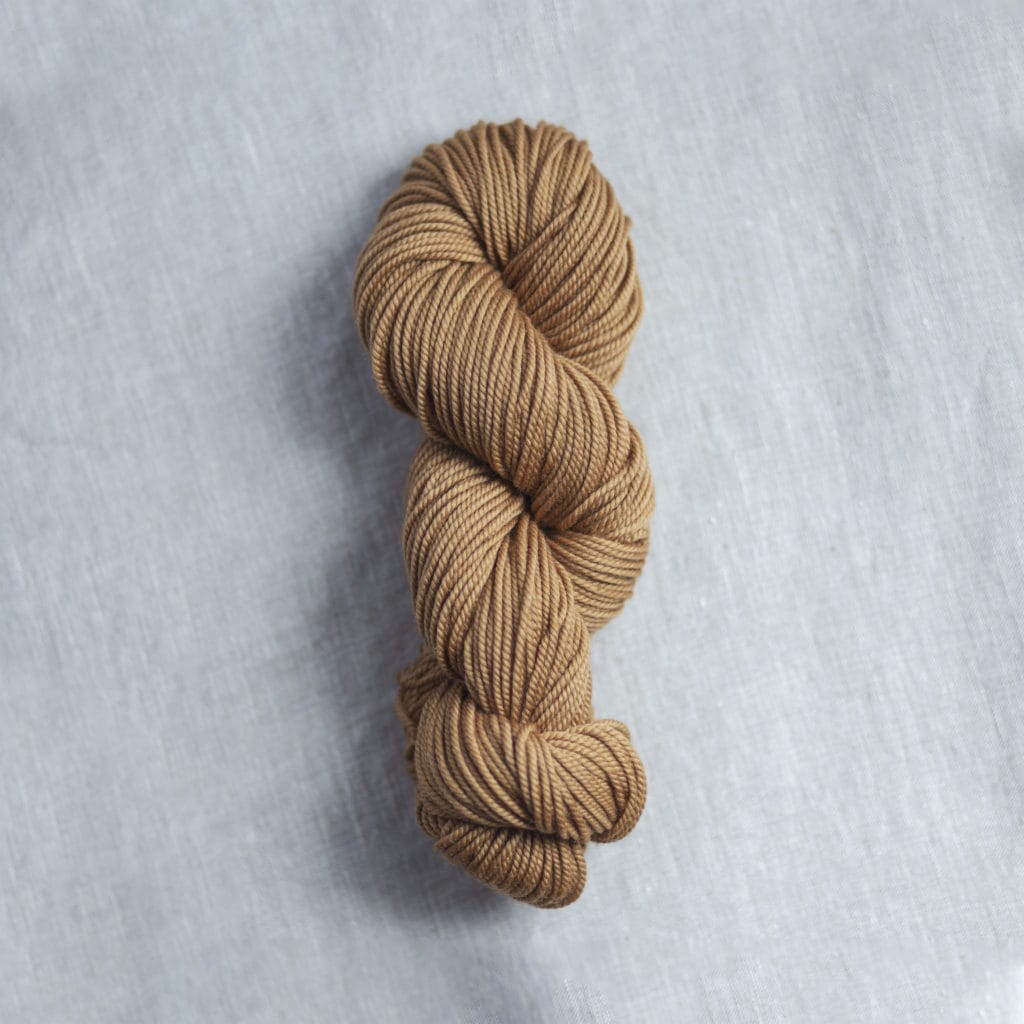
For the Muse I wanted to try a higher saturation of color. Up until now, I had been playing it fairly safe with my ratios and dye amounts, but I needed to see what could be accomplished. I did two different dye sets, a more “Regan” palette with red/brown and a royal set with purple/gold. My previous dye with red (featuring Twill) created a more orange-red, but dipping into the saturation of cochineal, I was able to create a more ruby for the Muse. On the flip side, I used a lighter amount of cutch to make a warm brown. I had actually used some logwood/iron to try and create a more gray brown, but the dye seemed to separate and clump together. In the end result, there are just some patches of almost black where the logwood/iron clung onto.
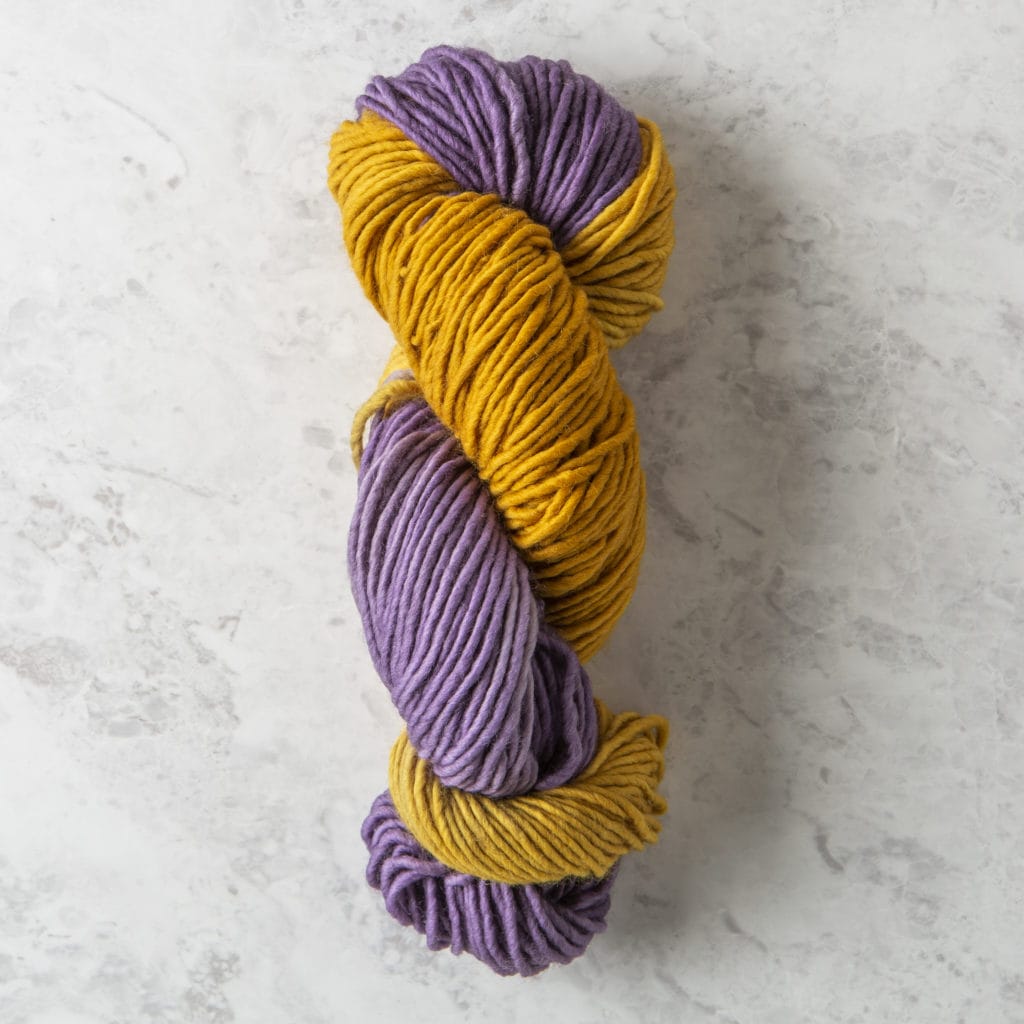
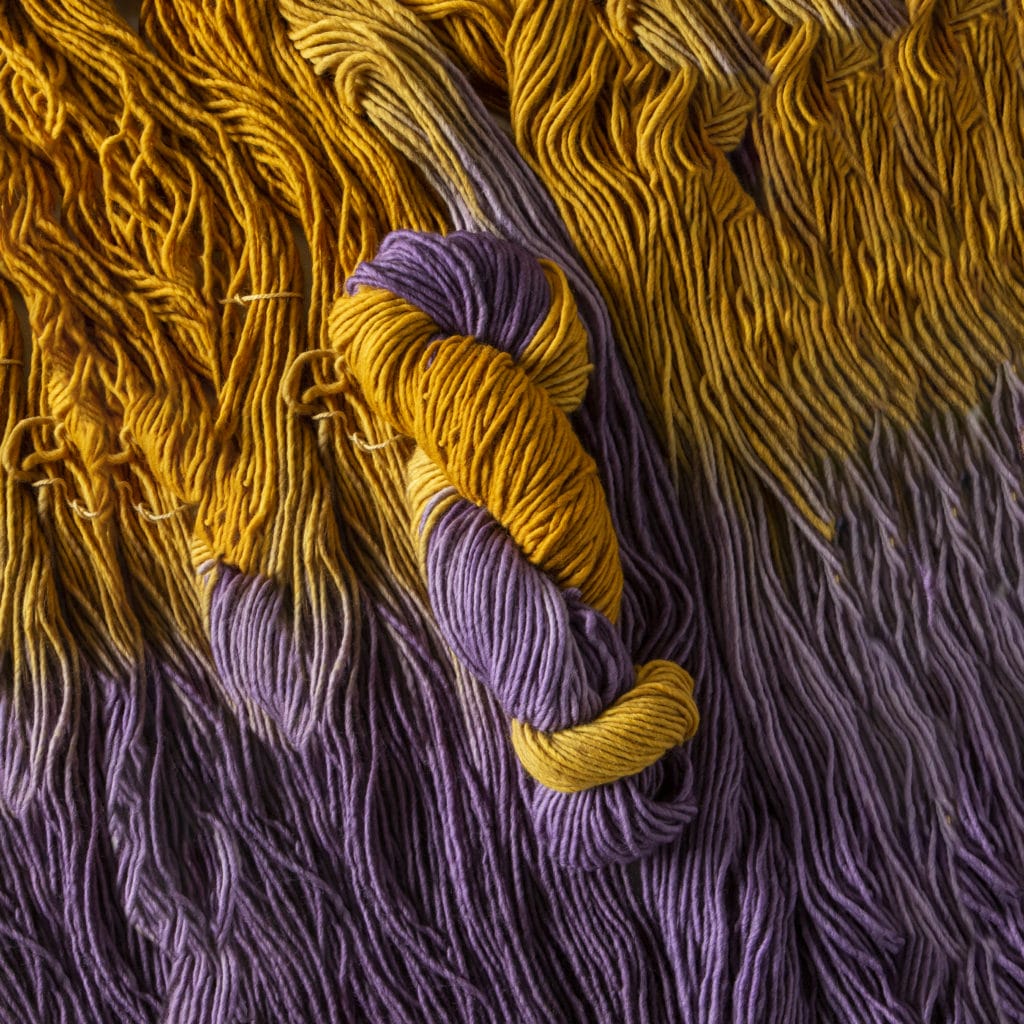
For the purple and gold, I stepped out of my usual color comfort. My whole journey I was adding iron to the logwood to create that gray color, but this time I used just the logwood and some alum to make the rich purple. And then I didn’t want just a yellow, I wanted a gold. Balancing out the osage and madder with a hint of cutch, I was able to finish off with a lovely marigold-esque vibrancy.
To finish this all off, I used the last of my Woodland Tweed (three skeins) and soaked up the leftover dyes from the cochineal, logwood, and osage. With that, all 18 skeins were dyed and drying.
Left to right: Twill Logwood-Iron // Cochineal overdyed with Logwood // Cochineal conconction // Leftover dye from logwood and cochineal concoction Muse Cochineal and Cutch two toned // Osage and Logwood two toned Woodland Tweed Logwood leftover dye // Osage leftover dye // Cochineal leftover dye // Logwood-Iron and Logwood-Iron-Osage two toned
Looking at them all next to each other, I’m amazed by the amount of color variation I was able to achieve with only five natural pigments. At first, 18 skeins looks and sounds overwhelming, but there are so many possible colors; I didn’t have enough yarn to do everything I wanted!
My final thoughts are that dyeing yarn is extremely fun, especially if you like playing with color. The real beauty of it is that I was able to cater my yarn and color choices to my specific preferences. Obviously for this adventure I was trying to get a wider range of color variation, but I think if I were to do it again, I’d stick to my usual autumn color palette.
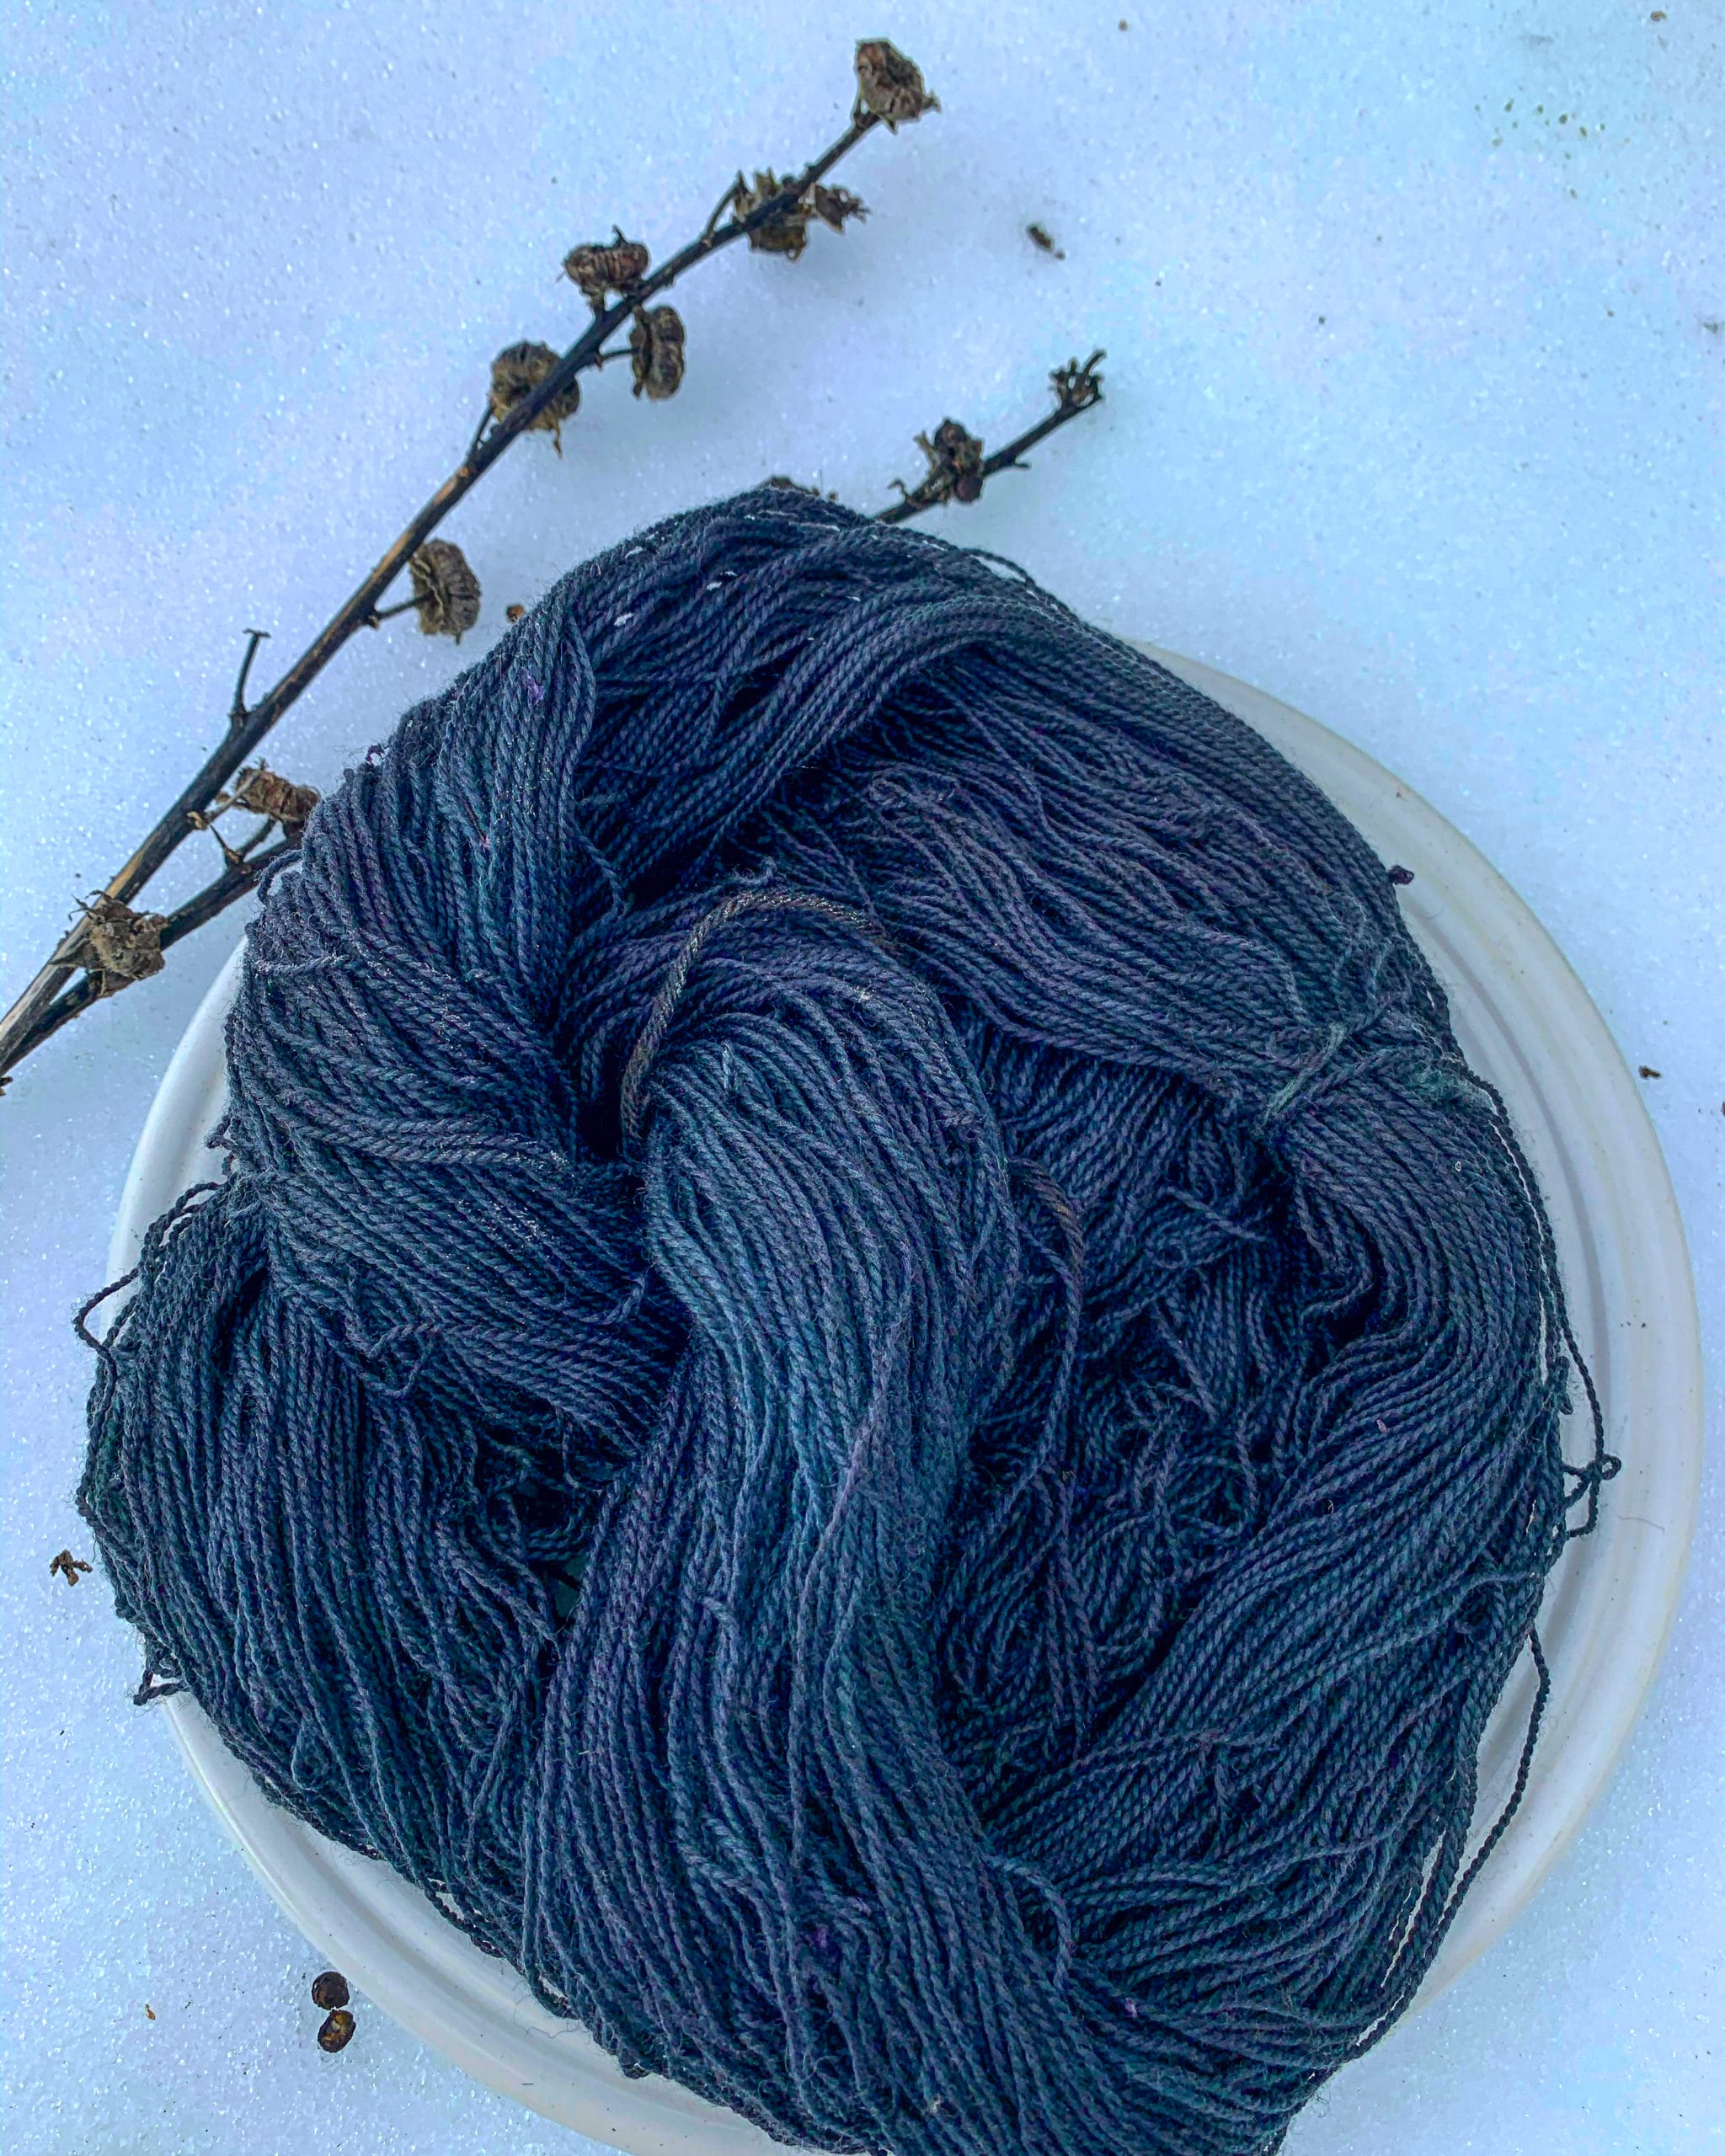
coffee // onion // indigo
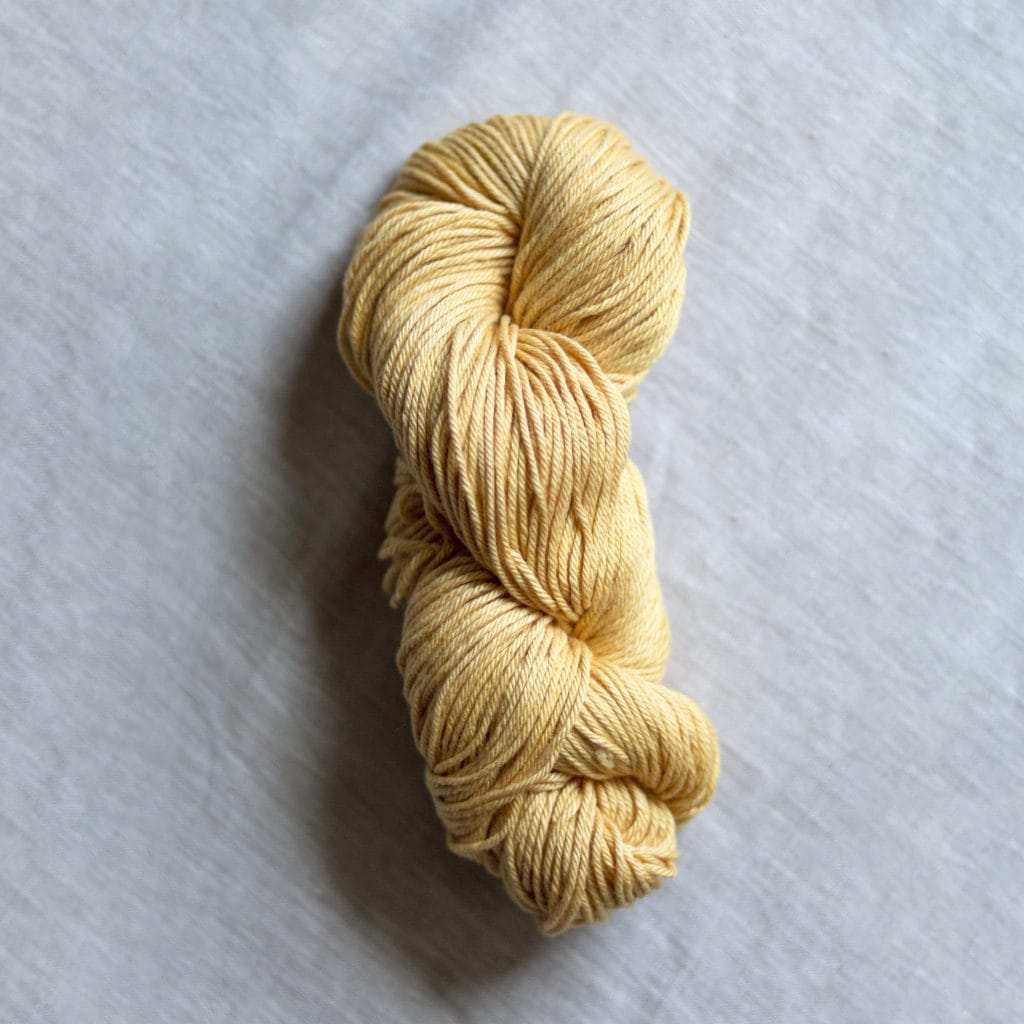
As a little extra bit, here are a few natural dyes I’ve done on my own. On the left is a skein I dyed using coffee. It was a pretty easy and straightforward dyeing process, and the result was pretty much expected. The middle came from the onion skins of about five or six sweet yellow onions. I expected to get a yellow color, but I was not ready for the intensity that I achieved (much more saturated in person). Finally, we had an office dye-day here at Knit Picks using indigo! The last photo is the skein I used for the fun, and is the result of a couple dunks into the indigo vat.
I definitely think natural dyeing is fascinating, and I look forward to seeing what colors I can get from things just in arms length. And hopefully you’ve had fun seeing my process. It’s a lot easier than one might think, so if you’ve been feeling hesitant about it, I say go for it. If I can do it, so can you!
Did you know you can experiment with dyeing yarn in your kitchen, using food-safe & low-cost products, and get some really cool results?! What a great way to play with our Bare Yarns!
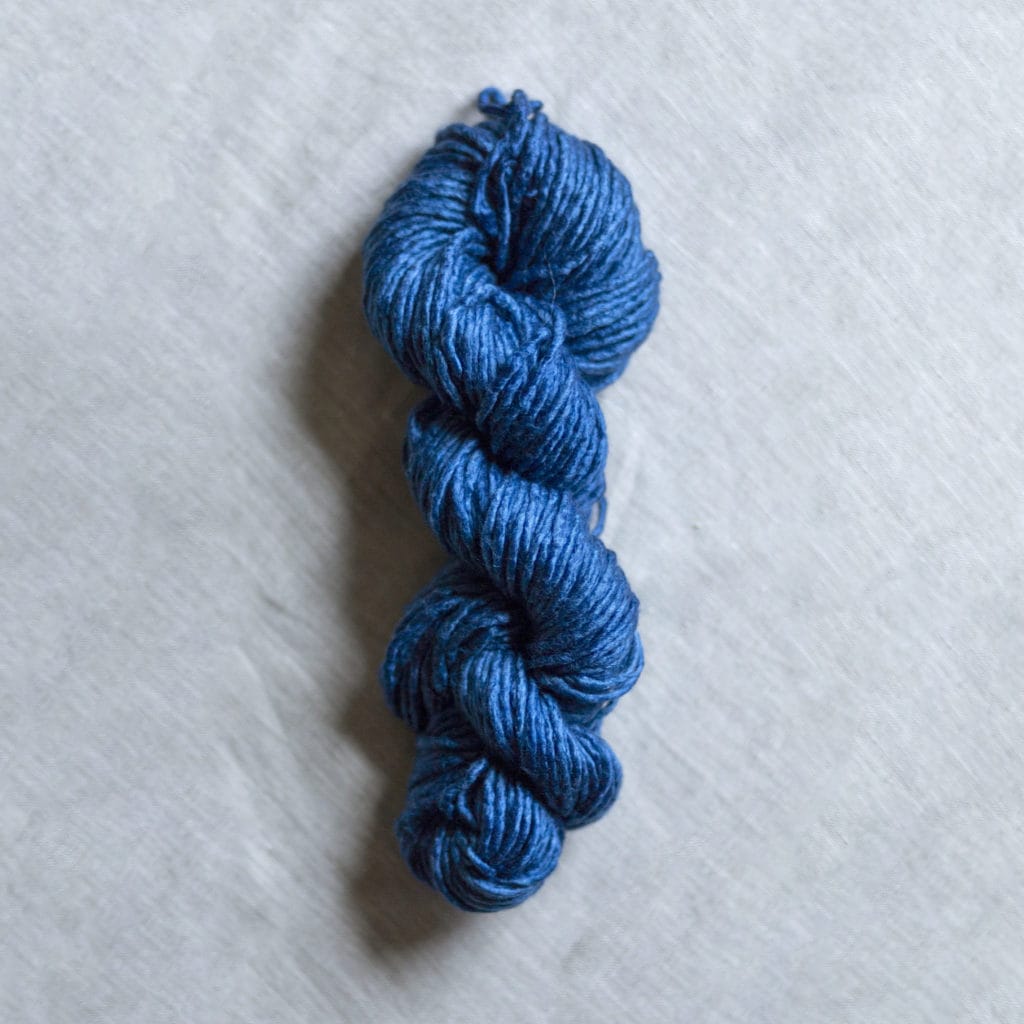
All the yarns in this post were dyed with Kool-Aid (or sometimes other brands of unsweetened drink mixes), in my kitchen. Above is Bare Capretta, and below is Woodland Tweed. There are lots of different ways you can dye yarn with Kool-Aid; today I’ll show you my latest favorite, in the microwave!
The question I hear the most about dyeing yarn with Kool-Aid is: is it colorfast? Or, does it wash out? The answers are YES, and NOPE! I have yarns I dyed 12 years ago that are still bright and vibrant. I won’t say they are 100% colorfast—some dyed many (over 10) years ago look lighter than I remember, but they’re still colorful and look great, even if slightly faded over a decade+. I do recommend storing items away from direct sunlight and I’ve never seen any dye come out during washing.
If you’re interested in learning more or other methods besides the microwave, google is your friend, and also I wrote several tutorials many years ago: an intro to dyeing with Kool-Aid when I first started doing it, how to dye striping yarn on the stove, dyeing in a crock pot (I used to use this method a lot, it works so well!), and another self-striping tutorial for really long stripe sections. Lately I’ve been enjoying the microwave method because it’s easy and compact (you just need a bowl, no big pot or crock pot) and fast! And it works well for speckle-y kinds of dye jobs.
Something else you may want to think about when planning your project is color mixing, how to get the colors you want. Kool-Aid doesn’t limit you to just the base powder colors—you can mix, overlap, and over-dye! The way to darken or mute colors isn’t to use more or less of a color. Instead, adding some of a complementary color (opposite on the color wheel) could achieve exactly the results you’re after. For example, adding a little orange to a blue will make a darker, less vibrant blue, and vice versa. It doesn’t have to be the exact complementary color; you can try mixing colors that you might not think would mix well just to see what results you get. One of my favorites is adding some orange to green to make it a more olive, darker shade of green.
Let’s get to the dyeing tutorial, then I’ll talk a little more about color at the end! I’ll show you exactly how I made the yarn pictured above, which is Bare Superwash Merino Twist. A note before you begin! You’ll want at least THREE ties in your skein so it doesn’t end up a tangled, wet mess—not all of our Bare yarns come with three ties, so you may need to add one yourself. I recommend using a cotton yarn for ties.
Also, this kind of dyeing only works on animal fibers— wool & alpaca especially—with nothing or only a little of other things mixed in. No cotton! No acrylic! A small percentage of nylon is okay.
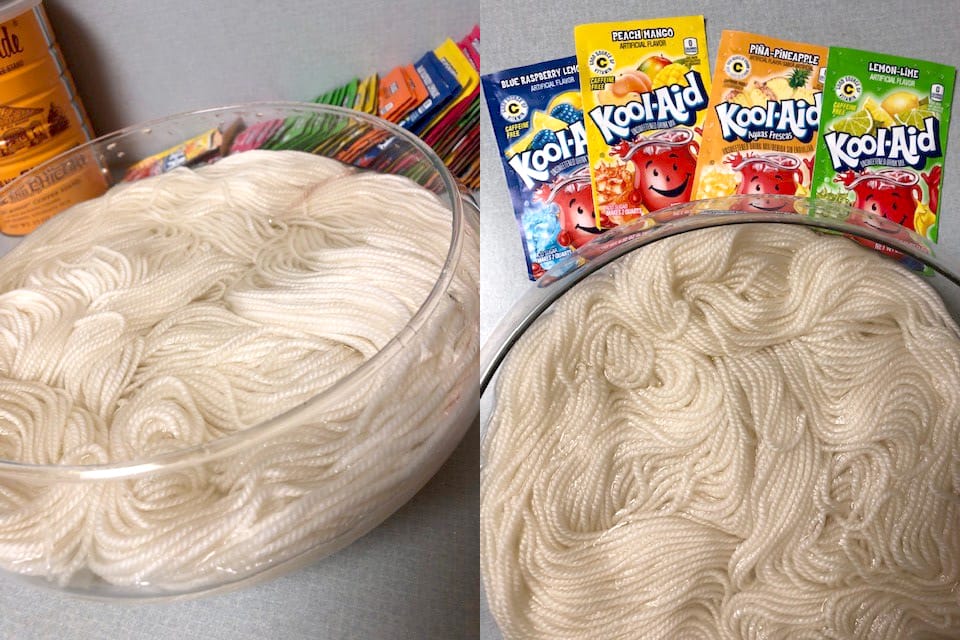
First, I like to soak my yarn in water with a big splash of white vinegar for an hour or longer. The Kool-Aid has acid in it so it’ll set onto the yarn without the vinegar, but I think the vinegar makes it a bit more colorfast in the long term, and it doesn’t hurt! If I’m going to dye several skeins, then I’ll soak them all in vinegar water in a big bowl or bucket together, then take them each out to dye them one at a time in a separate bowl. In this case, I was just dyeing a single skein, so I soaked it in the same bowl I’d be dyeing it in.
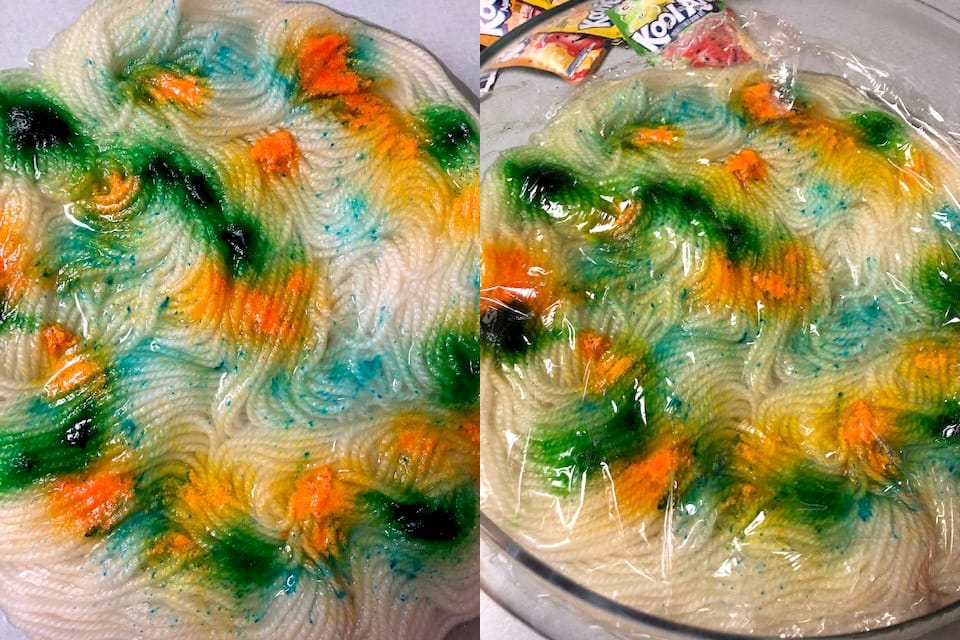
Next, place your skein in a glass (or otherwise microwave-safe) bowl with just enough vinegar water to cover the top of it. If you want to dye the skein in a certain pattern (like different colors on different sections of the loop) then position the yarn intentionally. For my skein, I wanted all-over speckle-y variegation, so I purposely let it be messily positioned in the bowl. Now sprinkle on some powder!
I purposely let the oranges, greens, and blues overlap and mix. Then cover the yarn with plastic wrap and microwave it for 1 minute. (I use maximum power, but I have a small microwave; if you have a high-power microwave, you might want to use a lower power setting.)
When you take it out, that powder should be mostly absorbed into the yarn. Now you’ll go through the process of adding more dye, and giving it more time in the microwave, until you’re happy with it. Your exact process may vary depending on how you want your yarn to look. I usually flip the skein upside down (that’s what I’d just done in the above right photo), then add more powder, then give it 1 more minute…
…then I repeat one or two more times. Reposition the skein, add more dye, another minute. I usually end up doing four minutes total. Never do more than 1 minute at a time (it could hurt your yarn!), and when the water looks clear, it’s set! Dump the yarn into a colander to cool to room temperature. Below, left you can see how the water is cloudy, but white, no dye. As long as there is no colored dye left in the water, it means the dye has set into the yarn, not in the water, that’s the important part!
Then rinse it in water (the same temperature as the yarn) very gently. If you want to get the vinegar smell out, you may choose to wash the yarn with a good-smelling wool wash now; I usually just rinse it with water, knowing that I’ll wash the finished object after knitting it up. Gently squeeze the water out in the sink, then roll the skein up in a big towel and gently press on it to squeeze the remaining water out. Shake it out, and hang it to dry over a hanger, shower curtain rod, or coat rack. It could take a couple of days to dry completely (reposition a few times to help it dry).
Here’s the finished yarn! This method is great for this kind of look with the white showing through, but if you want a more saturated look, just use a bit more water and stir mix the dye around for full coverage. Below are two more skeins of the same Bare Superwash Merino Twist dyed with similar Kool-Aid colors in different ways. The left-hand one was actually partially dyed on the stove first, for the dark solid green section, and then overdyed more in the microwave, and the right-hand one was using the same microwave method above.
For further color information, you can find Kool-Aid dyeing color charts and blog posts online to get mixing ideas, and you can also try mixing a little in a cup with water, and then dipping a white paper towel into the mixed dye to get an idea of the color you’re making, before using it on your yarn. Also, Kool-Aid can be hard to find in lots of colors (flavors) so your local options may be limited. You can use other brands of drink mix, but—this is important!!—make sure they don’t have sugar! Kool-Aid mix comes unsweetened (you need to add sugar when you make the drink) but many other mixes already have the sugar included. This would be bad news for your yarn! Another pro tip: generally, you can preview the color in the packet by looking at the color of the liquid in glass cup portion of the illustration (and not the color of the packet background).
Above are a few old yarns I dyed with Kool-Aid years ago, to show some different color effects. I do tend to prefer bright colors, so the lack of darker/muted shades has more to do with my preferences than with the possibilities!
There’s also the option of dyeing vibrant Kool-Aid colors over the top of other colors. Using our Simply Wool & Simply Alpaca yarns as bases instead of Bare can get you beautiful, darker, toned-down color results! Or dyeing Bare yarn with tea or coffee first, to give it a brown base, or just adding tea or coffee with the Kool-Aid… lots of options!
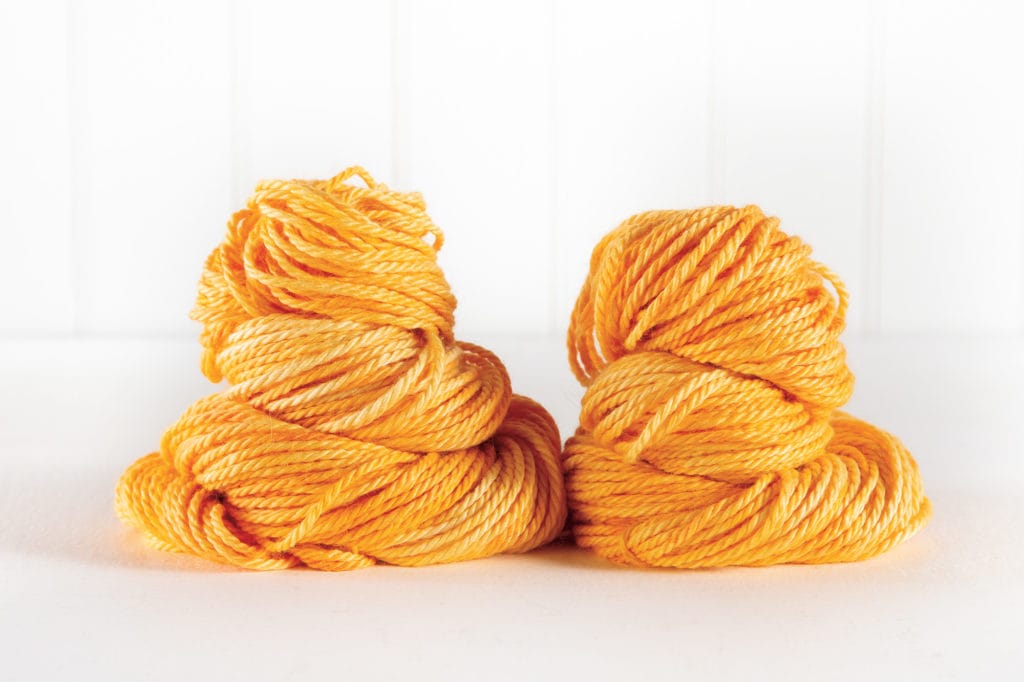
Those are two skeins of Bare Shimmer Bulky that I dyed (using the same microwave method) with a couple of shades of orange/yellow, for a tonal hue. I then over-dyed each skein separately, with totally different colors (below). On one, I overlapped a few shades of red and pink, for kind of a tonal coral; on the other, I used blues and greens, which mixed with the light orange base to be more muted versions of those colors. Orange and blue are complementary colors, so adding blue and green to that orange base worked to tone down the shades… if I’d mixed them all at the same time, it might have been muddier than how it turned out with this over-dyeing method. This kind of color mixing is a lot of experimentation; I wasn’t sure how it would turn out, but I’m happy with the result! You can always dye a very small amount of yarn first to try out a color idea, before using a whole skein.
I love doing this, as a full grown adult knitter, but it would also be a really fun activity to do with kids, to give a hands-on lesson on the basics of color theory, or just to play and have fun! If you dye your own Bare yarn, we’d LOVE to see the results! Post links in comments below, or tag us on instagram, etc. Have fun dyeing!!
Have you ever heard of idyes? Me, neither! Alison, our fearless Knit Picks Director, tells me that they’re acid dyes (like the kind Kim uses) but have a combination of cellulosic dye (for plant fibers such as cotton) and protein fiber dye (for animal fibers like silk), allowing you to use them on a large range of natural fiber projects. Inside each envelope is a little water-soluble packet (kind of like those dishwasher detergent nuggets) which you just pop into your washing machine and Vwalaa! You’ve dyed your own yarn. I asked her to describe her process and take some photos. Here we go!
From Alison: “IDye packets can be a nice option for folks who are new to fiber dyeing or those who would like solid color results in a hurry. This week, I wanted a fast, easy dye project that would fit into my schedule and produce a subtle solid colorway, so idyes were perfect! The envelope includes instructions for either stovetop dyeing, or use in your washing machine. I think the stovetop method produces the easiest, most consistent results, but the washing machine is a nice option for folks who don’t want to use a dedicated dyeing pot for the stovetop method.
Choose Your Yarn + Dye Color and Tie Up Your Skein: “I’ve been so excited about our new Bare Special Reserve yarns. They’re such a great price point for natural fibers and a fun opportunity to play around with different dye techniques. I picked up the Superfine Alpaca because I thought it would really take the idye color (I chose “Gunmetal Grey”), really well.”
“Tie your skein in a few extra places. I use a cotton yarn for my ties so that they don’t accidentally slightly felt to the yarn during the dye process. Don’t tie your strings too tight or the dye won’t be able to penetrate those areas well and your skein might end up looking tie-dyed with white patches. And don’t skimp on tying your skein! I learned the hard way in the past with an ultra-tangled skein that, although beautiful, took forever to wind into a reasonable ball.”
Soak: “Presoak your yarn in cold water until it is thoroughly saturated. This will help the dye penetrate all of the yarn.”
Into the Washing Machine: “Follow the packet instructions for adding the dye packet to the washing machine water along with either salt (for plant fibers) or vinegar (for animal fibers) to help set the dye. Use the hottest water possible for your dye bath. For my washing machine, I used the warm water setting along with the Wool wash cycle, then added an extra soak and an extra rinse. If I had been dyeing cotton yarn, I would use the hot water setting.
Drying: “When the wash cycle has finished, hang up your skeins to dry someplace where you don’t mind a few drips. My favorite place to hang drying yarn is over the shower curtain rod so that any extra clear water drips into the tub.”
Result: “I have enough from this dye project to make this great oversized herringbone cowl that will look great with my black wool winter coat.”
Additional Tips:
“Avoid agitation! It can cause animal fibers to felt and can tangle any type of yarn. The Wool wash cycle on my washing machine has almost no agitation so it works well for this project.”
“To make a pale shade, use a shorter wash cycle; a longer wash cycle means the yarn will be in the dye for more time and will get darker and more saturated.”
“Dye all of your yarn for a given project in one batch so that the yarn will all be the same color. There are so many variables in the dyeing process that it is pretty difficult to exactly replicate a color later.”
I’ve used iDye and RIT dyes a lot and have never had a problem with dye remaining in my various washing machines. If you’re nervous about dye hanging around after your project, you can wipe down the inside of the machine afterwards with an old towel and (if your washer has this setting) run a Tub Clean cycle.
Thanks, Alison! Who knew there were little dye nuggets ready for you to toss into your washing machine? Knowing that they won’t stain the inside of my machine, I might toss in some fabric with my fiber, too. Maybe it would give me a complementary yarn+fabric combination I could use to make a really cute outfit for one of my daughters!
Now that we’ve explored a few different dyeing techniques, which one are you likely to try?
Have you ever dyed fiber with Jaquard Acid Dyes? Neither have I! Kim here at Knit Picks is a pro. So I asked her to do some dyeing and take some photos, and she made it looks so easy! She has two methods: one uses a crockpot and takes about 3 hours (including cooling time) and one uses a microwave and takes about (wait for it) 4 minutes! Can you believe it? It’s totally clean and easy, too. Here’s Kim’s description of each method:
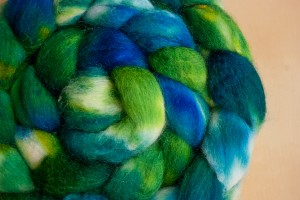
From Kim: “I love to dye fiber! The brighter the better! Here I’m showing you two techniques that I used with wool fiber. For both methods, I used the same Jaquard Acid Yarn Dyes in Lilac, Sapphire Blue, and Sky Blue. I used Wool of the Andes Superwash Bulky with the crockpot method and Wool of the Andes Roving for the microwave technique. Both processes will give you a mottled, multi-color look.”
Prep: “Unwrap your fiber from the packaging, and tie them neatly in a few places so the bundle stays together (there’s nothing worse than a tangled mess when you’re done!)”.
Soak: “Prepare a solution of warm water and vinegar and soak your fiber. When the fiber is saturated, squeeze out the excess water.”
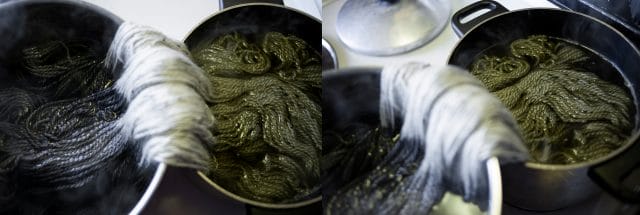
Crockpot Method (using Bare Wool of the Andes Superwash Bulky Yarn): “Use a crockpot that won’t be used for food again. Add some of the water/vinegar solution to the bottom, then lay half the hank in the crockpot and half out. Sprinkle the dye directly onto the fiber. The more dye you use, the bolder the color, but there’s only so much dye the yarn can absorb, so you don’t want to waste dye by adding too much.”
Fold and Repeat: “Fold the second half of the yarn on top of the layer you just put dye on. Repeat the process of sprinkling dye onto the side of the yarn that was bare. Add more water/vinegar solution to the crockpot until the fiber is barely covered. Use a stick or spoon (not to be used with food afterward) to poke the fiber down below the water.”
Heat: “Turn the crockpot on high and cook until the water is fairly clear, typically about 3 hours. Turn the crockpot off, and let the solution and fiber cool. “
Microwave Version (using Bare Wool of the Andes Roving): “Just to be safe, use a microwave that won’t be used for food again (they’re so cheap these days, and even cheaper at garage sales!). Lay out a piece of plastic wrap on your work surface that is double the width of your fiber, and quite a bit longer than your skein when stretched out. Sprinkle the dye randomly over the fiber. Add a little extra water to make sure the fiber is wet, but not over-saturated (or you’ll have a mess!).”
Cover and “massage”: “Fold the plastic wrap over the fiber lengthwise. Carefully massage the dye into the fiber. The more massaging, the less white will show in the end product.”
Zip it Up:”When you are satisfied with the distribution, fold in the ends of the plastic wrap. Then fold the whole package in half and place it in a gallon-sized Ziplock bag.”
Heat: “Place in the microwave and cook on high for 1 minute. Flip the package over and cook another minute. Repeat this process two more times, for a total of 4 minutes, or continue until the fiber is good and hot. Let it cool.”
Final stage: “Take the cooled fiber and rinse well. Gently squeeze the excess water out. Use an old towel to squeeze any extra water out and hang to dry. Then enjoy your beautiful creation whether knitting, spinning or wet felting.”
Thanks, Kim! Wasn’t that great? Both methods seem really fun and easy, and I love the idea of getting some dye colors I love (hello…yellow and orange) and coming up with yarn that no one else has in just 4 minutes! You can find all of our BARE products perfect for dyeing HERE and our selection of Jacquard acid dyes HERE. Happy dyeing! And if you try it, send us a link to your results, won’t you?
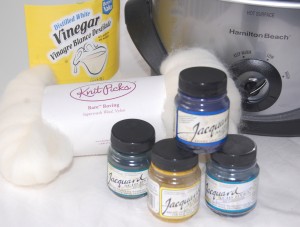
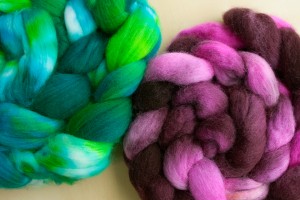
I am a huge fan of color. I love to mix and match and get some lovely and unique color combinations. My favorite is to dye Bare Roving and Yarn using the Jacquard Acid Dyes – there are so many colors to choose from! There are also many methods to dyeing. I used the crock pot method for this blog.
There are no complex tools needed to do this. You need is a crock pot (this cannot be used for food again, so head to your local 2nd hand store and pick one up just for dying), white vinegar, bare roving/yarn and acid dye colors of your choice. Make sure you use protective gear – latex gloves (to keep your hands from dyeing too!) and a dust mask or respirator is a must when working with the powder dyes. There are instructions in the Knit Picks dyeing tutorial on the different dying methods and here are a couple of great books that would help you: Teach Yourself Visually Hand-Dyeing & The Complete Guide to Natural Dyeing.
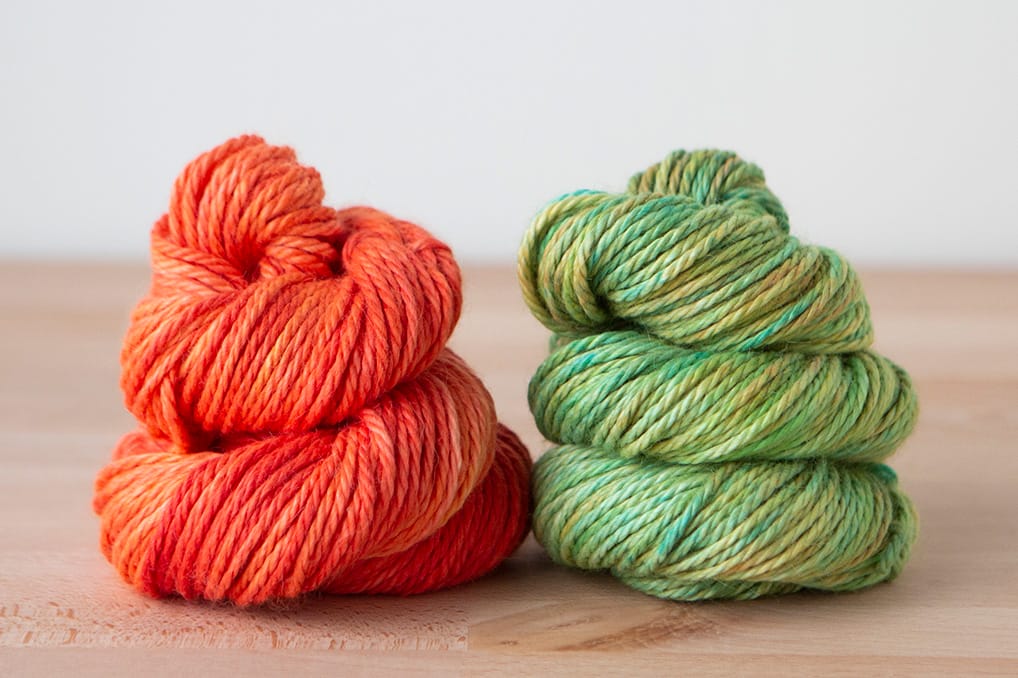
I experimented with a few color combinations. In this first example I used Sapphire Blue & Sunshine yellow Jacquard Acid Dye and Bare Gloss Roving.
These yarns are now ready for spinning. You don’t spin? Use the Bare Wool of the Andes and make yourself a felted scarf or hat! There are some great felting books available including The Complete Photo Guide to Felting.
In this book there are great illustrations and fun felting projects to make as well as great instructions for the different felting processes.