

We’ve all been there. The anxious phone call from a friend or family member asking is there was any way to stretch out the lovely handknit or crocheted project “just a bit”. And after a few investigative questions to determine just exactly how much just a bit was and why the fit was off, the real reason reveals itself – the gift that was carefully made stitch by stitch was accidentally thrown into the wash or taken care of in a way that wasn’t good for the yarn. After having this happen on an occasion (or two), I knew that things would be different for my knitted gifts in the future after I saw these adorable care labels we have at Knit Picks!
These small care labels are perfect as that little reminder to the recipient as to how to wash your gift. We even made a video tutorial that shows exactly how to sew the labels onto your knitted or crocheted project in two different ways. The first way shown in the video lets you attach the label in a way that can be easily removed (if you want the recipient to know how to care for it, but be able to snip the tag off) and the second way in the video will show you how to firmly attach the label in place by using a simple backstitch.
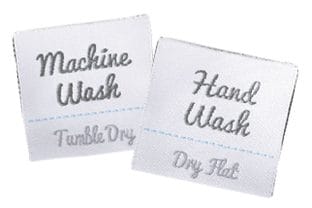
I really love the idea of being able to attach these cute care labels to my projects, and I can rest easy knowing I won’t be getting that all too familiar panic-stricken phone call! These labels are a great finishing touch to any project, especially ones that you are planning on gifting to friends or family. The care labels are available in two different styles – hand wash, dry flat and machine wash, tumble dry.
Between these two simple instructions, most of your basic care guidelines for yarn will be covered. All you need is one of the care labels, a sewing needle and matching thread to get started! And you’ll be on your way to ensuring your gift will last year after year.