


I know! I have completely gone over the deep end! But, as I was immersing myself in the beautiful world of tatting, I discovered that tatters like to “bling” their shuttles.

Decoromana was my inspiration! After reading her tutorial, I went across the street to Craft Warehouse and gathered a few supplies to try “blinging” my own tatting shuttles.

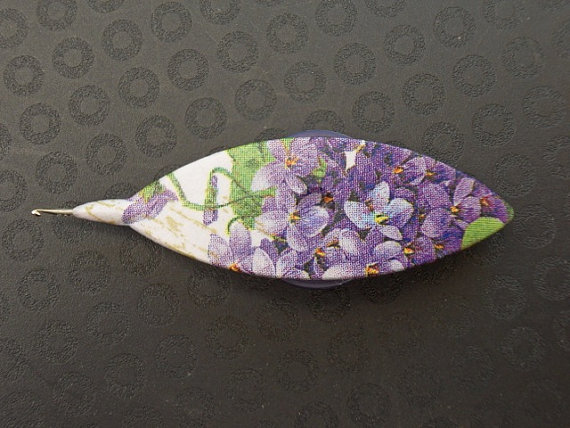
The scrapbook section turned out to be a bonanza! For the first shuttle, I grabbed a package of die-cut shapes in colors I thought would go with the spare Aerolit shuttle we had around the office. And, check out the little stick-on pearls.
I had to do quite a lot of checking to figure out which size of cut-outs weren’t to large for the shuttle. I worked out a base and then layered on top of that using Mod-Podge as glue. Finally, I “glued” the whole paper unit onto the shuttle and used very sharp, tiny scissors to trim the edges. I made a second design for the other side. I treated the shuttle like a decoupage project by putting a couple of layers of Mod-Podge over each side.
Decoromana suggests finishing of with varnish. I didn’t have any at home so I waited until I was in the office and walked over the The Artist’s Club. They had a lovely Satin varnish from Americana that worked perfectly. I could definitely tell the difference so don’t skip the varnish step. I only did one varnish coat.
I am thrilled with the results.

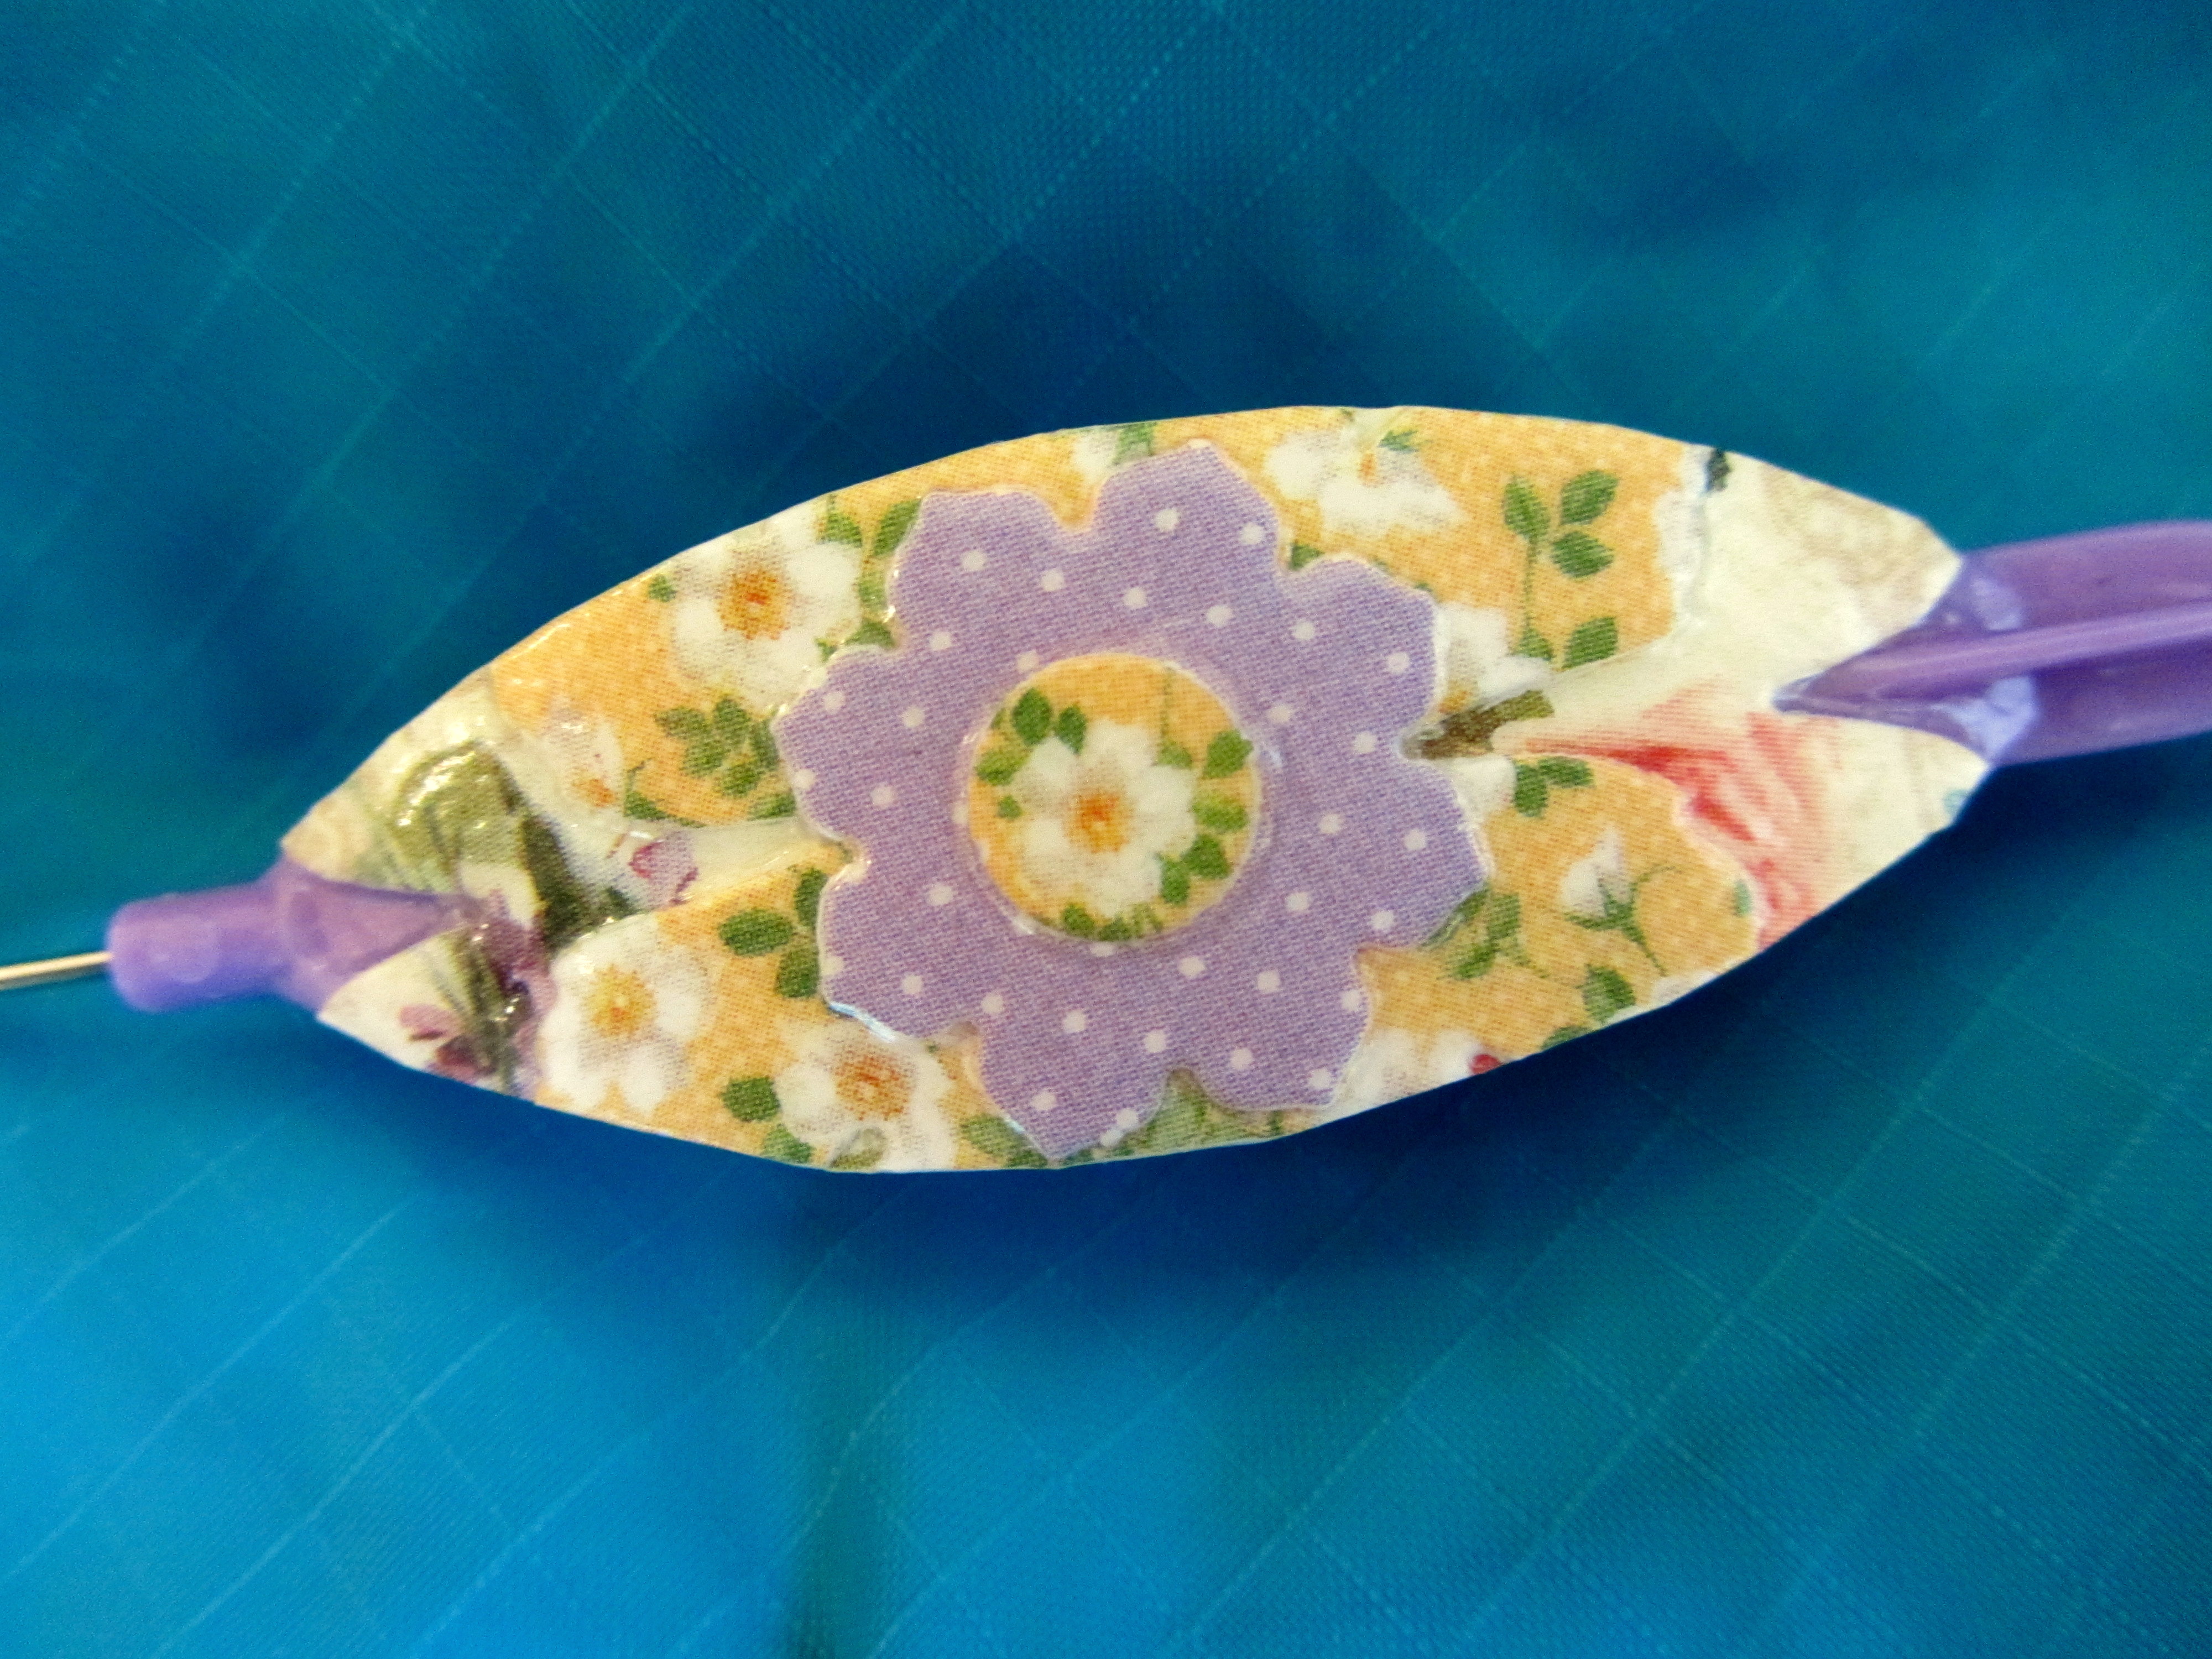
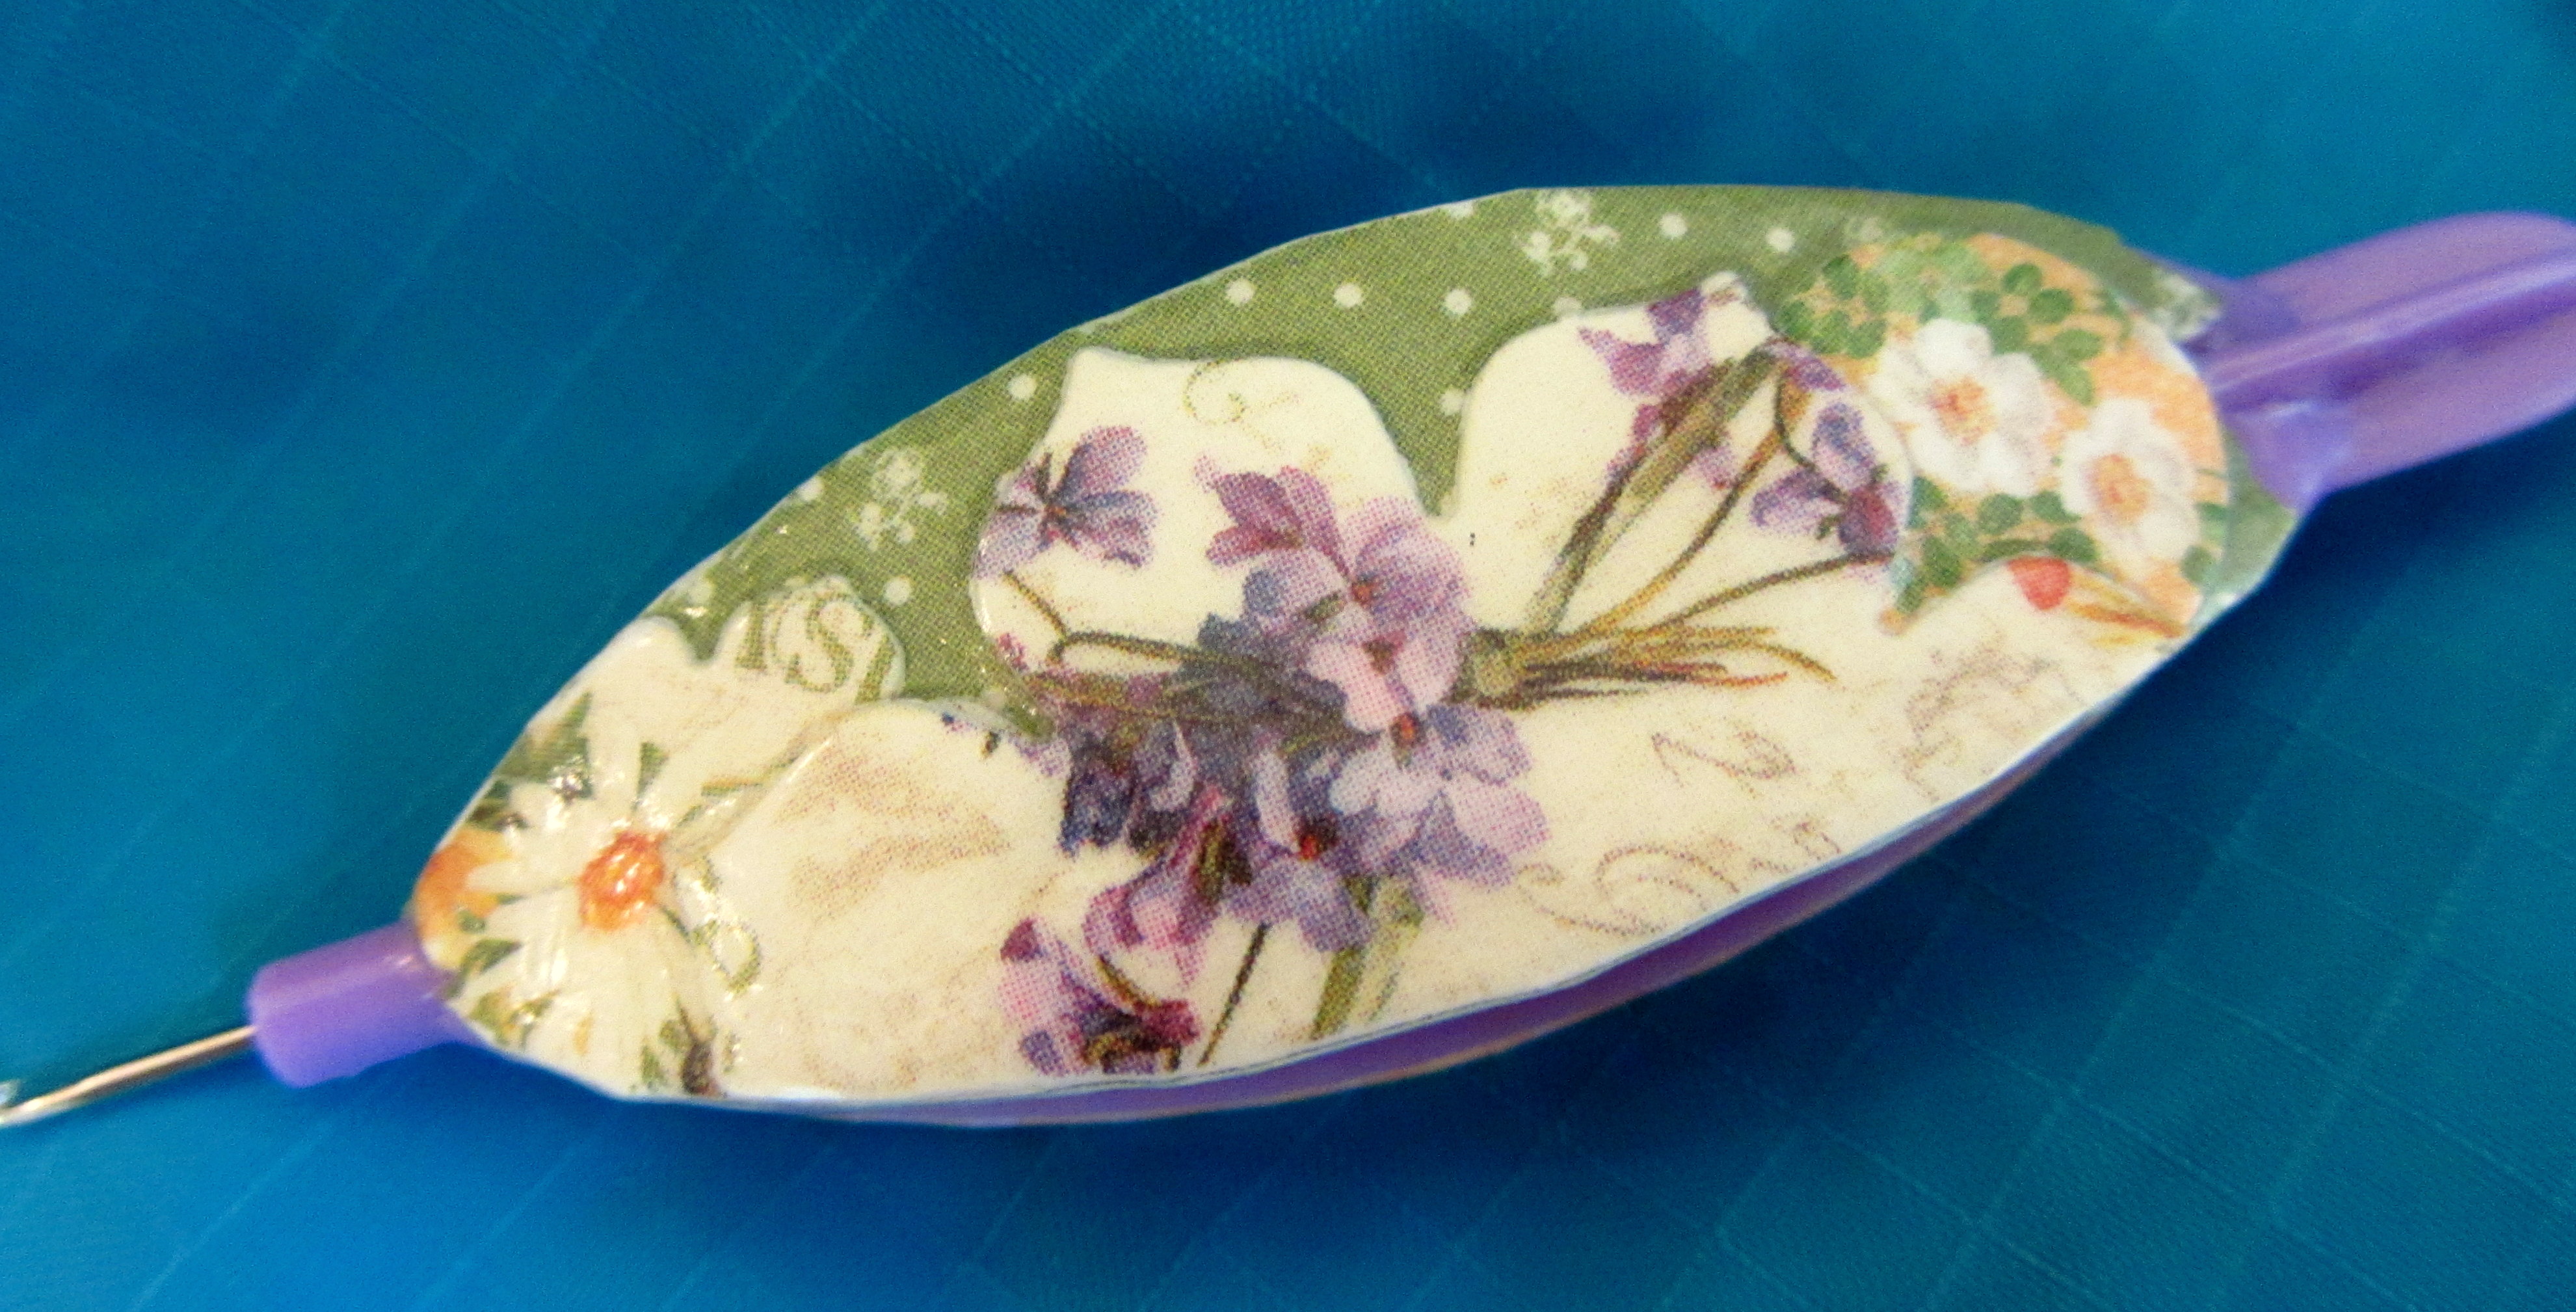
The plans for my second shuttle were a bit more involved. I set up a crafting space in the Artist’s Club department in order to have plenty of advice.
The scrapbook section of Craft Warehouse had walls of stickers. Some were silly but many were quite lovely. Oh, here’s a tip. Take a shuttle with you when you go to the craft store. I fell in love with the beach stickers but most of the packages had stickers that were way too large for the shuttle. I finally found a set where most of the images would fit easily on the shuttle.
Again, I was working with a spare sample shuttle. I planned on basecoating the shuttle, stippling in a bit of shaded sand, putting on the stickers, doing a bit more shading and finally two coats of varnish.

My painting skills leave a bit to be desired but the shuttle does look wonderful. The varnish even lets the glitter from the stickers show through!